Showing posts with label Waterbury. Show all posts

Thursday, December 22, 2016

Swing... and a miss!

Sometimes you can find an old vintage photo of a scene, and then either go on location or do a search on Google maps and instantly recognize most of the key structures etc...
That was the case with this post from a couple of weeks ago where I found the old Perry granite shed was still sitting in Waterbury relatively intact.
Sometimes, things don't quite work out as well.
Take for instance, the Eldredge* Woodworking plant. It showed up in the Wordless Wednesday post from December 14 - and in the 1938 aerial photos of Waterbury mentioned above.
Here's what Google street view reveals the building looks like today:


The structure that was immediately adjacent to the track in the photos from "back then" is either significantly changed or just .... gone.
I guess sometimes you just strike out...

*Determining the proper spelling of "Eldredge" has been problematic.
The Central Vermont Railway engineering department plats clearly show it as "Eldr-i-dge." While the Sanborn Map spells it "Eldr-e-dge."
Yikes! Which was correct! Historians tend to be fairly anal about the spelling of surnames...besides, I needed to make a sign for the model!
The History of the Town of Waterbury, which has proven fairly reliable, references a number of folks with this surname. Since it spells all of them "Eldredge" that's the spelling I've chosen.


Monday, December 5, 2016

Then and Now - Perry Granite (later Cooley-Wright), Waterbury, Vt.

Zooming in from a 1938 aerial view of Waterbury on the UVM web site produced this screen capture. The Perry Granite shed is clearly visible with its "Rock of Ages" lettering on the roof:
Eventually this building would house the Cooley-Wright Manufacturing Co foundry. Google maps street view of the building. It's in pretty good shape considering how long it's been around.
The granite shed is inching closer to the top of the "to build" list. (I want to complete the buildings to the left of track in the aerial view first).  I'm planning to include the rooftop lettering - hope I can come with an easy way to recreate it.

Sunday, July 10, 2016

Demeritt Cannery - Planted

Got the track in Waterbury ballasted, added some additional scenic texturing, and planted the ridge of trees behind the Demeritt Cannery. Then I "planted" the cannery in place. 
At the same time, a large project is also going on at the other end of the basement - but more on that later. 
This photo shows a task that's moving up on the "to-do" list - adding some lighting that shines on the front of the structures in Waterbury - right now everything is pretty badly backlit due to the position of the ductwork in the basement and the position of the overhead lights. 

Tuesday, June 28, 2016

Demeritt Cannery Completed

I put the finishing touches on the Demeritt Cannery yesterday. The pictures show it sitting on my modeling desk on its Gator board "sub base." I will add some dirt/gravel grass textures to this when it's installed on the layout. 
The building is almost completely styrene. One of the freight doors on the can storage building (the gambrel roof portion to the far right in the photo above) is scribed wood. The rest of the structure is styrene. 
As I mentioned in a previous post, the covered "dump" pit was an interesting feature of the building. To capture the look of the steel grating that covered the pit when it wasn't in use I utilized some Tichy fire escape material. 
The freight doors have Tichy boxcar door hardware hinges with a small handle at the base made from wire. 

Paint is Vallejo "Blue Grey" with some other grays dry brushed to create the look of paint peel and cracking. Weathering is light gray, Payne's Grey, and black Pan Pastels with some rust tones on the metal hardware on the door tracks and hinges. 

Sunday, May 1, 2016

Test-fitting Demeritt Cannery


 I've completed the basic buildings for the Demeritt Cannery in Waterbury. This is one of the key structures remaining to be finished in the "front door" scene - hence the reason for focusing on it. 
Entire building is Evergreen styrene - based on the two prototype photos I managed to turn up of the building. To fit the buildings I needed to adjust the hillside behind the structure and made a Gatorboard base for the building. Although the covered shed, which I assume is some sort of canopy over a dump pit, was on the right side of the gable end of the building, there was no way to fit it there with the track in place so I shifted the shed to the left side of the building. 
Although the pictures show the sections of the building loosely fit together, I plan to secure them to the Gatorboard base once they're painted and detailed. 
After I took these pictures I airbrushed the building with a base coat of Vallejo Pale Blue Gray.


Saturday, July 18, 2015

Op session preps and Waterbury Progress

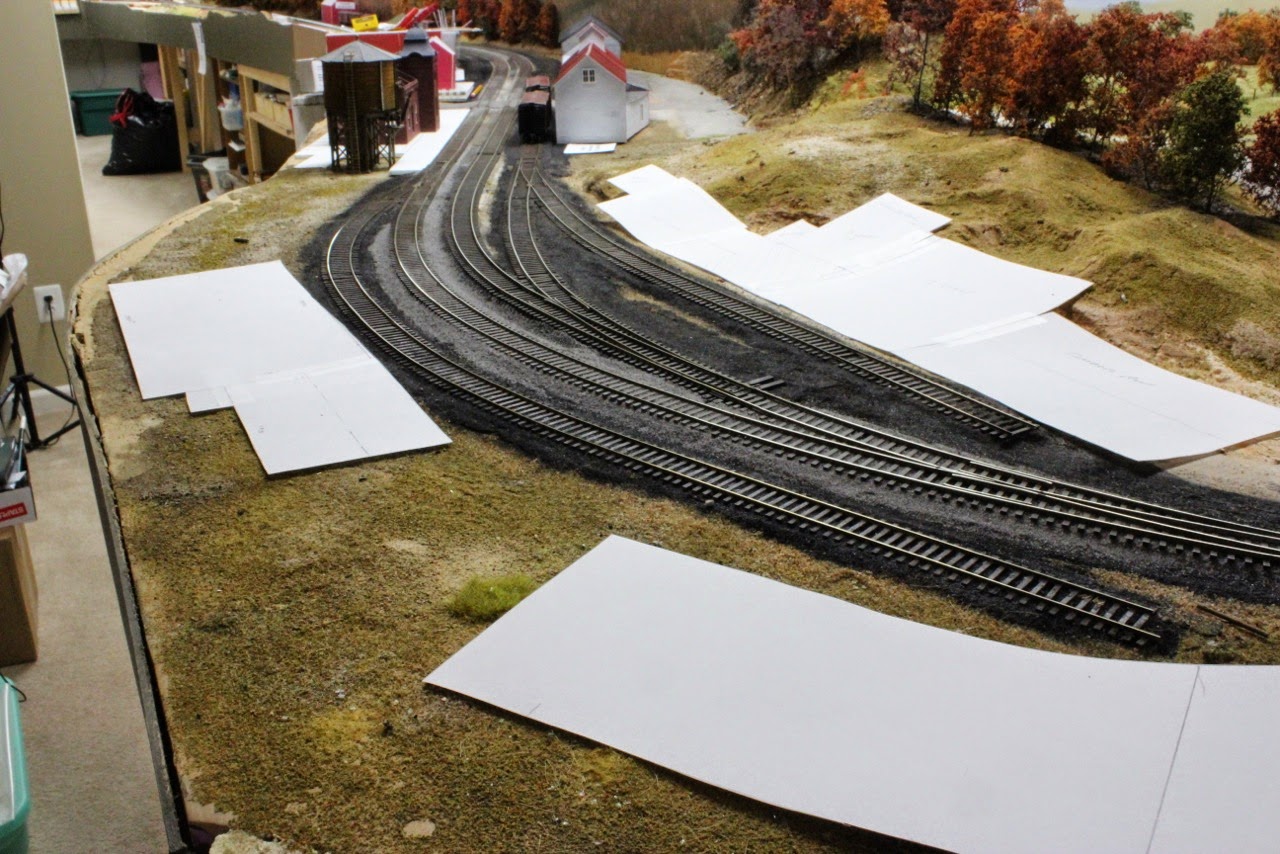
Low angle aerial view of Waterbury. Filled in the gaps between the old scenery and new fascia, adding about 4"-8" to the foreground of scene. Time to call in the ballast crew and the static grass landscapers. 


Derby & Ball - ready for some final texturing and details.

What's with this guy? Obviously my son Matthew's work….

Doing something I've never tried before - two op sessions in the same month. The smart thing to do would have been to leave the layout as-is from the last session. I find it difficult and somewhat time-consuming to make the shift between "construction mode" and "operating mode." Maybe as more of the layout gets "finished" this will become less time consuming. That's my hope. 
Of course, in the two weeks between I redid some the fascia in Waterbury - which left a gaping hole between the old scenery and the "new" fascia. 
I filled that in with foam and got a coat of earth-colored paint on it with some basic texturing in the form of sifted dirt. 
I was going to repaint the fascia (it now needs it - badly!) before today's session but cooler heads prevailed when I had images of my operating crew members sporting spots of green paint!
Next on the agenda is finishing the country store for Williams Creek, getting Mrs. Griffith a house to go with the barn, and then a LOT of static grass work between the end of the peninsula and Randolph. 
Possible location for the Griffith Farm house? 
But right now I have to make sure the throttles have fresh batteries…. and find the directions for the fast clock….
Remind me WHY exactly I'm doing this? 

Sunday, July 5, 2015

July 5 - Progress Report

Progress on the hay barn at Griffiths Farm. I might add a farmhouse "up the road aways…." But I finally got the lower level windows, doors, and trim in place. And planted the wire tree. 
Considering this was a holiday weekend (Happy Independence Day!) I didn't get a LOT done on the layout. Besides, I have a small group of guest operators coming by on July 18 for an operating session so I really don't want to dive into any major messy projects until that session has concluded. Once that session is done the plan is to finish the areas that I plan to have judged for the NMRA AP Program scenery certificate. (I run hot and cold with the whole MMR/AP Program thing. But I figure I'm pretty close to knocking out three certificates - Electrical, Civil, and Scenery - so I might as well. At that point I'll reassess whether I want to pursue what would be for me the last two certificates.) 
Even without the MMR certificates I'm so close to getting some sections of this layout "finished" that I'm determined to do just that. 
The barn scene I've shown several times was one of those "90%" done projects - the doors and lower windows weren't installed, and the tree adjacent to the barn was simply plopped into place. 
Friday morning was spent finishing up the structure itself - I even "dug" a hole and planted the tree.
The Williams Creek area has progressed with a creamery building (a Branchline kit with a scratch built boiler house addition). But the scene needs something else. 
I can't think of anything more New England than a country store. I'd had the sub walls for a BEST Trains country store (The Trussel Store) on the layout for more than a year. Finally this weekend between other obligations I got the clapboard walls painted and painted and glazed the windows. 
Progress!
Walls with windows for the country store. The mullions on one of the large laser-cut large store front windows simply wasn't there when I removed the pieces from the wood sheet. Need to repair it. 

Not entirely sure if it will be placed in front of the mainline in Wiliams Creek or between the track and the backdrop - either position will require "adjusting" the scenery a little but I think it will be a nice addition to the scene. I'm going to hold off selecting exactly where to place it until it's assembled. See the photo below for the two possible locations. 
As far as color, I toyed with painting it plain white - but the creamery is white. I also toyed with ochre yellow, which was a very common color on older rural New England frame buildings (see the BEST web site for a photo of the store in that scheme). In the end I settled on barn red with white trim. Should really pop. 
I plan on adding a simple interior and some lighting to this structure - partially for the MMR thing (you get extra scenery points for "lighting") but mostly because I think it will be neat to have a chance to do a "nighttime" shot or two. 
A light construction project for this week. I've stripped most of the structures from Waterbury in preparation for a short work session Tuesday evening. We're going to re-do the fascia around the lobe end of the peninsula (above) to make it a smooth curve and straighten out of a reverse curve in the fascia to add a few inches to the scene at Waterbury (below). 

A little bit of major construction is also on the agenda for this week - luckily it won't impact the upcoming op session (actually should be finished well before then). I've never been pleased with the fascia on the lobe end of the peninsula. Frankly it looked awful. John Paganoni is coming by Tuesday evening to help resolve the issue with the curved portion of the peninsula. At the same time I'm going to straighten out a weird "reverse" curve in the present fascia - essentially making the fascia straight and adding 6" or so to the front of the layout. I'll save what I'm planning to use that additional depth until another post. 


Saturday, April 18, 2015

Friday, April 3, 2015

Derby and Ball Woodworking Shop

Back at the modeling desk adding some details to the Derby & Ball woodworking building. I have several photos George Dutka sent me as a guide, but clearly the structure had seen better days by the time he snapped these images.
Chief inspiration is a Phil Hastings photo of the Ambassador rounding the curve at Waterbury. That's the woodworking building to the left of the locomotive.
One thing that barely shows up in the photo it a "box on stilts" to the left of the gable window.
As far as what it actually was - my guess is it was some sort of sawdust handling/storage/collection system. Someone suggested it might be a steam box of some sort since the company made skis that would have been bent and formed from wood strips.
Here's one view of the woodworking shop. That "box on stilts" is just out of view to the left.

I'm not sure what it is, but it certainly adds some visual interest to an otherwise plain Jane building, so last night I cobbled it up out of styrene. The black styrene is a subshell that will be sheathed in Campbell's corrugated metal. I also got the roof panels cut out.
The door and windows are painted and I got about half of them "glazed" before calling it a night.


Thursday, February 26, 2015

Derby & Ball Co. - 3


Quick update. 
I've been making some progress on the Derby & Ball Co. complex - as you can see, the basic walls of the "main" building are assembled and have been primed. The building is resting on the "plans" for the woodworking shop portion of the complex.

Tuesday, February 17, 2015

Derby & Ball Co. - 2

Logo from a 1934-vintage Derby & Ball scythe handle.
I haven't been able to turn up a lot of detail on the Derby & Ball Co., but have found a few interesting facts that I'm including here in the hope that more information may reveal itself. 
Derby and Ball is an example of a manufacturing company that changed with the times and adapted to new markets when their original product was no longer in demand. The company was founded by Albert Derby, one of the principals in a company called Frost, Derby & Co. The company started manufacturing scythe snaths in 1857. In 1882, Franklin P. Ball, who had been engaged in the manufacture of scythe snaths in Springfield, Vt. since 1852, joined the firm which was renamed Derby & Ball. The company had two locations - one was in Bellows Falls, the other in Waterbury. The Waterbury facility specialized in manufacturing the wooden (primarily willow) handles for the various scytes. 
Catalog page showing the various styles of scythe handles offered by Derby, Ball & Edwards Corp. 
In 1920, the Edwards & Edwards Co. merged with Derby & Ball forming Derby, Ball & Edwards Corp.  In 1933 the company was reorganized as Derby & Ball, Inc. In 1933 they started manufacturing baseball bats in addition to scythes. 


The company would last into the early 1960s but not as a manufacturer of scythes or even baseball bats. (The bats were only made for a few years before that business was sold to the makers of Louisville Slugger.) Recreational skiing started becoming popular in the years before WWII, and purely by accident the company started to make skis in 1934. A December 1950 newsletter of the Mt. Mansfield Ski Club explains the story behind how the company got involved in the ski business and explained how the skis were made. 

Monday, February 9, 2015

Derby & Ball

Derby and Ball wood shop is visible to the left side of this Phil Hastings photo. The smoke is obscuring everything but  the smokestack on the remainder of the complex. 
Bernie is coming out here in a few weeks and we'll either resolve the White River Junction issues or break out the saws-all and fix it the fun (albeit messy) way. 
In the meantime I decided to focus my attention on a  few more of the Waterbury structures. 
First up on the docket is the Derby and Ball Co. building complex. 
This includes a long two story structure and a one-story building that was likely used as a wood shop. 
You can see the basic outline of the main building in this mockup, which is nothing more than a piece of newsprint cut to fit the layout with rough sketches of the window and door locations. 
The footprints of the Derby and Ball buildings to the left of the mainline. 

I'd already done some mockups of the structure - my models will be fairly large as model railroad structures go but won't be scale size - I simply don't the have length. But I should be able to capture the spirit of the complex. 
The smoke from the locomotive in the Phil Hasting's photo is obscuring the two-story buildings - here's how they look today - like many of the older trackside buildings in Vermont they've been renovated and altered slightly over the years, but the basic "bones" are still there - I have to thank George Dutka for these shots which he was kind enough to lend me (and they're published here with his permission):
George Dutka photo shows the Derby and Ball main building. The white "garage" in the background is the old woodworking shop. 

Sanborn Insurance Map closeup of the Derby & Ball complex. 

Another photo from George. This shot of the shorter building in the two-story complex reveals the gable roof was different at one point. I plan to build my model following the lower gable trim since I think the resulting model will be a little more interesting.
George even found an "earlier era" picture of the complex - I'll be using this shot to backdate my model in some places - there's room for artistic interpretation even in prototype modeling!

At this point the model isn't much to look at since I've been laying out the doors and windows on the sub wall - more updates to follow. 
(I have to add after building the last three or four structures from wood it's really, really nice to be working with styrene on this one!) 


Sunday, November 23, 2014

Shepley Coal Company Sheds


These two sheds make up most of the Shepley Coal complex at Waterbury. 
View from the opposite end. Still need to stain the end wall!
You can see the two coal sheds to the right (in front of 2-8-0 452) in this George Corey picture of Waterbury. The next industry I plan to work on in Waterbury is the Cooley-Wright foundry, visible in the distance to the left. 
 We have family visiting for the Thanksgiving holiday week, so I simply can't spend a great deal of time in the basement. Since I tend to wake up early (thanks to two dogs who don't seem to get the concept of "sleeping in on the weekend") I have some time in the morning to get a little modeling done before the rest of the family rolls out of bed. 
Since I need to be quiet for these morning work sessions I've chosen to finish up the coal dealer and freight house in Waterbury. 
Photos show the current state of the Shepley Coal Company sheds. Though not as interesting as silo or elevated ramp style sheds, these lean-to sheds were perhaps the most common in New England in the 1940s and 50s. 
Mine is made from Scribed basswood sheets with 6 x 6 posts glued along the side. The bracing crossmembers are 2 x 8s. Everything is stained with a combination of Hunterline Blue Gray, Creosote, and Light Brown stains. The roof is black .040" styrene - I'll add tissue to the roof to represent tarpaper. 
Also, the rear walls of the two sheds face the backdrop, so these are also plain styrene. No reason to expend effort on something no one will ever be able to see. 
You'll notice there is some pink foam crumbs visible where I carved away some scenery to make room for the sheds. I didn't vacuum it up before taking the pictures - need to be quiet, remember?
Finally - about the name - Shepley was the name of the company as seen on prototype Sanborn Maps. I didn't have room to model the sheds full size - but my sheds are plenty long. I have a small shack that will serve as a scale house that will be installed when I add the scenery texture to this scene. I'm not sure I'm going to call the industry Shepley. I might name it after a friend.