Showing posts with label Scratchbuilding. Show all posts

Tuesday, May 12, 2026

Layout Work Resumes - Wetherbee's Hardware (Part 1)

With the book in hand and shipping (thanks to everyone who ordered the book!) it's time to turn my attention back to the layout, and to this blog!

You ever get completely overwhelmed by the number of projects you want to complete? My typical reaction when that happens is to start a bunch of stuff that I'll work on for a bit, then put away. OR I just get some sort of overload and can't start or finish ANYTHING! The latter is what happed to me about three weeks ago.  I went downstairs, turned on the layout room lights, looked around, and promptly turned them back off! There seemed like there was so much to do I couldn't come up with a single project to focus on. 

Of course, thinking about this logically I'd remember that no matter how many projects I might want to do, I can only do one thing at a time!

There are too many empty lots in what is supposed be Enosburg Falls - and ideally, I'd like to get the rest of the structures for the town completed in time for the Mid Atlantic RPM meet this fall. I don't know if we'll have an open house this year as part of MARPM, but getting the town looking "done" by mid to late fall seems a reasonable goal. 

Between the CV freight house and the front edge of the layout is a large open area - approximately 7"x18" defined by Archambault Street and Railroad Ave. This is across the street from the implement dealer that I built five or six years ago. I did a nine or ten part series of posts on that build - you can find part 1 HERE.

As I was flipping through the History of Enosburg Falls book I came across this photo of a hardware dealer that, according to the descripition in the caption,

Test fitting walls and windows. Nothing is glued up or square at this point!

Experimenting with different finishes on piece of scrap shingles. 

Shot of the left front facade shows the two different types of siding. 


was located near where I had that blank lot. It was a fairly long, narrow building and I thought while it's in no danger of winning any architectural awards, it was typical enough of the business district of a New England small town that it would make a nice addition to the scene. 

I don't know for certain, but it looks as if this was two older buildings - perhaps a house and a barn? - connected with a "modern" addition connecting them together. Note this is the only picture I have found of this building, so I would have to imagineer the rear and side walls!

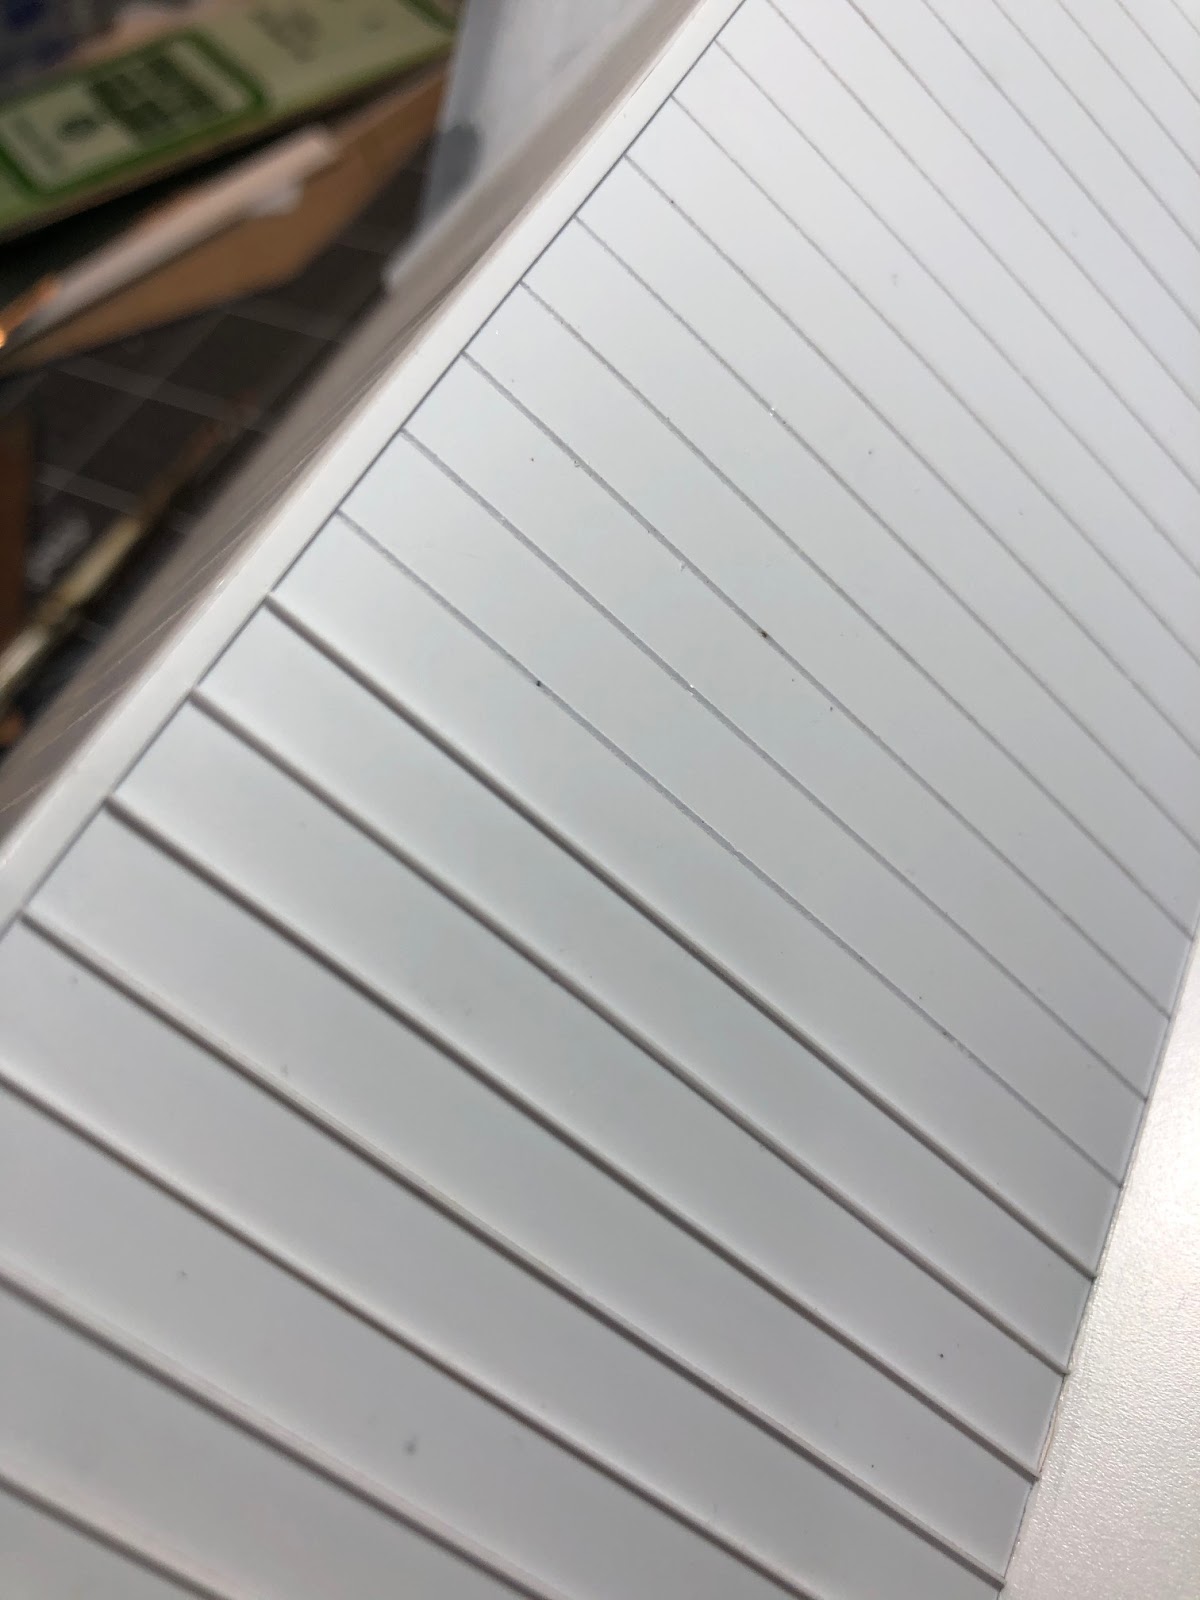
The first step was to figure out how to build this thing. My go-to and much preferred material is styrene, but in this case the entire street facing upper floor of the building is shingled. Note these are not shakes - these shingles have flush cut ends with varying widths. I've built a number of BEST Trains laser structure kits and several of them use laser etched wood sheets with the shingle pattern embossed in the wood. Thinking that would be easier than applying individual layers of shingles, I ordered a sheet of the stuff. For the first floor of the street side of the building I opted to use .090" vertical scribed boards. 

I dug through my rather extensive collection of Tichy and Grandt Line door and window castings and came up with close enough matches to what showed in the protoype photo. I did have to shorten the middle section somewhat - meaning I don't have quite as many big shop windows as the prototype - but I doubt anyone will ever realize that unless I tell them!

I will say it's been a long time since I cut window openings out of wood stock - and it's not something I enjoy. At this point I have front walls cut out - and my original plan was to use wood for the entire building, especially for the side wall that looks fairly weathered and worn from the little bit of it that shows in the right edge of the photo. But I'm toying with making the remainder of the building out of styrene. 


Friday, May 23, 2025

Ice Cream Parlor for Enosburg - 2


Finished the ice cream parlor for Main Street in Enosburg. This is the one spot on the "outer loop" of the layout that has no scenery started at all. I've decided completing this area is the going to the primary goal for the next few months. (Secondary goals include conducting several test op sessions for someone other than myself!) 

The building is Evergreen styrene, built using my normal method of a plain styrene subshell covered with styrene clapboard and novelty siding to capture the look of the prototype building. The awnings were interesting - I made a styrene shell for them and then glued tissue paper in place to give some semblence of cloth texture. A base coat of blue paint, with some drybrushed highlights of lighter blue, hopefully gives the illusion of minor folds in the "fabric." 

The sign was prepared by Bernie Kempinski - and really helps make the building. He thought that he'd gotten away with doing signs with the passing of our mutual friend Paul Dolkos. No such luck. 


Monday, May 12, 2025

Ice Cream Parlor for Enosburg

Other than operating on the layout a few times, I really haven't done much on the layout since we went to Cocoa Bach back in January. I had surgery a the end of January that kept me out of the basement for a couple of weeks, and I've been getting used to life on dialysis. So far that's going better than expected but it certainly is life-changing. (Luckily, I do PD dialysis at home at night, so the impact on my daily life is much less than if I had to actually go to a dialysis center). So this is the "new normal" - at least until when and if I get a kidney transplant.

But last week I found some time to wander to the modeling desk with the goal of getting started on ... something. 


Back before Christmas I'd started on a South River Modelworks kit - so I dug that out. Stared at it for a few minutes and promptly put it back in the back. Don't get me wrong I love those kits but they're a lot of work - and I just wasn't in the mood for a big project. 

One area that needs some attention on the railroad is the Main Street scene in Enosburg Falls. This was referred to as the Billado Block - but on the HO Richford it's been a plain of brown painted plywood since the layout was started. 

In looking over the Jack Delano photo of the scene the obvious building to start with was the ice cream parlor. (Actually the building is an old creamery). 


A set of footprints for each of the buildings on that side of Main Street quickly revealed that "Full scale" models of all four structures (the parlor, the doctors house, the cafe, and the bank) wouldn't fit. 

I'll have to figure out how to address the other buildings at some point. One approach is to eliminate the bank building entirely - but the cafe is connected to it, leaving the question of how to address that. It would be hard to narrow the bank building enough to fit - or I could simply use a much narrower structure for that corner even if it wasn't a scratchbuilt model of the exact prototype. I'd gladly entertain any feedback and thoughts on the best way to approach this in the comment section. 

No matter what I end up deciding with the rest of the block, the ice cream parlor could be safely added full size (it was really too small to compress, although I shortened the overall length to allow me to add some trees behind the building the block the support post from intruding on the completed scene. 

The building still exists - although obviously it's been modified over the years. I have a railroad drawing that shows the outline of the building as a rectangle - the photo of the building today shows a lean to addition to the track (bike path) side of the structure. I haven't included that on my model since I'm choosing to believe the railroad map - but it wouldn't certainly make the building more visually interesting! 

Construction has been relatively straightforward using my typical techniques for frame buildings made from styrene. A sub shell of Evergreen .040" styrene Evergreen clapboard and novelty siding with Evergreen metal roofing panels on the taller portion in the rear (likely an ice house at one point) and N Scale Architect HO shingled roof on the main building. 

Currently I have the basic building together - it's sitting in the paint booth waiting for the initial coat of paint to dry so photos of the building in its current state has to wait for the next update. 

Saturday, August 22, 2020

Concrete Texture

Progress continues in the basement, but some limited summertime activities and a distraction (more on that below) have kept me away from any long duration model railroad work sessions. 

I did, however, manage to get the implement dealer completed, mostly in preparation for a clinic I'm called "Researching and Scratchbuilding Tips for Prototype Structures" at an online RPM meet later today. I wanted to finish the building for the clinic, which I did, but the bigger challenge was taking what was a long clinic (last time I presented this live it ran 55 minutes), adding more information to it, and then editing it down to fit the 30 minute time slot. I think I'm in good shape - but I did remove some of the "here's two or three ways you can do this step" - limiting the talk to what I actually did. 

Just after dusk. Obviously some light discipline is called for!

We'll see how that works out. I'm doing the same clinic for our local NMRA division later in the year (October, as I recall). So at least I'll get one more use out of it. I think the idea of 30 minute clinic slots is particularly good - frankly I think it should be used when (or if) we get back to having live meets and conventions. I've sat through a lot of clinics over the years that would have benefitted from some harsh editing!

 On to the main topic for today's post. When I built the implement dealer I added a poured concrete foundation made from .040" plain sheet styrene. I did sand the surface of the styrene prior to painting in order to get it to look like something other than smooth plastic. I painted it and thought it looked okay - until I took some test photos of the building, Those foundation walls were missing any texture.

I have AK Interactive's Concrete (they make an identical material for asphalt, the only difference is the color). It's basically some sort of joint compound-like stuff with a gritty texture added. And, while the texture is great for larger scales, or even HO scale pavement if you apply it carefully and smooth it well - it's really meant for larger scales such as 1/32nd military models and the like. In HO it looks just a little too chunky to make a convincing concrete wall.

I showed the AK Interactive stuff to my wife (leaving out how much I'd paid for a tiny tub of this stuff!) and explained the chunky problem. She dug through her art supplies and handed me acontainer of "Ceramic Stucco Medium" - basically matte gel medium with some fine, gritty material added. The difference was this gritty material was much finer than the AK Interactive stuff. 

After I taped off the clapboard sections of the walls to avoid any overspill, I dabbed this stuff right out of the jar (you can thin it and color it with acrylic paints, in fact that's what it's made for) along the base of the styrene. In this case, I didn't color it, or even paint it. It dries to nice "almost new" concrete color out of the jar. It has a decent working time - so I had lots of time to spread it smooth with an artists spatula. 

I found it naturally formed some uneven spots in various places - looking exactly like a poured concrete wall. If you were modeling a stucco building you could easily use this to create a look of failing stucco with the underlying brick showing through. Or, if you wanted it to look like patched concrete you could let an initial application dry, and then add a second partial coat in a different color.

Before the next step I suggest letting it dry completely - preferably 24 hours or so. When it dried it looked just a little too heavy - but some light sanding to just knock the surface down, followed by a couple of applications of Pan Pastels gave some variation to the color and helped smooth the surface just a little. One more tip - if you're going to color it add the paint to the material before you apply it. I don't think "surface painting" this after it's dried would be as effective. 

All in all I'm pretty pleased with the final result:


About that distraction - over the last couple of weeks of evenings I've been painting some 28mm Revolutionary War (American War of Independence to any Brits out there!) figures. Years ago I was heavily into wargaming - even did some re-enacting way, way back when. I was never into "winning" war games - but I did always enjoy researching the uniforms and painting figures to represent them. I haven't done any miniature figure painting for many, many, years - but out of the blue a few weeks ago I dug out a couple of old boxes of figures and decided to paint them. I quickly found I'm really out of practice. 

But here's a very much in progress shot of a British Regiment - the various figures shown are representative of the Center (also called Line, or "Hat"), Grenadier, and Light Companies of His Majesty's 63rd Regiment of Foot. 


Tuesday, April 14, 2020

Agricultural Implement & Paint Dealer - Part 11 Trim, Stairs, and Test Fitting

Over my lunch breaks on the last few days I got the windows glazed and installed, added the trim, installed the doors, and even scratchbuilt a set of front steps. 
Steps were made by stacking square stripwood,
which was sanded and painted to give a concrete texture.
Today I even got the initial coat of Sculptamold in place to "plant" the structure. (It needs another coat). 
Sharp-eyed readers will note the wires emerging from the side of the structure. 
Trim was added using pre-painted
 1x6 and 1x8 stripwood.
I even installed the subsurface of the street. 
Things are shaping up nicely. 


Saturday, April 11, 2020

Agricultural Implement & Paint Dealer - Part 10 - Another sign

Here's everything needed for this project. 
Cut the .008" wire that the sign will be
"hanging from" long enough to fit between
the two printed signs with a few
scale inches of wire left protruding above the top. 
As I was test-fitting the implement dealer structure in position I decided the scene needed a sign out front - preferably an older, now rusted sign, hanging from a bracket on a pole. 
So I found a sign on the internet, sized it in Photoshop, and printed out two signs. 
Then I found a length of wood dowel, and some .019" and .008" wire. 
The photos show the basic process. 

The wire is secured to the rear of one sign with ACC, and then the second sign is added to the rear. Touch up the edges of the white paper and carefully dab some dark rust colored paint on the edges and surface of the signs with a sea sponge (below). 


Paint or stain the pole (I used some Hunterline Light Brown, followed by a wash of acrylic Burnt and Raw Umber. Then I drilled a hole in the pole and used ACC to secure a short length of .019" wire. The next step was to glue the sign to the horizontal wire, allowing it to hang a few inches down on the .008" "chain."


Sorry for the quality of the photos - I want to get this structure and scene completed, and didn't want to dig out the proper camera for this - and as you can from the photos above, this sign is really small!
But though it's small, I think it will add just a little something to the finished scene.


Saturday, April 4, 2020

Agricultural Implement & Paint Dealer - Part 9 - A couple of signs

Since none of the prototype photos of the Enosburg Falls implement dealer structure showed any signage, I was on my own when it came to making up appropriate signs. 
After looking over what signage I could find (through a variety of internet searches), some common patterns emerged. For one thing, there was a large sign over the larger doors - in fact my prototype has a remnant of such of sign (search through earlier posts in this series of posts). 
So it was a simple matter to create an appropriate sign in PhotoShop (above). 
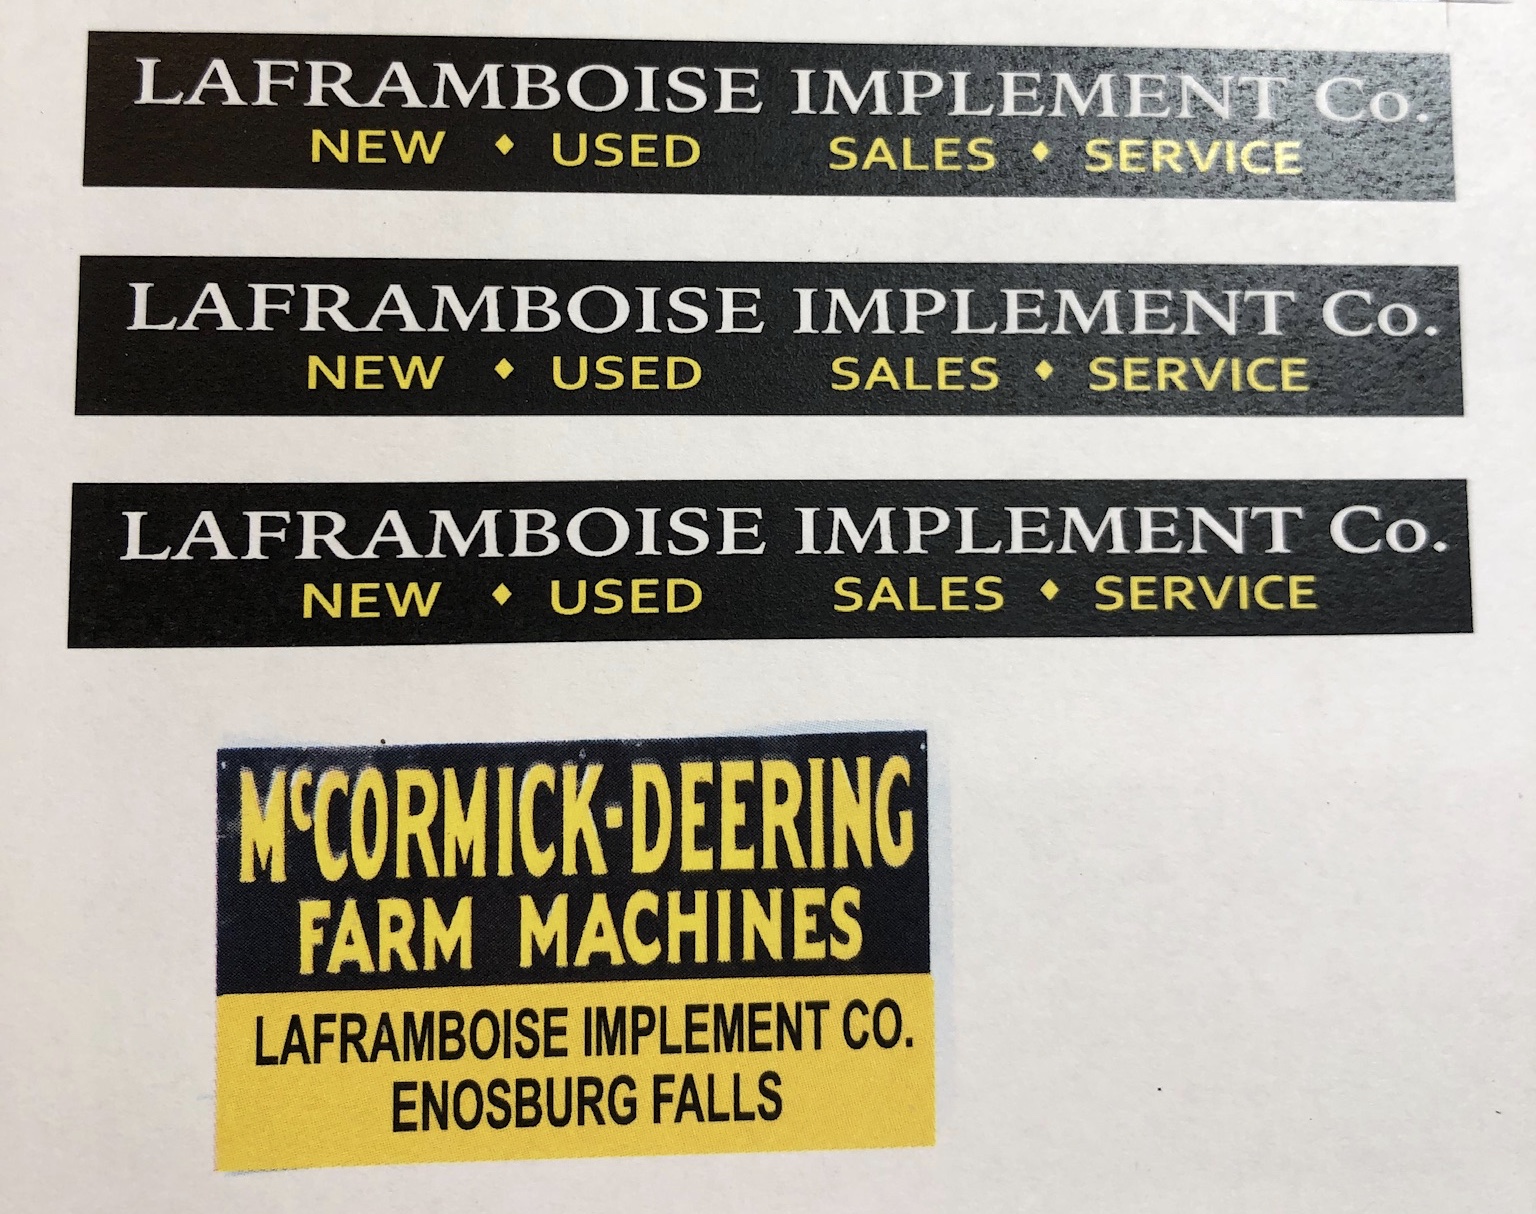
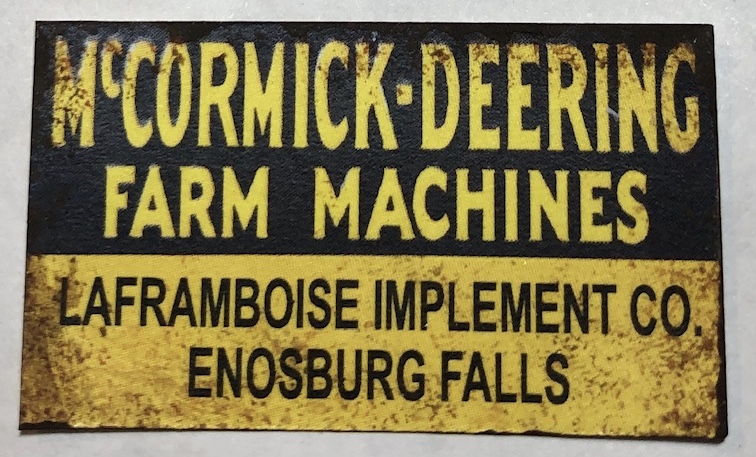
On one of my searches, I came across a neat black and yellow McCormick-Deering sign, with the dealer's name in the lower section of the sign. I imported the sign into PhotoShop, and replaced the Mott Implement Co. lettering with my own company's and inserted Enosburg Falls as the town name. 
After I printed the signs out (copying and pasting it a few times so I'd have extras in case I messed one up!) I carefully trimmed the overhead sign from the paper and glued it a piece of .040" styrene. Some stained stripwood 3x6 trim, drybrushed white and then installed around the edges of the sign, completed the main sign:


I wanted the Mc-Cormick Deering sign to look like a metal sign so I used a sea sponge to gently dab a compbination of old rust-colored paint to the sign. I made sure to go lightly on the surface and a little heavier on the edges. 
Work continues on the main building as well. I realized the inside of the building looked like a big empty box when viewed through the garage door windows. But a full interior didn't seem worth the effort since that would be a little too hard to see - besides, I need to get this building finished and move on to something else! 
On a whim, I googled "Vintage Farm Implement Dealer interiors" and found this image:

I sized it to the fit the rear wall of the garage portion of the building, printed it out, and glued it in place. 

Monday, March 9, 2020

"Agricultural Implement & Paint Dealer" - Part 8 - Initial painting and terraforming


Got an initial coat of paint on the implement dealer this weekend, including a coat of paint on the raised seam roof.

Actually the roof got two coats of paint - the first, from Polly Scale Flat Aluminum, just lacked any life - looking more like a flat light gray. After that dried, I went back over the roof with a 50:50 mix of Vallejo "Steel" and "Silver," which produced a much better metal color. 
For the main walls I dry-brushed a coat of two craft paint colors - about two parts of one called Snow White (any "real" white would work) and one part of a very light cream (or off white) color called "Parchment." 
While that was drying, I cut a piece of 1" thick foamboard to fit between the front edge of the layout and roadbed, and carved it to shape. There's still some work to do here, but I did pose in the building in an approximate position. 
As you can tell from the overall shot of the building, the paint on the front wall needs another coat of white to even it out just a little. I think the effect came out pretty good on the side walls (see closeup photo to the right). My goal is a well-maintained, but weathered front wall, with the side walls showing more signs of wear and tear on the paint. 
The rear wall of the building was painted a barn red color (not shown), for some variety if nothing else. Frankly, the rear of the structure will likely end up almost completely obscured by brush and trees. 
I also made some progress on the Thresher's Mill diorama (I don't really consider these dioramas, but structure bases with a small amount of landscaping around the building itself, but that's a subject for another post. 
I'm getting ever closer to wrapping this seemingly never-ending project up!

Friday, March 6, 2020

"Agricultural Implement & Paint Dealer" - Part 7 - Fascia and Freize Boards

At first New England buildings, especially those built in the 19th century, may appear very simple. They're not simple as much as they're understated, but when you study them close enough there's plenty of small details. 
The Implement dealer building is certainly one of those plain or understated buildings, but the wild assortment of additions and changes to the prototype structure over the years produced an interesting building. "Simple shapes combined into a complex whole" may be one way to describe this thing. 
Last night I tackled one thing I don't really love about  building structures, the fascia trim and freize boards. The one good thing about getting to this stage is that it means the end of this endless project, while not here, is certainly close!
I started with the fascia trim. For most buildings this isn't a single piece of lumber, it's actually comprised of several pieces of descending widths. Studying prototype photos over the life of the building showed at least three different arrangements of the fascia trim, so I opted to go with what I thought looked good on the model. (You may remember from one of the initial posts on this project, I don't actually have photos from my modeled era, only decades before, and decades after - so some logical guesswork is called for!).  In the case of this building I went with a wide board on the bottom, and two additional boards on top. The trickiest part of this step is getting the correct angles on both ends of the fascia trim. I started by laying an over-length piece of styrene onto the side wall being sure to get the styrene to line up with the roof on its length and one end. 


Next, I used a square to locate the angle on the top of the board. NOTE: In this case I marked the line with a pencil so it would show up in the photo - in truth the pencil line is too thick to create a mark accurate enough to make the cut. I usually mark this angle by scribing it lightly with the tip of an X-Acto blade.     


To cut the angle on the bottom of the board I repeated the process, making sure the board was seated correctly in the peak of the roof. In this case, the trim boards end inset from the corner posts, so I was able to use them as a guide. 
 I repeated this process for each of the three pieces on the front and rear of the "paint store" section and on the gable side of the "L extension by the garage doors. I cemented the trim in place using MEK applied with a small brush. 
Once the fascia was completed I added the freize boards to the underside of the roof overhang on the side and rear walls of the building. 
Then I added the trim to top of the "false front" section of the structure on the front wall (lead photo above). 
After all that was done, I gave the model another light coat of primer gray, focusing on the roof and trim. 


Tuesday, March 3, 2020

"Agricultural Implement & Paint Dealer" - Part 6 - Ribs, lots of ribs ...

Roof ribs, that is. 
I've noticed a lot - the majority in fact, of the smaller industrial and agriculture related buildings along my prototype feature standing seam metal roofing of one form or another. Over the years I've tried all kinds of ways to model this, from paper with stripwood "ribs" to Builders in Scale metal roofing, such as on this model of Ben Thresher's mill. 
Frankly, when it's painted and weathered the real metal roofing looks perhaps the best, except the material is just a little too thick, meaning for this building, with all its valleys and angles in the roof panels, I didn't think it would offer the best approach. 
Instead I opted to go with Evergreen styrene metal roofing. This material is easy to work with, but the most tedious part is adding all those ribs to the slots in the roof sheet. 
For a situation where the ribs end at the bottom of the roof, simply install the slightly long ribs along the length of the roof and then trim the ends flush. For areas where the ribs run between two other sections of roof, or one section and the peak, it's a little more tricky. 

Here's how I do it:
1. After the roof panels are in place, and the strip styrene ridge cap (a 1x6 styrene strip at the top of the peak) I cut the rib overlength and insert the bottom of the rib into the slot. That plain styrene on the right is the subroof on another portion of the building - meaning the ribs are running between the ridge and another roof panel.  
 2. Once the bottom of the rib is in position, lock it in place with a slight amount of styrene cement or MEK applied with a needle applicator or a small brush.
 3. Once the cement has dried, insert the rest of the rib into the remainder of the slot. I focus on getting the rib into the slot and with no gaps or waviness. Leave the rib overhanging the ridge cap slightly at this point.
 4. Use flush cutting nippers to trim the rib just inside the base of the ridge cap. Then run styrene cement along the entire length of the rib. 
5. Repeat Steps 1-4 ... a lot ... (!)

Thursday, February 27, 2020

"Agricultural Implement & Paint Dealer" - Part 5 - Fitting the Roof

With all the benchwork and roadbed (and most of the track) completed on the layout I turned my attention back to the Enosburg Falls implement dealer.  
In my last post on this project I'd gotten the basic building assembled. Next step is the roof. During my era the prototype had standing seam metal roofing. For this I used Evergreen styrene metal roofing (24" spacing). 
This is a piece of styrene with grooves pre-milled the appropriate distance apart. Installation is pretty straightforward - cut the panels to shape, and then add the "ribs" - strips of styrene - to complete the roof. 
This building has an L-shaped footprint, with an almost flat-roofed addition over the garage doors, meaning the roof panels are anything but simple rectangles. To get them sized properly I started with pieces of thin cardstock (actually the back of old memo pads) and cut them to the correct width. 
Then I used a square to set the angle on the adjoining roof section and drew a line to get the angle correct. This wasn't as complicated as it sounds, but it did take some trial and error. I'm glad I did all this experimenting on the cardboard pieces and not the Evergreen sheets. 
Once I was convinced the roof pieces looked correct, I used them as a pattern to cut out the styrene pieces.
There were a few spots where I had to cut a slot in the styrene to permit the roof panel to fit and allow the gable end of the roof to extend past the vertical wall of the building. See the photo at left. I found it easier to cut the slots slightly too wide (toward the inside, it's important not to not have a gap between the roof and exterior wall. The slight gaps will be hidden by adjacent roof panels or flashing. 
At this point the basic roof panels are in place. The next step is to add the "flashing" to the peaks and valleys using 1x6 strip styrene. Then I'll tackle the most tedious parts of building this style of roof - installing the ribs. 
Once that's done the roof will be ready for painting and weathering.