Showing posts with label Implement Dealer. Show all posts

Tuesday, April 14, 2020

Agricultural Implement & Paint Dealer - Part 11 Trim, Stairs, and Test Fitting

Over my lunch breaks on the last few days I got the windows glazed and installed, added the trim, installed the doors, and even scratchbuilt a set of front steps. 
Steps were made by stacking square stripwood,
which was sanded and painted to give a concrete texture.
Today I even got the initial coat of Sculptamold in place to "plant" the structure. (It needs another coat). 
Sharp-eyed readers will note the wires emerging from the side of the structure. 
Trim was added using pre-painted
 1x6 and 1x8 stripwood.
I even installed the subsurface of the street. 
Things are shaping up nicely. 


Saturday, April 11, 2020

Agricultural Implement & Paint Dealer - Part 10 - Another sign

Here's everything needed for this project. 
Cut the .008" wire that the sign will be
"hanging from" long enough to fit between
the two printed signs with a few
scale inches of wire left protruding above the top. 
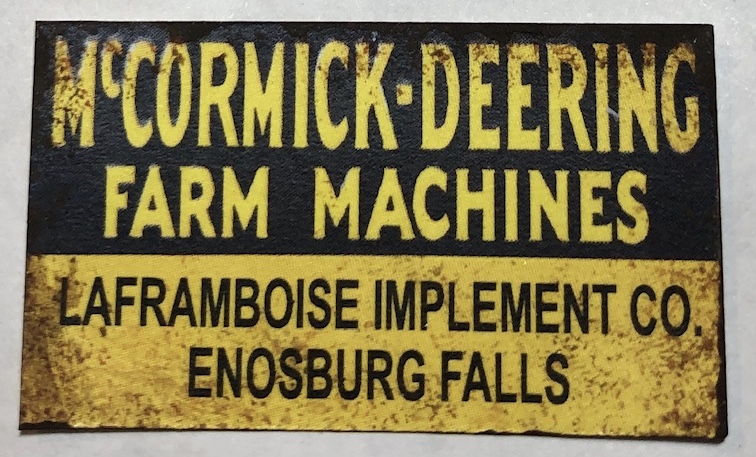
As I was test-fitting the implement dealer structure in position I decided the scene needed a sign out front - preferably an older, now rusted sign, hanging from a bracket on a pole. 
So I found a sign on the internet, sized it in Photoshop, and printed out two signs. 
Then I found a length of wood dowel, and some .019" and .008" wire. 
The photos show the basic process. 

The wire is secured to the rear of one sign with ACC, and then the second sign is added to the rear. Touch up the edges of the white paper and carefully dab some dark rust colored paint on the edges and surface of the signs with a sea sponge (below). 


Paint or stain the pole (I used some Hunterline Light Brown, followed by a wash of acrylic Burnt and Raw Umber. Then I drilled a hole in the pole and used ACC to secure a short length of .019" wire. The next step was to glue the sign to the horizontal wire, allowing it to hang a few inches down on the .008" "chain."


Sorry for the quality of the photos - I want to get this structure and scene completed, and didn't want to dig out the proper camera for this - and as you can from the photos above, this sign is really small!
But though it's small, I think it will add just a little something to the finished scene.


Saturday, April 4, 2020

Agricultural Implement & Paint Dealer - Part 9 - A couple of signs

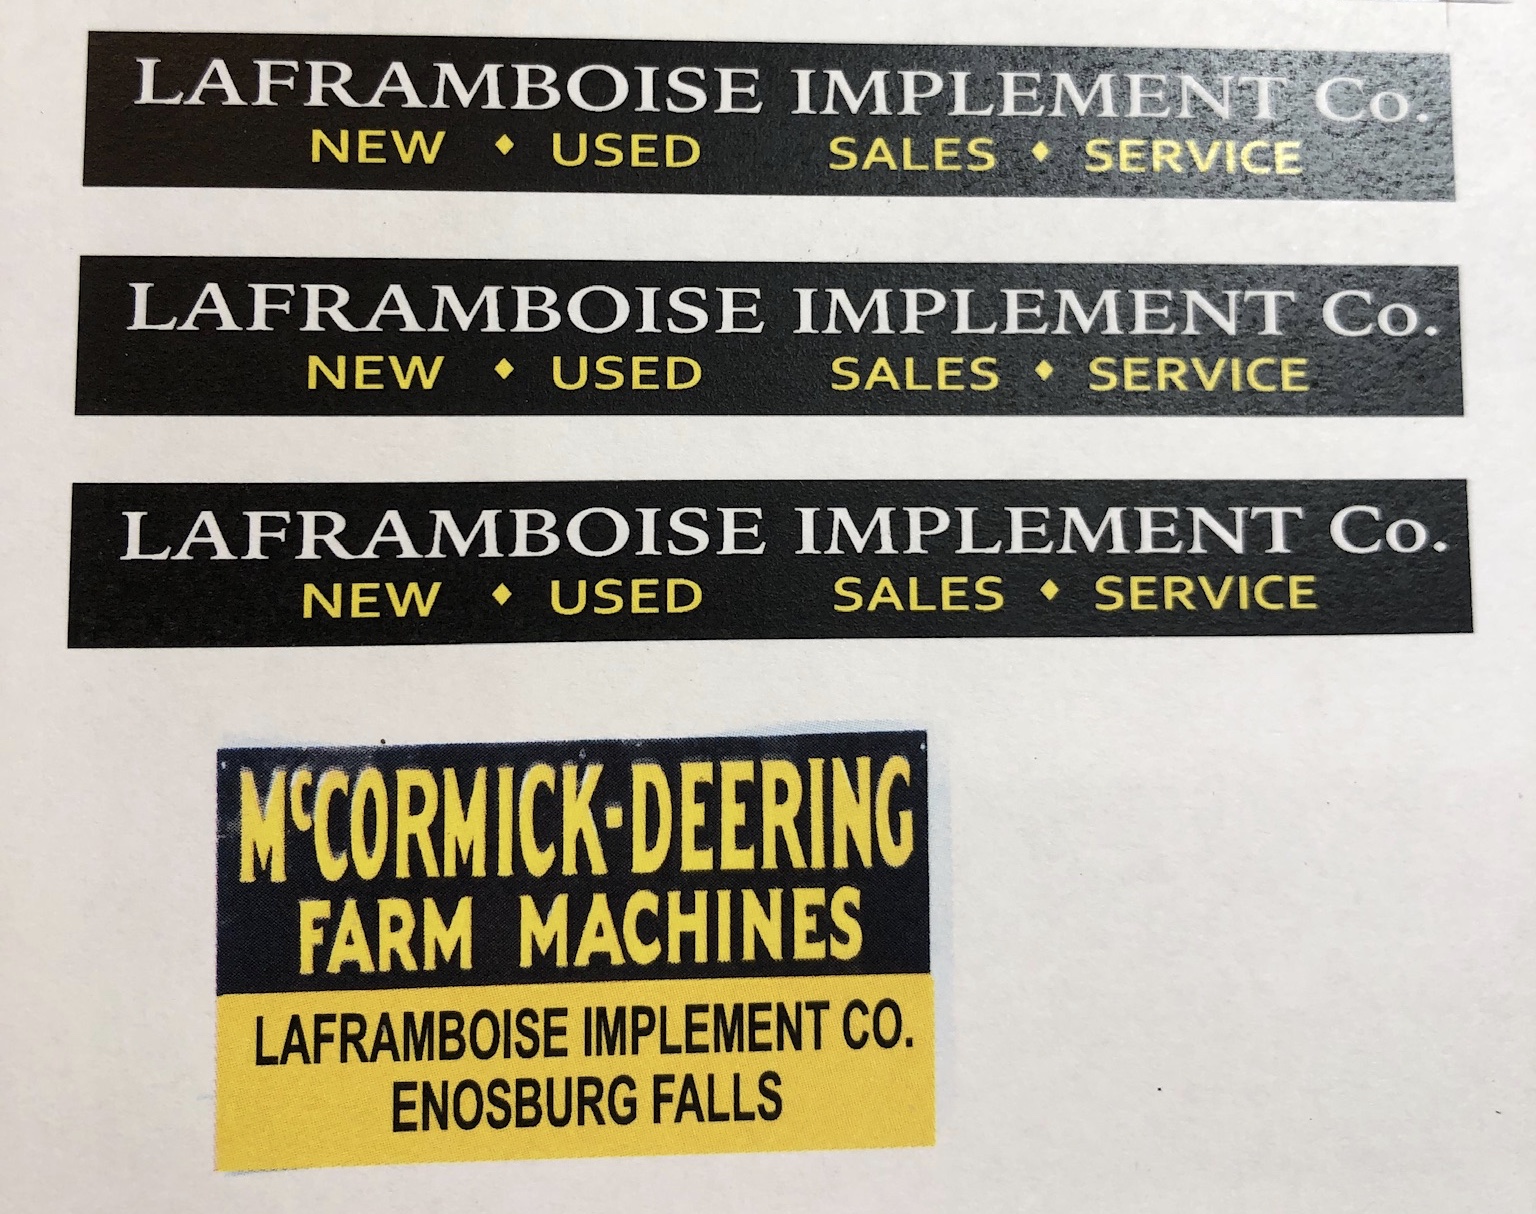
Since none of the prototype photos of the Enosburg Falls implement dealer structure showed any signage, I was on my own when it came to making up appropriate signs. 
After looking over what signage I could find (through a variety of internet searches), some common patterns emerged. For one thing, there was a large sign over the larger doors - in fact my prototype has a remnant of such of sign (search through earlier posts in this series of posts). 
So it was a simple matter to create an appropriate sign in PhotoShop (above). 
On one of my searches, I came across a neat black and yellow McCormick-Deering sign, with the dealer's name in the lower section of the sign. I imported the sign into PhotoShop, and replaced the Mott Implement Co. lettering with my own company's and inserted Enosburg Falls as the town name. 
After I printed the signs out (copying and pasting it a few times so I'd have extras in case I messed one up!) I carefully trimmed the overhead sign from the paper and glued it a piece of .040" styrene. Some stained stripwood 3x6 trim, drybrushed white and then installed around the edges of the sign, completed the main sign:


I wanted the Mc-Cormick Deering sign to look like a metal sign so I used a sea sponge to gently dab a compbination of old rust-colored paint to the sign. I made sure to go lightly on the surface and a little heavier on the edges. 
Work continues on the main building as well. I realized the inside of the building looked like a big empty box when viewed through the garage door windows. But a full interior didn't seem worth the effort since that would be a little too hard to see - besides, I need to get this building finished and move on to something else! 
On a whim, I googled "Vintage Farm Implement Dealer interiors" and found this image:

I sized it to the fit the rear wall of the garage portion of the building, printed it out, and glued it in place. 

Monday, March 9, 2020

"Agricultural Implement & Paint Dealer" - Part 8 - Initial painting and terraforming


Got an initial coat of paint on the implement dealer this weekend, including a coat of paint on the raised seam roof.

Actually the roof got two coats of paint - the first, from Polly Scale Flat Aluminum, just lacked any life - looking more like a flat light gray. After that dried, I went back over the roof with a 50:50 mix of Vallejo "Steel" and "Silver," which produced a much better metal color. 
For the main walls I dry-brushed a coat of two craft paint colors - about two parts of one called Snow White (any "real" white would work) and one part of a very light cream (or off white) color called "Parchment." 
While that was drying, I cut a piece of 1" thick foamboard to fit between the front edge of the layout and roadbed, and carved it to shape. There's still some work to do here, but I did pose in the building in an approximate position. 
As you can tell from the overall shot of the building, the paint on the front wall needs another coat of white to even it out just a little. I think the effect came out pretty good on the side walls (see closeup photo to the right). My goal is a well-maintained, but weathered front wall, with the side walls showing more signs of wear and tear on the paint. 
The rear wall of the building was painted a barn red color (not shown), for some variety if nothing else. Frankly, the rear of the structure will likely end up almost completely obscured by brush and trees. 
I also made some progress on the Thresher's Mill diorama (I don't really consider these dioramas, but structure bases with a small amount of landscaping around the building itself, but that's a subject for another post. 
I'm getting ever closer to wrapping this seemingly never-ending project up!

Friday, March 6, 2020

"Agricultural Implement & Paint Dealer" - Part 7 - Fascia and Freize Boards

At first New England buildings, especially those built in the 19th century, may appear very simple. They're not simple as much as they're understated, but when you study them close enough there's plenty of small details. 
The Implement dealer building is certainly one of those plain or understated buildings, but the wild assortment of additions and changes to the prototype structure over the years produced an interesting building. "Simple shapes combined into a complex whole" may be one way to describe this thing. 
Last night I tackled one thing I don't really love about  building structures, the fascia trim and freize boards. The one good thing about getting to this stage is that it means the end of this endless project, while not here, is certainly close!
I started with the fascia trim. For most buildings this isn't a single piece of lumber, it's actually comprised of several pieces of descending widths. Studying prototype photos over the life of the building showed at least three different arrangements of the fascia trim, so I opted to go with what I thought looked good on the model. (You may remember from one of the initial posts on this project, I don't actually have photos from my modeled era, only decades before, and decades after - so some logical guesswork is called for!).  In the case of this building I went with a wide board on the bottom, and two additional boards on top. The trickiest part of this step is getting the correct angles on both ends of the fascia trim. I started by laying an over-length piece of styrene onto the side wall being sure to get the styrene to line up with the roof on its length and one end. 


Next, I used a square to locate the angle on the top of the board. NOTE: In this case I marked the line with a pencil so it would show up in the photo - in truth the pencil line is too thick to create a mark accurate enough to make the cut. I usually mark this angle by scribing it lightly with the tip of an X-Acto blade.     


To cut the angle on the bottom of the board I repeated the process, making sure the board was seated correctly in the peak of the roof. In this case, the trim boards end inset from the corner posts, so I was able to use them as a guide. 
 I repeated this process for each of the three pieces on the front and rear of the "paint store" section and on the gable side of the "L extension by the garage doors. I cemented the trim in place using MEK applied with a small brush. 
Once the fascia was completed I added the freize boards to the underside of the roof overhang on the side and rear walls of the building. 
Then I added the trim to top of the "false front" section of the structure on the front wall (lead photo above). 
After all that was done, I gave the model another light coat of primer gray, focusing on the roof and trim. 


Tuesday, March 3, 2020

"Agricultural Implement & Paint Dealer" - Part 6 - Ribs, lots of ribs ...

Roof ribs, that is. 
I've noticed a lot - the majority in fact, of the smaller industrial and agriculture related buildings along my prototype feature standing seam metal roofing of one form or another. Over the years I've tried all kinds of ways to model this, from paper with stripwood "ribs" to Builders in Scale metal roofing, such as on this model of Ben Thresher's mill. 
Frankly, when it's painted and weathered the real metal roofing looks perhaps the best, except the material is just a little too thick, meaning for this building, with all its valleys and angles in the roof panels, I didn't think it would offer the best approach. 
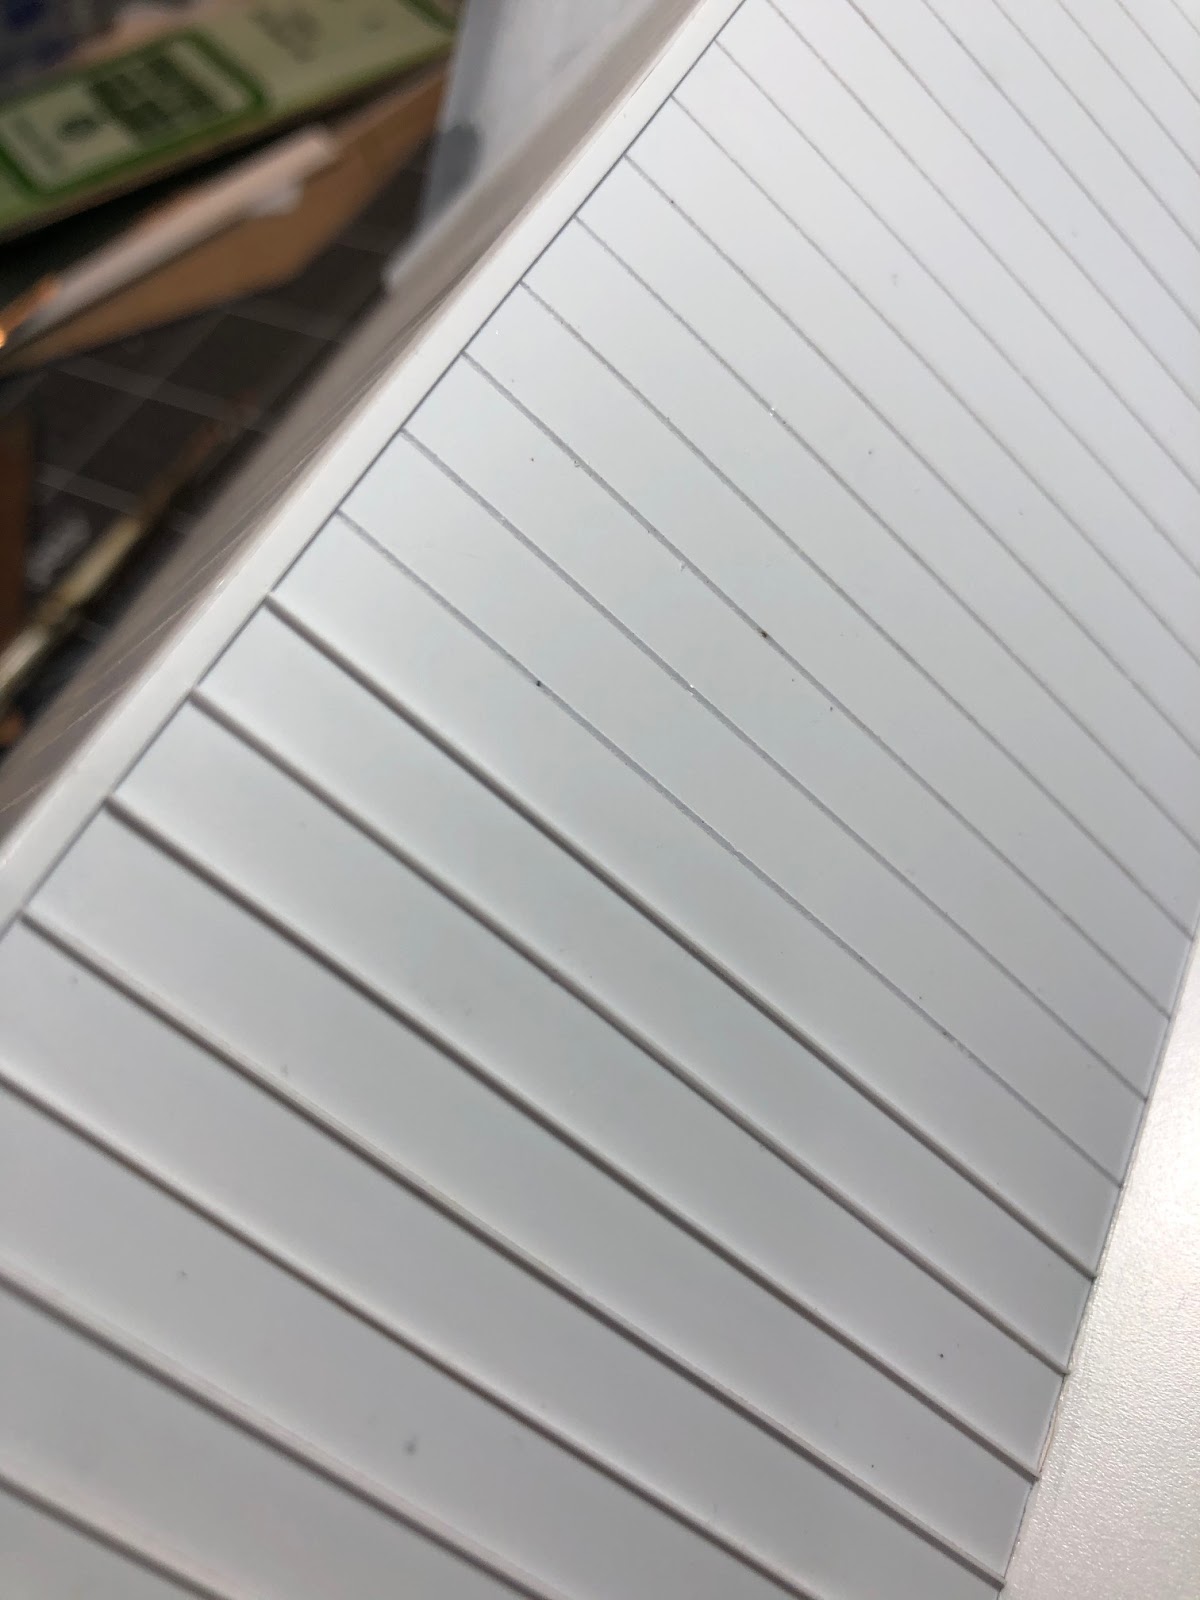
Instead I opted to go with Evergreen styrene metal roofing. This material is easy to work with, but the most tedious part is adding all those ribs to the slots in the roof sheet. 
For a situation where the ribs end at the bottom of the roof, simply install the slightly long ribs along the length of the roof and then trim the ends flush. For areas where the ribs run between two other sections of roof, or one section and the peak, it's a little more tricky. 

Here's how I do it:
1. After the roof panels are in place, and the strip styrene ridge cap (a 1x6 styrene strip at the top of the peak) I cut the rib overlength and insert the bottom of the rib into the slot. That plain styrene on the right is the subroof on another portion of the building - meaning the ribs are running between the ridge and another roof panel.  
 2. Once the bottom of the rib is in position, lock it in place with a slight amount of styrene cement or MEK applied with a needle applicator or a small brush.
 3. Once the cement has dried, insert the rest of the rib into the remainder of the slot. I focus on getting the rib into the slot and with no gaps or waviness. Leave the rib overhanging the ridge cap slightly at this point.
 4. Use flush cutting nippers to trim the rib just inside the base of the ridge cap. Then run styrene cement along the entire length of the rib. 
5. Repeat Steps 1-4 ... a lot ... (!)

Thursday, February 27, 2020

"Agricultural Implement & Paint Dealer" - Part 5 - Fitting the Roof

With all the benchwork and roadbed (and most of the track) completed on the layout I turned my attention back to the Enosburg Falls implement dealer.  
In my last post on this project I'd gotten the basic building assembled. Next step is the roof. During my era the prototype had standing seam metal roofing. For this I used Evergreen styrene metal roofing (24" spacing). 
This is a piece of styrene with grooves pre-milled the appropriate distance apart. Installation is pretty straightforward - cut the panels to shape, and then add the "ribs" - strips of styrene - to complete the roof. 
This building has an L-shaped footprint, with an almost flat-roofed addition over the garage doors, meaning the roof panels are anything but simple rectangles. To get them sized properly I started with pieces of thin cardstock (actually the back of old memo pads) and cut them to the correct width. 
Then I used a square to set the angle on the adjoining roof section and drew a line to get the angle correct. This wasn't as complicated as it sounds, but it did take some trial and error. I'm glad I did all this experimenting on the cardboard pieces and not the Evergreen sheets. 
Once I was convinced the roof pieces looked correct, I used them as a pattern to cut out the styrene pieces.
There were a few spots where I had to cut a slot in the styrene to permit the roof panel to fit and allow the gable end of the roof to extend past the vertical wall of the building. See the photo at left. I found it easier to cut the slots slightly too wide (toward the inside, it's important not to not have a gap between the roof and exterior wall. The slight gaps will be hidden by adjacent roof panels or flashing. 
At this point the basic roof panels are in place. The next step is to add the "flashing" to the peaks and valleys using 1x6 strip styrene. Then I'll tackle the most tedious parts of building this style of roof - installing the ribs. 
Once that's done the roof will be ready for painting and weathering. 

Monday, November 18, 2019

"Agricultural Implement & Paint Dealer" - Part 4 - Test fit of Garage Doors and basic assembly

Before assembling the walls, I test fitted the garage doors. For the large windows above the two smaller garage doors I started with a Tichy storefront window casting and added some 1x3 strip to create a frame for the window. I also added a center post between the two upper windows. 
Once I was satisfied with the fit of the garage doors I assembled the four exterior walls.
 
I had some 90 degree corner braces (I think they're from City Classics, but I'm not positive) so I used one in each corner, positioning them so they wouldn't interfere with the windows or roof. 
Next step: the angled front door for the "Paint Store" section of the building. 

Friday, November 15, 2019

"Agricultural Implement & Paint Dealer" - Part 3 - Front wall and Garage Doors

With the attic refinishing project complete (that's a whole other story) I finally had a chance to turn my attention back to the Enosburg Falls implement dealer. 
The first thing I did was adjust the front facade of the building to match the prototype photo I have showing how the large overhead doors were arranged before they were boarded up at some point in the 1990s. (See this photo)
This required cutting one new opening in the front wall and enlarging the opening with the two smaller doors. As I was enlarging the door openings, I made sure to allow enough space for the two windows above each smaller door. 

Before I cut the openings, I tried to find commercial garage door castings that would work. Everything I found in my stash of gas station kits and plastic doors were either too short, too wide, not tall enough, or too tall. Scratchbuilding was the only option. 
I tried two approaches to the garage doors. For the taller single door, I started with a piece of Evergreen .015 clear styrene, cutting it slightly larger than the opening to provide a surface to attach it to the door opening from the inside. Then I added styrene strip for the vertical and horizontal portions of the door. A coat of white paint - being sure not to get any paint on the window "glass" completed that door.
For the two smaller doors I cut a rectangle of .015 styrene wide enough to accommodate both doors and the center post between them. 
Then I cemented the trim strips to the styrene base. The vertical trim was fairly straightforward, the horizontal trim pieces were installed overlength and then trimmed to fit with a fresh razor blade. 

One everything dried, I carefully cut out the door openings and filed them square. After painting, I'll add clear glazing to the windows. 
I can't say I like either of these approaches better than the other - if you needed a door painted a color other than white, I suspect the second approach might be a little easier. 
One thing I do know - it was far easier to scratchbuild these than the two or three evenings I wasted trying to find a ready-made solution. 

Monday, September 16, 2019

Progress on the Implement dealer for Enosburg Falls


I've made some adjustments to the mockup that I showed last week - primarily lowering the overall height of the building since it just didn't "look" right. The sketch is really an outline of the shape of the wall - the doors etc.. are not to scale at all!

I have the rear and side walls completed - here is a mid-progress shot of the street side wall. 

One little detail that I almost failed to notice - the right side of the building (with the clapboard in this photo) is older than the "overhead door" section - and it has narrower clapboards than the section to the left. But I needed to get the two halves to end up with a flush surface. The first attempt was to build it like the prototype - but the series of angles where the two halves of the building join together didn't look right. 
I scrapped that attempt and went with the approach shown here - basically a subwall for the entire facade of the building with the two different sizes of clapboard laminated to it. 


Tuesday, August 20, 2019

"Agricultural Implement & Paint Dealer" - Part 1 - Researching


I need to get started on this since I've committed to doing a clinic on how I research and model prototype specific structures for the Mid Atlantic Railroad Prototype Modelers (MARPM) meet at the end of next month. 
The series of blog posts for this project will not include all the photos/diagrams/etc... from the clinic - think of this as an overview of the project. For a more in-depth description consider attending the MARPM.

While I have some typical New England buildings left over from prior layouts that I will be using on the Richford Branch, I certainly plan to model some signature structures. The first of these is this "Agricultural Implement & Paint" dealer, which still stands in Enosburg Falls, Vermont. 
I've known about this building, with its unusual front corner door, for a number of years. In fact, I first noticed it in an early issue of the CVRHS Ambassador when it appeared in an article on the Richford Branch. 
Sanborn Maps label the structure as Agricultural Implement & Paint." What the name lacks in pizzazz it makes up for specificity. Reviewing the maps over the years show the building was originally L-shaped with peaked roofs. At some point between 1920 (the date of the latest Sanborn Map on the LOC website) and 1960 or so when the Ambassador photo was taken, the building received a flat roofed addition that converted the footprint to a rectangle from an "L."
Some places change radically from year to year or decade to decade, meaning the opportunity to a building from the 19th century standing relatively unchanged is pretty rare for some parts of the country. Luckily for me, rural Vermont is not one of those parts. 
A quick wander around the streets of Enosburg Falls on Google Maps streetview show the building still stands, and is remarkably unchanged. I did screen captures showing all the sides of the building. I've included those below:
This view shows the rear of the building. You can see the original "L" footprint.

 "Trackside" perspective (the building was located directly
alongside the Richford Branch mainline.) The angled front door is 

visible to the left. 

Compare this Google Streetview with the b&w 
photo above to see how little the building has changed. 
Full in the knowledge that I need to come up with a better name for this thing, I thought I had enough information to get started on the model. 
I have two more potential sources of photos/information to check for this structure. 
The first is the history of Enosburg Falls (if you've seen the video layout updates on my YouTube channel you've seen this book). 
I also need to check the Central Vermont Railway in Steam, Volume 3, DVD which features a trip in a van up the Richford Branch to see if this store shows up at any point. It's surprising what shows up in that video - for instance, the only overall photo I've ever found of the Richford plywood plant happens to be in that DVD. 
If anything turns up in either place I'll do a post highlighting what I've found. Otherwise, the next post in this thread will show the approach to site planning and mocking up the building.