
 |
| Sanded tile grout pavement in place. Note the subtle variations in color and texture in the "older" pavement on the left. This was done by "stirring in" small amounts of darker and earth-tone grout when still dry. |
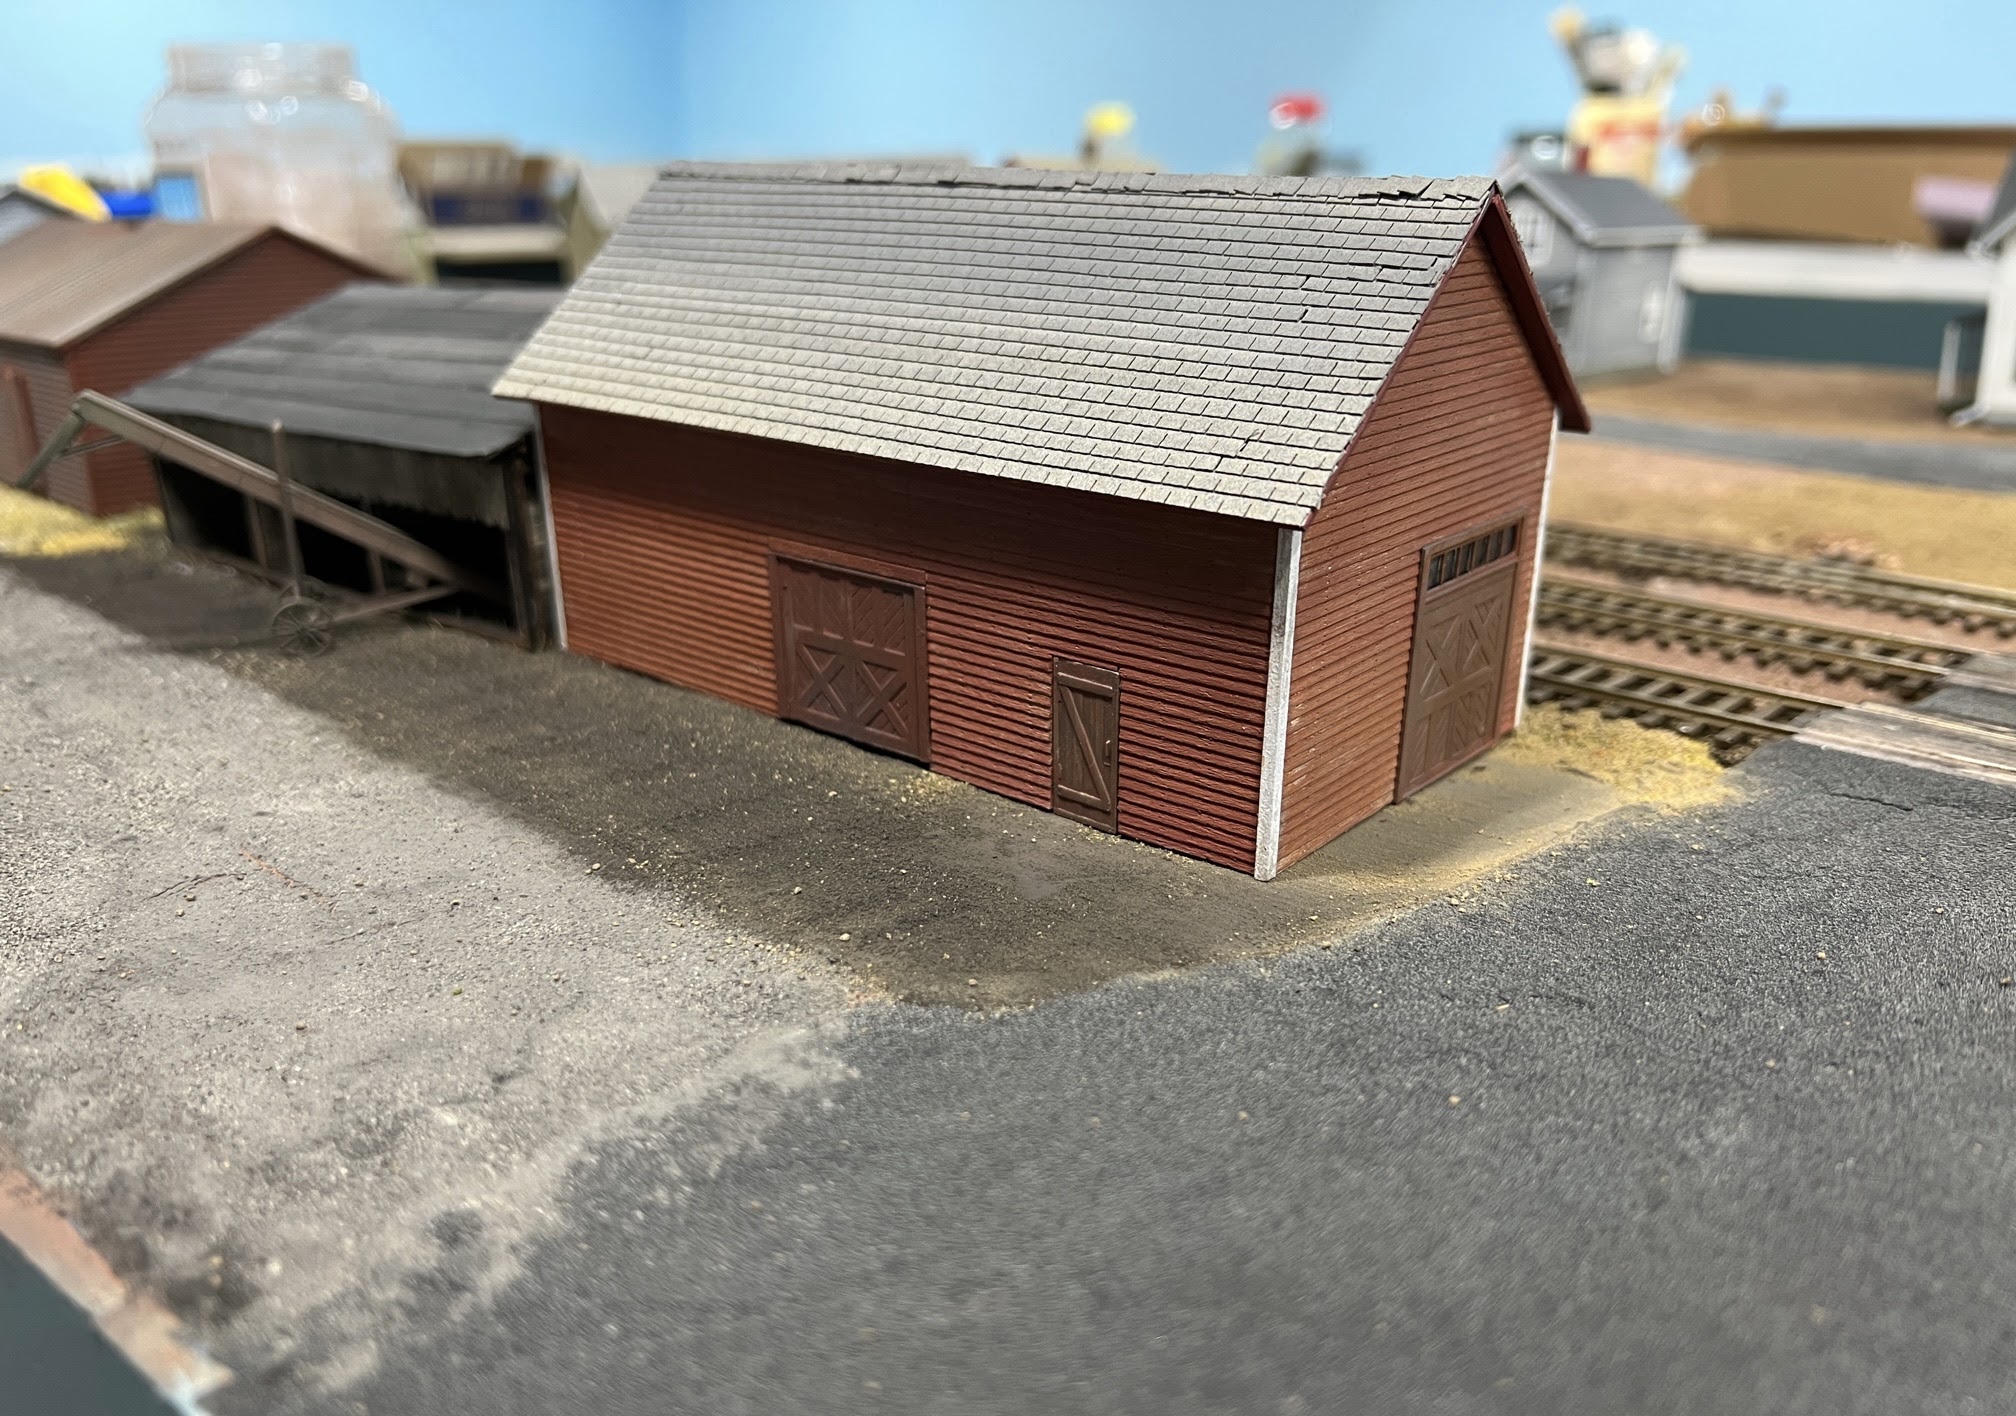
Since I built the basic benchwork going on three years ago, the town of Enosburg Falls, which is right up front when one comes down the stairs into the basement, has remained a partially scenicked, half done repository for stand in structures, surplus rolling stock and an assortment of tools and modeling supplies. And that's on top of the layout!
Getting the underside of the layout looking presentable was step one. The next item on the to-do list was to get the top of the railroad cleared off and at the very least ballast the track and install the roads.
I won't elaborate on ballasting the track. I used pretty standard techniques. One thing I'll add about ballasting - a little ballast goes a LONG way, and too much ballast can reduce a well running layout to an engine stalling, derail inducing, mess. So when you ballast track use about half the ballast you think you need - and be especially careful with it around turnouts!
I've tried all types of methods to make roads in the past. For smooth paved roads I think styrene may make be the best choice. But in this case I was looking to create an older, faded somewhat rough road. I tried Ceramic Stucco texture - which I've used with some success on building foundations - but that stuff is pricey. I also tried AK Interactive asphalt and concrete texture. I found the texture just a little too gritty for HO scale (it's great in larger scales) and if you think the artist medium like the Ceramic Stucco is expensive, just wait until you see the price for a very small tub of the AK stuff!
 |
| Oyster Gray - much lighter than it appeared on the label. |
I went to Home Depot and ended up with two bags of sanded grout - one was a light gray color called Oyster Gray, the other a very dark gray (almost black) called Charcoal.

Since neither color looked right I started combining them together. I worried I'd get a "salt and pepper" effect but frankly the stuff is fine enough that it really blended into a single color.
 |
| About a 70-30 blend of Oyster Gray and Charcoal produced a faded pavement color. |
Applying it is simple. I put masking tape to mark the width of the road and create a sharp transition from paved to unpaved areas. After mixing the grout to the desired color apply it dry to the area of the layout you want to pave. Then use a disposable foam brush to smooth the grout. I noticed the lighter gray grout tended to have clumps - these were easy to break up during the smoothing process.
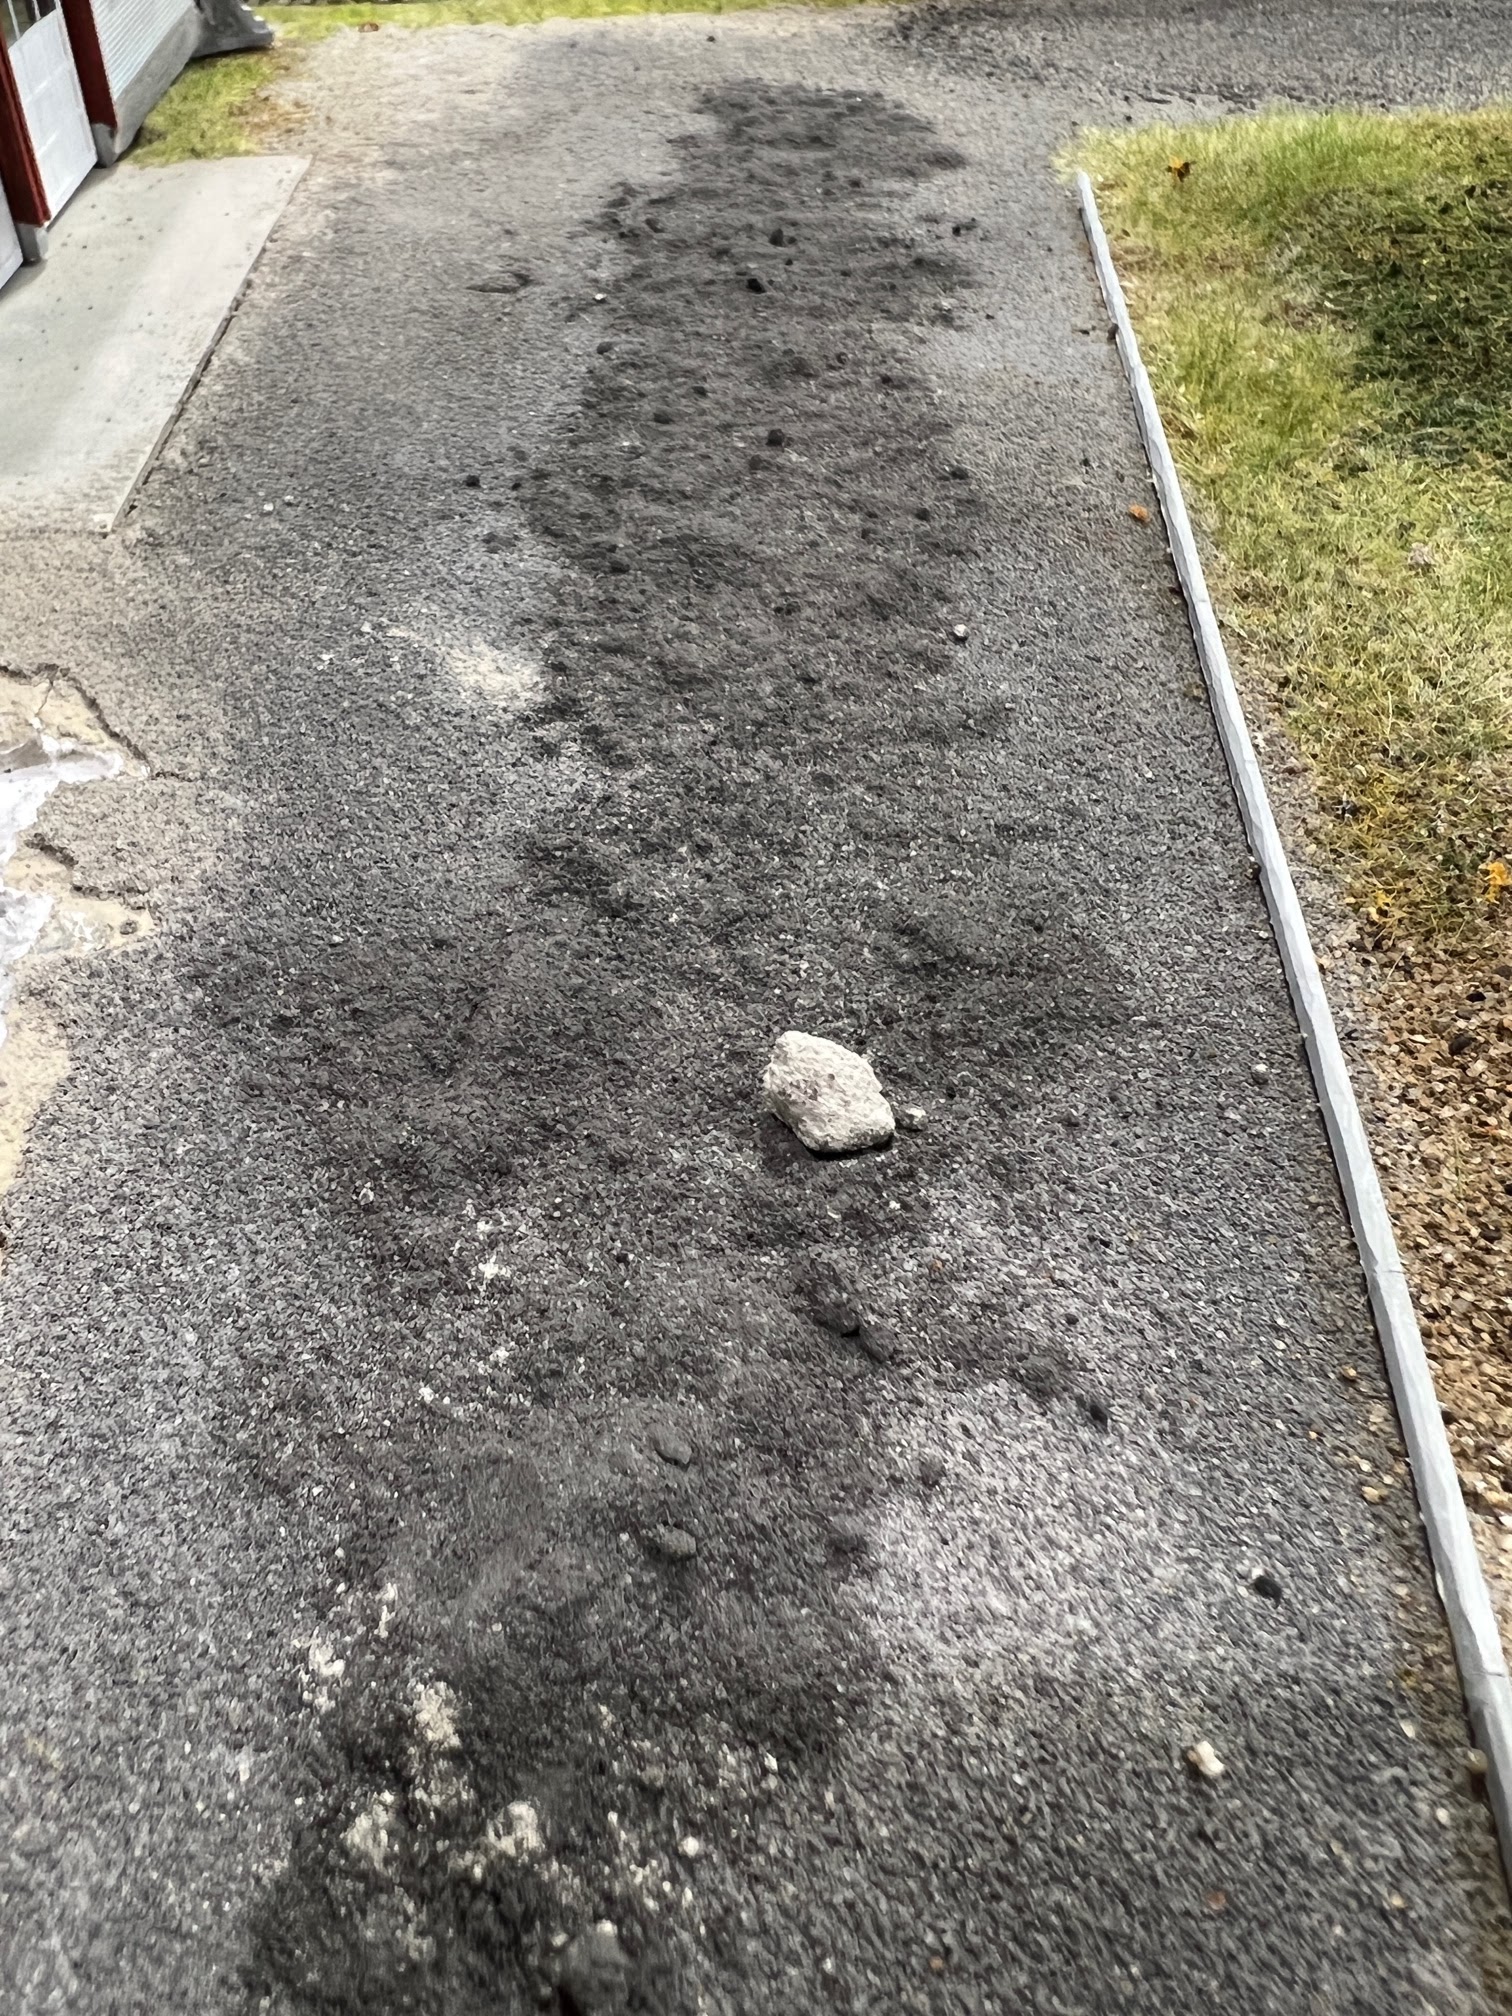
The last step is to secure the pavement in place. For this mist the grout with a mixture of alcohol and water (about 25% alcohol/75% water). Start with a gentle mist to "lock" the grout in place and then completely soak it. The next day it will be rock hard.

 And I've gotten most of the basic landforms in place around Kempinski Curve. It's ready for grass, foliage and some trees.

4 comments:
Thanks for the explanation! I will keep this post handy for the large paving lot/road area on my layout.
Looks great Marty. I have used a similar approach for dirt roads mixing the grout with the very find paving material from Arizona Rock and Mineral. If only I kept the mixture ratio recipe to match the color batch-to-batch!
Marty, would you recommend the grout method for N Scale? Love your stuff by the way. It was your book, Getting started in N scale, way back in 1996 that got me into this.
Glad to hear my book provided some inspiration to at least one modeler!
Yes I think this method would be effective in N scale - one caveat - you need to be especially diligent to really get the surface flat - almost smooth.
I think in the N scale book (might be the second edition?) showed how I used a roll of masking tape asa roller to flatten the Arizona Rock and Mineral material I used for the dirt roads on the project layout.
(Honestly I don't remember if I showed the same technique on the Carolina Central, but I know I used it!)
Post a Comment