Friday, December 30, 2022

Video Update #12

 I recorded and posted a quick video update - and then got distracted by the holidays and forgot to provide a link to the video here! 

At this point I'm sure most everyone who's interested has found this thing, but in case you missed it, here's a link to the video on You Tube:

https://youtu.be/WMBTFFrr-ng

Apparently you can also get directly to my YouTube channel by searching for @cvsne678. 


Enjoy, and Happy New Year! 


Tuesday, December 20, 2022

12th Anniversary of this Blog!

December 17th marked the 12th anniversary of this blog. In keeping with what has become a blog anniversary tradition, here are a few numbers, going back to December 2012*, first month I actually took notice of these statistics! For some reason I didn't do a post last year, so there's no 11th anniversary stats! 

I started this blog to create a diary of sorts that would document the building, rebuilding and operating my home layout. As of today, there's a total of 975,845 unique page views! That's an increase of 163,365 since the 10th anniversary post - roughly 81,700 a year for 2021 and 2022. 

As I noted two years ago, that's not as many new views per year as prior years, but while blog traffic isn't increasing much, it's remained fairly stable. 

Here are the top ten  posts from the past 12 months (you can find these by entering the post title in the search box to the right of your screen):

That's enough looking back - looking forward what do I plan for the coming year? 

First of all, I'm really going to make a concerted effort to upload videos to my YouTube channel on a regular basis. Two things have gotten in the way of video uploads in the past year - first of all I was really focused on getting several aspects of the layout complete. I also wanted to avoid a string of videos (and blog updates for that matter) that featured benchwork shots and nothing else! Secondly, and more importantly, I needed to work through the mechanics of doing decent videos. While my videography is far from perfect, I think have it at a point where it's at least watchable! So look for more videos in the coming year. 

And you can find my channel by searching YouTube for "CVSNE" or simply clicking the link HERE

What's the plan for the layout itself in 2023? 

I'd like to get some additional "open country" scenery completed - that includes finishing the river crossing area. Work is already well along with literally dozens of pieces of Central Valley girders covering my modeling desk! 

The other big planned project for 2023 is to upgrade/update, and complete a myriad of locomotive projects. So look for blog posts (and perhaps videos!) on getting some of those key players out of their boxes and onto the track! 

I'm continually surprised, thrilled, and more than a little humbled at how many people follow (and I hope enjoy!)  my various corners of the model railroad internet. 

In the meantime please accept Christine's and my wishes for a Merry Christmas and Happy and Healthy New Year! 


Monday, November 28, 2022

A quick update

I haven't really posted much on the blog the last five or six weeks - but that doesn't mean things haven't been busy in my model railroading world! 

Three (!!!) open houses from early October until now. 

Before the first open house I managed to get a fair amount of "open country" scenery "completed." Of course, there's always the chance to go back and add more "texture" - but I did convert a fair percentage of the layout from "plywood pacific" to something looking more like rural New England. 

About a week before the first open house I put the brakes on layout work and did nothing but clean off the layout, clean the track, and make sure things looked ship shape. It was really hard not to dive back into messy layout work before the other open houses. It took all my will power but I managed to keep the layout and the layout room looking presentable.

That doesn't mean there was a complete lack of progress. For example, I got the paper mill peninsula track and wiring completed before the second open house.  

Obviously, this building, and/or the benchwork, needs some adjustment!

I even managed to meet with Bernie Kempinski and get the "old mill building" for the paper mill complex cut on his laser. Somehow, we ended up with a structure that's too large to fit the space for it. the main culprit is the single story "wing" on one end of the building. I have a couple of ideas to fix that issue. 

The open houses provided a chance to run trains over the layout for an extended period of time. I'm thrilled to report for the most part everything works well - and we've only got a couple of minor trouble spots that could use some tweaking. 

Completing the rework of the paper mill peninsula means trackwork is basically finished and the next step is to complete ballasting of the track. I didn't want to mess with ballasting between the open houses but I hope to get that done over the course of the holidays. (Ballasting is one of those tasks that's best done in short frequent work sessions - ideal for this time of year!) 

In the next few months I'd also like to (at long last!) get the through truss bridges installed. 


Tuesday, October 18, 2022

MARPM 2022 Open House

The current state of the Richford Branch

Well, the Mid Atlantic Railroad Prototype Modelers (MARPM) meet is in the books. 

And that was but one part of a whirlwind of stuff going on both in "real life" and model railroading over the last month. 

I managed to:

  • Get a fair amount of scenery to "Phase 1" completion on the layout
  • Stic Harris came by the week before the meet to at long last wire up the turntable and get some lighting installed in a couple of buildings. 
  • Clean up the basement and layout (an almost overwhelming task considering the fact that I haven't had any kind of formal layout visits since pre-Covid!
  • Finished up my Getting Real column for Model Railroad Hobbyist
  • And that doesn't even include cleaning the garage, fall yard work, etc...!!!

I had a great time at the meet itself taking in some great clinics, looking at some great models in the display room, and reconnecting with old friends and making new ones. I even managed to run over to the Great Scale Model Train Show at Timonium and purchase a couple of goodies. 

I gave my Building and Researching Prototype Structures clinic on Saturday afternoon. It seemed well attended although I didn't get a head count. 

Once my clinic was completed I headed back home to make final preps for the open house on Sunday. For example, I remembered on the drive home that I had taken every piece of rolling stock off the layout. So I spent 30 minutes Sunday morning setting up a display train... I also needed to finish cleaning the track - and with all the scenery work I'd been doing there was a fair amount of dirt on the rails... 

I'd heard Iain Rice had passed away a week or so before the meet. So it seemed appropriate to have this locomotive on display. 

I didn't take any photos of people looking at the layout - but according to our guest book we had about 15 folks stop by - exceeding my expectations (we are, after all, located more than 70 miles from the hotel where the meet was held!) 

I really enjoyed visiting with everyone who stopped by here and the folks I spoke with at the meet. 

And thanks to Stic Harris for all his help both before and during the open house! 

LaFramboise Implement dealer needs some tractors and other farm equipment to display! 

The next goal is to keep the layout in its current state until after the next open house - scheduled for November 19. 

I'm pleased with how well the cannery fits in this spot (compared with the feed mill). 


Monday, October 3, 2022

More progress on the Curve


Please know that anyone impacted by Hurricane Ian is in our thoughts and prayers. Like just about every place else on the east coast this past weekend was a wash - literally - so I spent some time in the basement. My original goal was to get the track laid on the paper mill peninsula. That requires two custom curved turnouts. The track gods were not smiling on me - so after a completely frustrating several evenings and most of Saturday trying to build the fool things I pitched the bits of rail and nursed my burnt fingertips. Sunday was spent as far away from track laying as possible - adding an additional layer of scenery textures to Kempinski Curve. Nothing particularly unique - I used the same materials and techniques I've shared before. I still need to add a couple of more foreground trees to the left of the boxcar in the shot below:

I'm going to do battle with the track laying dragon again this evening - if success again eludes me I'll advance away from the enemy and regroup after the MARPM open house. 


Monday, September 19, 2022

Planning some foreground trees

See how the building and track look as if they're "floating" in the photo above? They look as if they've been plopped on top of the world and are not really part of it. What can be done to fix this? 

I've become convinced that one of the best ways to truly "set" a scene is to include some scale (or near scale height) trees. I've also found that by placing scale height trees closer to the foreground you can create the same sensation that forced perspective creates. 

I made up the base armatures out of Crepe Myrtle tips (For more detail on how I build up these armatures see THIS POST, or search the archives for "Crepe Myrtle") but haven't yet put the finer branch structure or foliage in place. But I dug those out yesterday and played around with several of them to get identify the best choice for the area around Kempinski Curve. 

I think even with the "basic armatures" you can see how it "blends" the track, and the building to the left, into the scene instead of having them stick out. I'm hoping the finished trees, properly colored with smaller branches and some leaf texture will really set the scene - late fall in New England. 


Wednesday, September 14, 2022

Tile Grout Pavement - Create a Road to Somewhere...

Sanded tile grout pavement in place. Note the subtle variations in color and texture in the "older" pavement on the left. This was done by "stirring in" small amounts of darker and earth-tone grout when still dry.  

Since I built the basic benchwork going on three years ago, the town of Enosburg Falls, which is right up front when one comes down the stairs into the basement, has remained a partially scenicked, half done repository for stand in structures, surplus rolling stock and an assortment of tools and modeling supplies. And that's on top of the layout!

Getting the underside of the layout looking presentable was step one. The next item on the to-do list was to get the top of the railroad cleared off and at the very least ballast the track and install the roads. 

I won't elaborate on ballasting the track. I used pretty standard techniques. One thing I'll add about ballasting - a little ballast goes a LONG way, and too much ballast can reduce a well running layout to an engine stalling, derail inducing, mess. So when you ballast track use about half the ballast you think you need - and be especially careful with it around turnouts! 

I've tried all types of methods to make roads in the past. For smooth paved roads I think styrene may make be the best choice. But in this case I was looking to create an older, faded somewhat rough road. I tried Ceramic Stucco texture - which I've used with some success on building foundations - but that stuff is pricey. I also tried AK Interactive asphalt and concrete texture. I found the texture just a little too gritty for HO scale (it's great in larger scales) and if you think the artist medium like the Ceramic Stucco is expensive, just wait until you see the price for a very small tub of the AK stuff!


Oyster Gray - much lighter
than it appeared on the label.
 
I use tile grout as a base earth texture since it's easy to work with and inexpensive. I use sanded tile grout (for those who don't know, there are two basic types of grout - sanded, and unsanded). The sanded dries with a slightly gritty texture as you may expect. 

I went to Home Depot and ended up with two bags of sanded grout - one was a light gray color called Oyster Gray, the other a very dark gray (almost black) called Charcoal.  

Since neither color looked right I started combining them together. I worried I'd get a "salt and pepper" effect but frankly the stuff is fine enough that it really blended into a single color. 

About a 70-30 blend of Oyster Gray
 and Charcoal produced a faded
pavement color
.
 

Applying it is simple. I put masking tape to mark the width of the road and create a sharp transition from paved to unpaved areas. After mixing the grout to the desired color apply it dry to the area of the layout you want to pave. Then use a disposable foam brush to smooth the grout. I noticed the lighter gray grout tended to have clumps - these were easy to break up during the smoothing process. 

You can introduce subtle changes in the pavement color by manipulating the dry grout with the foam brush. You can also add more dark or light gray grout as desired. I even tossed a small amount of earth toned grout into the mix to warm up the pavement slightly. 

The last step is to secure the pavement in place. For this mist the grout with a mixture of alcohol and water (about 25% alcohol/75% water). Start with a gentle mist to "lock" the grout in place and then completely soak it. The next day it will be rock hard. 

In other news, I also started working in the basic landforms in the Berkshire area. Old magazines make great weights to hold the foam in place as the glue dries! 

And I've gotten most of the basic landforms in place around Kempinski Curve. It's ready for grass, foliage and some trees. 


Friday, September 9, 2022

More updates

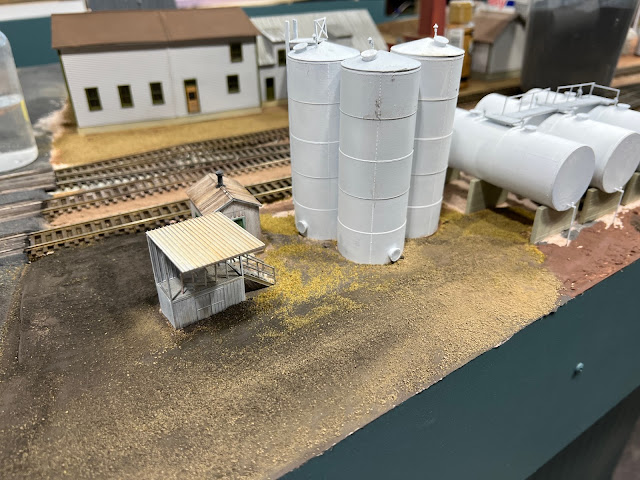
In my update on Enosburg Falls I forgot to include a shot showing the Standard Oil dealer. The basis for this is the old Grandt Line kit - truly one of the most versatile structure kits ever offered in the hobby! The tanks need some additional weathering - I'm thinking a light wash to highlight the seams and perhaps some rust streaks. 

Another area where I did a little "tweaking" was in the East Berkshire area. There was one spot in this rural New England town where the railroad was four tracks across - the main, a double ended siding, and two spurs one in the foreground the other in the background. 

I opted to remove the spur closest to the backdrop, and  I may still remove the foreground one. Photo shows the turnout and spur removed. The gap ion the main track has since been filled!

Next step in this area will be to install the basic landforms in place, but I'm hesitant to hide my modern art painting on the plywood!  


Tuesday, September 6, 2022

Layout Update - Pre Open House Preps and Goodbye to a friend


This is a fairly long blog post. After not doing much of anything model railroading related for a few weeks, there's been a flurry of different activities going on in the layout room this past weekend. Not only do I want to get some of these items off the to-do list for the open house, spending some time in the basement definitely helped take my mind off another, less pleasant aspect of the last two weeks (more on that below). 

Stic came by and we finished up the final benchwork cutting and fitting for the rework of the paper mill peninsula. The recessed area in the foreground will be part of the mill race. We worked through the details of the track arrangement, sticking pretty close to the plan (seen HERE) although I did add another spur that ends at the mill race that I only recently noticed in a few prototype photos. 

The track is (obviously) temporarily positioned in this photo. I'd hoped to avoid hand laying a turnout but frankly the track will flow much better if I do so that's a big item on the to-do list this week. Goal for the MARPM open house is get the track in place, wired, and tested and the fascia installed. 


One easy task was getting a couple more roads paved. I smoothed out my custom blend of gray and dark gray (almost black) sanded tile grout using a foam brush, and soaked it. After it dried overnight it looked like older, faded asphalt pavement - exactly the look I was going for. 

In an old photo of Enosburg Falls there was a garage like building facing Pleasant Street just south of the tracks. There was also a small door at approximately boxcar floor height alongside the track. Somewhere in the past someone told me this was actually a small warehouse for a local lumber dealer. I cobbled up my version of the building in an afternoon. Behind the building, and along the tracks, there was a coal shed. It's shown here with the shed from MineMount Models McGuirk Coal kit. I may end up building a different shed for this spot, but the overall dimensions will be similar. I also cobbled up a coal drop for this lumber/coal dealer using some styrene sheet. 

The other ongoing project, which is going to take a while, is ballasting the track that's in place. I managed to get a lot of the track in Enosburg Falls ballasted yesterday. I'll simply keep the stuff needed to complete ballasting at hand and do a little bit every evening - perfect task for 15-30 minutes a day! 

**********************************************************************

Beauregard (Beau) 2008-2022

Anyone who's come to visit or operate on my layouts, watched my videos, or even followed this blog know about our Basset Hounds - Beauregard and Molly. We adopted them in 2008 when they were just shy of a year old and they've been part of lives - and my model railroading buddies - ever since. 

He lost his sight suddenly last winter but since he was a scent hound he recovered from that quite well - although he could no longer safely go up and down stairs. Then in May he starting suffering from repeated bouts of a canine version of vertigo that he frankly never really got over. This was compounded by other health issues more recently. While he was a real trooper until the end we knew in our hearts he wasn't happy and was simply fighting his best to stay around for us. And that didn't seem fair. Sadly, last week we made the gut wrenching decision to say goodbye to Beau. We miss him terribly and really haven't adjusted to not having him around. 

Every dog owner will tell you they've had one dog that they simply can't forget. And although I love Molly, Beau always was and will always be my "one truly special dog." 

The photo below shows Beau in the alert Basset position. Next to him is a pair of my dad's socks that Beau had liberated from Dad's suitcase. 

As my Dad described him years ago "He's not a dog, he's a clown wearing a dog costume!" 


Thursday, August 18, 2022

Enosburg Falls Condensery


I don't think I'll be able to get an actual model of the Enosburg Falls condensery before the MARPM Open House (before the end of the year is more likely!) but that doesn't mean I don't want to think through what the building might look like. 

Here's a couple of views of the same side of the building (obviously the trackside of the building) from two different eras. 

Obviously the building has seem some changes - I'd like to be able to determine the era these photos were taken - it may help refine what my model for the ~1941 era model should look like. 

The shot with the GTW reefer is the later image of these two. I think the car barely visible to the extreme left is a showing the large "wiggle worm" CV logo of the post-1963 era. 

The two freight cars in the earlier picture should be able to help set a baseline to come up with a range of years for that photo. I suspect it's sometime in the first 30 years of the 20th century but would like to narrow down the date. 

Thursday, August 11, 2022

Wasted Effort


There's a fairly large open spot along the condensary spur between the condensary building and the creamery that seemed ideally suited for something like a coal dealer. And I had a kit squirreled away that I felt would be an ideal fit for this spot. Don't ask where I got it - it's entirely possible it showed up at MR as a review sample - more likely I picked it up at a train show for a price I couldn't resist. (If I paid more than a $1 for it I got ripped off). The "list price" on the thing was $75.00!! 

I thought with relatively few parts this would relatively quick project - something to fill the open area between those two buildings until I could devote the time to a more detailed Finescale Miniatures coal bin kit I have for this spot. 

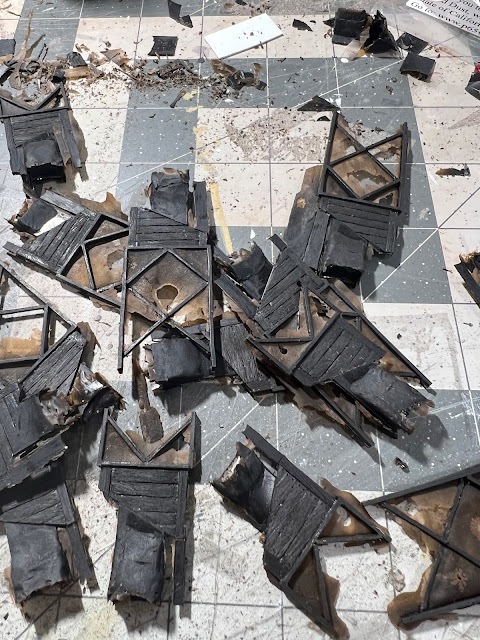
Saturday evening I dug out the kit. It's a resin kit. The large pieces, such as the boards on the sides and ends of the bin, are actually nicely detailed. So I pulled the various pieces out of the box and arranged them on the table. 

Step one in the instructions went on about "Some flash may be present" and "to carefully trim away" any flash.  Here's what "some flash" looks like:


And it didn't help that this wasn't some more modern flexible resin - this stuff was like the old Westerfield "glass" resin - only much thicker with huge gates that were larger than some of the parts!  And in many cases it was difficult to discern the line between "part" and "flash." I should have surrendered right then and there but I persisted and spent most of Sunday afternoon (it was too hot and muggy to do anything outside) clearing the flash. Frankly I thought things were looking pretty good. 

What's not evident in the photos was how the parts were warped and twisted. I tried my normal assortment of tricks to straighten and align the resin parts. This usually resulted in the brittle, hard resin breaking and shattering. But I pressed on. 

I started trying to attach the leg assemblies to the bin walls and managed to break the taller leg section in a couple of spots. Frankly that helped since gluing the pieces back together got rid of more of the warps and twists.  Then I noticed the leg assembly was considerably longer than the bin - and shorter than the other leg sections - so even without the warp the thing simply wasn't going to ever fit right. 

I decided to let the model sit for a couple of days - sometimes stepping away from a project helps solve whatever problems you're having. 

Not in this case. 

So last night I came to the conclusion that I'd wasted an entire afternoon and a couple of evenings of modeling time on this thing that would never produce a satisfying result. 

So I cut my losses and did what I should have done as soon as I removed the pieces from the box - I pitched the thing. Guess I know why this company never did a second kit ... 


Sunday, July 31, 2022

Below layout paneling

While it still needs some corner trim and perhaps base molding, the paneling directs the eye upwards at the layout. 

 I mentioned in my last post that I was on the docket for the MARPM meet layout tour. Although I've had the occasional visitor in the last couple of years, the last time I had an open house of any type was the first weekend of March 2020 - literally days before the Covid lockdowns started! 

I took a few minutes to look over my blog posts from March 2020 through the late summer. (As an aside, being able to record my progress - or lack thereof - is one of the main reasons I maintain this blog!). And while the alcove "Curve" scene is obviously much further along than it was then some areas of the layout have remained remarkably stagnant. So a couple of weeks ago I walked around the basement and made a list of things to do before the open house. I divided it into two parts - "Need to finish" and "Nice to finish". Almost top of the list on the former was "Do something about shelves under layout."

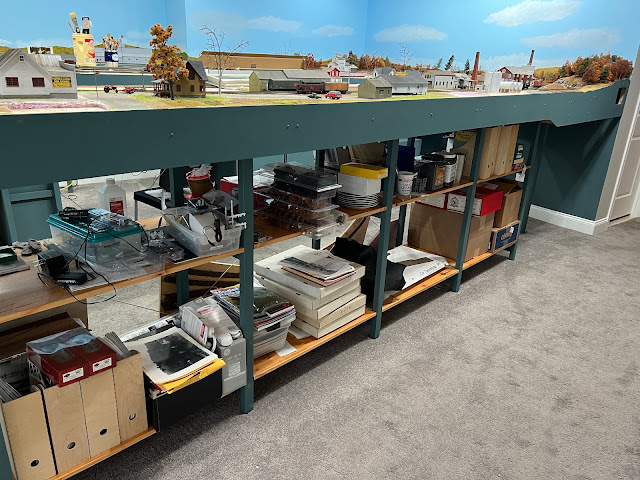
I don't know about you, but I've been to plenty of open houses over the years where people spent more time looking at and commenting on all the stuff under the layout than the railroad itself! We had a couple of neighbors downstairs a few weeks ago and while they didn't comment on the stuff under the railroad they certainly noticed it. Messy shelves with stuff stacked on them never looks neat or orderly - no matter what we tell ourselves.  

I intended to use the Ivar shelves in the "entry area" of the layout to display railroadiana and perhaps models that I've built or acquired over the years that don't really fit my New England branchline theme. But in the last few years that really hasn't panned out. I tell anyone who listens that the shelves aren't really at an ideal height for displaying or viewing anything. 

The "before" view in all its glory. 

But in reality those shelves have become the semi-permanent homes of a variety of jetsom and flotsam ranging from the boxes from half completed structures to old magazines and empty freight car boxes. 

So last weekend I bought a couple of sheets of beadboard paneling, painted them my fascia color and installed them on the "display" side of the shelves. At least that will eliminate the distraction when you first enter the layout area. My ultimate goal is to have nothing under the layout at all. For now, the "operating aisle" side of the shelves are open and usable for storage. Of course all the stuff that was on the shelves in now stacked on the other side of the basement - but dealing with that is the next project! 


Monday, July 18, 2022

MARPM Open House - October 16, 2022

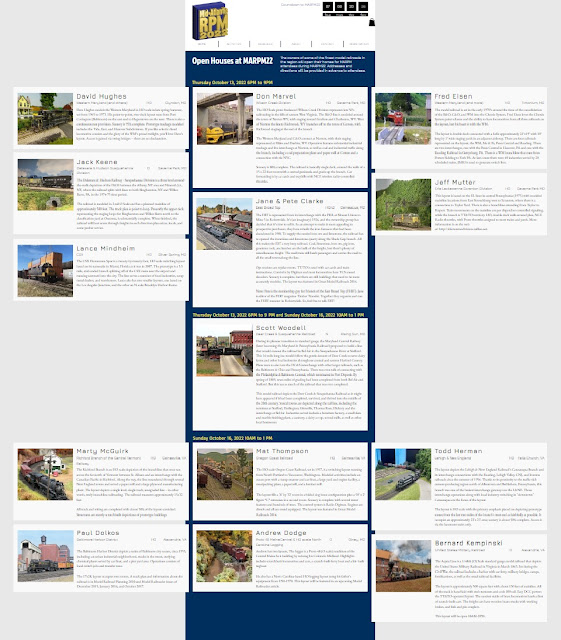
The Mid-Atlantic Railroad Prototype Modelers (MARPM) has posted the official line up of layout open houses. You'll note that somehow I've managed to get the Richford Branch included amongst a lineup of truly stunning and spectacular model railroad layouts in our area. 

The layouts in the northern Virginia area are open (mostly) on Sunday, October 16. 

In preparation for the open house I've made a list of things I need to complete as well as a list of things I'd like to complete. I may post the list here with some thoughts on preparing for an open house.  But even if I don't if you're planning to attend MARPM and are in the area please feel free to stop by and inspect progress (or lack thereof!). 


Monday, July 11, 2022

McGuirk Coal - A new kit named after ....


Mine Mount Models has released a very typical small town coal dealer. This isn't a fancy "bunker" dealer (like several Finescale Miniatures kits featuring tall wooden bins with hoist mechanisms). Those Finescale coal dealer kits are really cool, and frankly some of the most prototypically accurate kits in the FSM line, but they are big facilities, like those you would have seen in a big city in the steam era through the early diesel era. 

Mine Mount Models new kit (named McGuirk Coal, since I suggested it to Mine Mount Models President Ron Klaiss!!) represents a much more typical smaller dealer with a low shed-like coal bunker. And while I'm honored he named the kit after our family, even if he didn't I'd still be suggesting you find room for at least one (or more!) of these in your steam era or early diesel era town. You could even model it abandoned and forlorn in later years! 

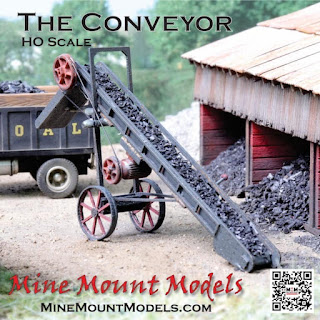
Ron is also offering a coal conveyor (actually it could be used for any bulk material such as stone or gravel). While Walthers makes a decent plastic coal conveyor this one is a noticeably different style, and is far more detailed than the Walthers one. 

You can buy either McGuirk Coal and the conveyor separately, or you can combine them (which I did) and save a few sheckles. 

You can order McGuirk Coal from this link: https://minemountmodels.com/shop/ols/products/mcguirk-coal-ho-scale or simply click HERE

Friday, July 8, 2022

Realigning the Sheldon Springs Mill

The paper mill complex at Sheldon Springs has always a key element of my Richford Branch. I built the benchwork and installed the track and got it working "fairly well." While the track in the mill yard itself functioned fine, the curve into the mill peninsula from the mainline didn't like steam locomotives. It was simply too sharp, or had a weird kink, or the curved turnout I incorporated as part of the curve was just a little out of whack. 

My trackwork nemesis....this turnout and that curve
I reworked that turnout twice, replaced it once, and tried re-aligning the curve. But nothing helped. I actually considered removing the paper mill peninsula altogether - and even extending the Richford yard peninsula to fill that space. Such plans were greeted with much groaning and subdued laughter. After all, the prime directive of this layout is to stay with the theme - ignoring all those great "what if..." ideas that constantly derailed progress on my previous layout. 

But something had to be done with the paper mill. 

The first issue I identified is that the track arrangement had gotten too complex and crowded. I won't really take a lot of blame for that - over the last few years I've come up with some more information on the complex that I didn't have a few years back. 

But although there are still some questions remaining about the purpose of some of the buildings (like exactly what is that "bunker" in the lower right hand edge of the overall shot of the complex for? And when did it disappear?)


I do have a pretty good feel for how the pieces of the puzzle fit together, and I'm fairly confident I know what the track arrangement should be. 

And of course comparing this newfound knowledge to the original track arrangement revealed a "close but no cigar" situation. Sure, I could freelance some buildings to fit the track arrangement as it was, but would I ever really be satisfied with that - especially when I'd turned up information on the real thing? 

Besides, reworking to reflect the prototype would give me a chance to really fix the operational issues with the lead into the mill. And it would reduce the amount of track and turnouts on the peninsula - I've come to the realization that the less track, the better. In fact I'm eyeing another spur (elsewhere on the layout) for possible removal.... 

The drawing shown here, which Bernie Kempinski did based on some of my sketches, shows the basic approach (although some of the specific structure footprints and track arrangements may change or evolve as the scene is constructed).  

The first step was to build a new, curved turnout for the lead into the paper mill. This replaced the original straight no. 6.

Once the turnout was finished and tested I removed the track and plywood subroadbed from the peninsula. I'll remove the fascia panels next - actually I might be able to swap the taller and lower fascia panels. But I ordered a couple of pieces of bendy board from Rockler just in case. 

While I'd love to have this scene basically looking complete in time for the open house scheduled as part of MARPM in October, I may not meet that goal. There are several other projects I want to get finished up - such as the background forest areas in a couple of other spots on the layout, and ballasting Enosburg Falls and Richford, that may be a better use of time between now and the open house. 

But on the other hand my layout progress has been somewhat paltry over the last year ... the MARPM open house (and our annual Holiday open house, which we'll be hosting this year after a couple of year hiatus, may be just that gust of wind I need to get a bunch of stuff done. 


http://centralvermontrailway.blogspot.com/search?q=Sheldon+Springs