Thursday, February 27, 2014

Does dividing the peninsula make a layout seem larger?

I follow the USA & Canadian Railway RMWeb forum since I think getting a British perspective on American railroads and modeling is kind of interesting. (I first found RMWeb looking for information on Irish narrow gauge railways since I have a long-standing interest in those lines). One of the regular posters on the USA & Canadian forums is an N scaler "Barry Ten" who is building a very nice layout (see this thread) reflecting the railroads of the Southeastern US.
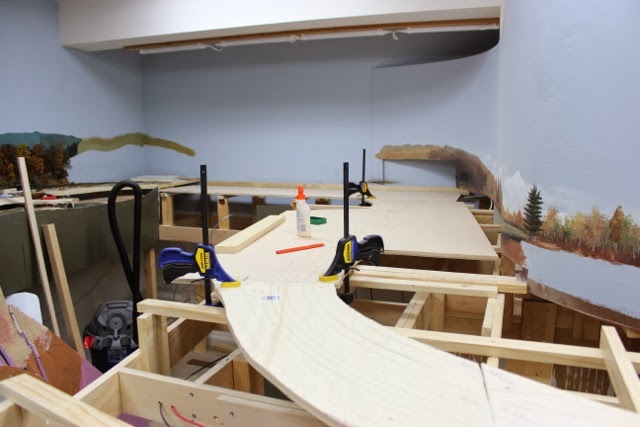
The footprint of the layout is similar to many we have on this side of the pond (as the Brits would say) - around the walls with a peninsula jutting into the center of the room. Or at least it will have a peninsula jutting into the center of the room once he finishes building it.
The other day he posted the following regarding whether or not to include a "backscene"  - what we'd call a "backdrop." Hey, I might not be able to translate a lick of Russian anymore, but I can handle translating English!
Here's Barry's post:
"I considered a backscene, but reckoned it would make the room feel a bit too cramped as it would effectively block my view of one half of the room from the other. My plan is to have a high ridge down the middle of the peninsula instead, but not as high as a backscene would have done..."
When I read this over my morning coffee this morning I immediately remembered having the same concerns with my layout in Colorado. On that layout I'd originally built the peninsula without a center divider,  (even though we'd used them pretty consistently on several MR project layouts as then managing editor Jim Kelly was a big fan of them!) I planned to rely instead on a ridge to divide one side of the peninsula from the other as I'd done on the N scale Carolina Central. Here's what the layout looked like - sorry if these images aren't up to snuff, they're fairly small pics and I no longer have the original larger files:

 I toyed with the idea of adding a peninsula, but, like Berry, was unsure if it would make the room seem even smaller than it was. In an effort to see what it might look like I used my completely mediocre Photoshop skills to add a "sky" backdrop, as well as some of the planned buildings to the scene. The result is shown below.
I'll leave it to the reader to decide if this makes the room larger. I will say I added the backdrop to the layout and was happy I did.


Wednesday, February 19, 2014

Progress in Randolph


Making progress on the subroadbed for the Randolph area. At this point, the new 1 x 4 grid benchwork is completed and the plywood subroadbed has been installed on the north end of Randolph. Station will be located where the bottle of yellow glue is sitting in the top photo. Still need to jigsaw the plywood and install risers for the south end of Randolph. My goal for this week is to get the cork roadbed in place and perhaps get a start on the track and wiring.

Tuesday, February 11, 2014

Steam Locomotive Colors

George Dimond, courtesy Central Vermont Railway Historical Society
 For many years model railroaders were told to paint steam locomotives "Grimy Black" - which is basically a flat, dark gray.  In addition, model railroaders started weathering steam locomotives to appear so old, dingy, and poorly maintained that they looked like they were on the verge of falling apart. 
Supposedly this made the models look better in the low light levels typical of most model railroads - and all that weathering supposedly made the details "stand out." Really, it was another example of the extreme weathering - to the point of caricature - that gripped the hobby in the 1950s and still hasn't let up in some quarters. 

Studying prototype pictures, at least of the Central Vermont, shows the shop and road crews took great pride in their iron steeds, and the locomotives showed a hard-working, but well maintained appearance even in the last few years of steam. 

This shot shows 2-10-4 no. 707 arriving in White River Junction in September 1953. By this point she's the last of her class in service and would soon be relegated to standby duties out of White River Jct. She may be dusty and soot covered in this photo, and appears to have been working hard out of the road, but she's most definitely not gray. 
An even better example is the lead image of 4-8-2 no. 600 being readied for another run at the White River engine terminal. In March, 1954 she's not only not gray or "Grimy Black," she's shiny!
The lesson here is to feel free to paint your steamers black, and to take it easy on the weathering. 
If you find there's not enough light in the layout room then consider adding more lighting to your layout instead of lightening your locomotives. 


Monday, February 10, 2014

Electronic editions - N Scale Railroading and Locomotive Servicing books

 
Kalmbach has just released electronic versions of a number of their popular model railroading book titles, including the two books I currently have in print - N Scale Railroading, Getting Started in the Hobby (2nd Edition) and Model Railroader's Guide to Locomotive Servicing Terminals.
These are offered at a considerable discount compared to the cover price of the print editions, something I think is smart but not something every book publisher offers.
Here's the web page with the various books shown, including, ahem, mine....

Saturday, February 1, 2014

Laying out Randolph

Laying out the Randolph track arrangement. In this photo, the under construction Waterbury station is serving as a stand in for Randolph. 
Been working on converting the prototype track arrangement at Randolph onto the layout. I'm doing this "full size" using actual track components, or xerox copies, and cut outs of buildings. I pinned a large piece of plain white poster paper to the layout surface so I could sketch out ideas, and make changes. Eventually that piece of paper will serve as the template for cutting out the sub roadbed. 
A key signature scene for Randolph is in this aerial view. I think I can take liberties with the prototype (such as bending the track the "wrong way," curving tangent track etc…..) as long as I get this "downtown" scene fairly accurate. 

Aerial view of the depot area in Randolph. The station is in the upper right hand corner, which means this photo is oriented with my backdrop side on the bottom and fascia side on top. Randolph Coal and Ice (lower left) and the firehouse (with the peaked-roof tower) are also signature structures for this scene.