Showing posts with label Benchwork. Show all posts

Wednesday, August 16, 2023

New Addition to the Layout - Part IV : Back on its own two (four) feet...


The stars aligned last Saturday and Stic and I were both in town and had some free time to raise the Charlton section of the "Northern SNE" from the spot on the basement floor where it has sat unceremoniously since the day we unloaded it from the truck. One lesson I'd learned from previously layouts is to paint the legs BEFORE installing them - especially when the layout room is carpeted like mine. So earlier in the week I dug out the fascia paint and painted the four legs for the Charlton section. And while the paint and rollers were out I painted the fascia panels on the paper mill peninsula. 

I'd thought about trying to install the legs on the Charlton section myself - if for no other reason than I was getting sick of seeing this thing on the floor. As an aside - is there anything sadder looking in the hobby besides a chopped up layout viewed out of context? But I waited until I could get some help since (1) It didn't seem like a one person job - in actuality it turned out to be a three person job; and (2) Like most model railroads this thing is heavy, awkward, and delicate. A bad combination when the desire is to avoid as much damage as possible! 

Stic arrived nice and early and after we got ourselves a game plan the first step was to cut out the pieces of the layout section that we knew we wouldn't be using. This included a real hodgepodge of wood on one end that connected to the rest of Jason's layout. There was also some track that had popped from the ties in the process of moving, and a turnout and associated siding that simply would not make any sense in the context of the new arrangement. Those all went into the scrap bucket. When we took the layout out of Jason's basement we cut away more of the river than I knew I could use - I reasoned it would be easier to cut away more of the river than leave it short and be forced to splice more water onto the river. So out came the jigsaw and more water went away. 

Frankly at this point I was doubting even trying to incorporate this into the railroad. We went to lunch, which, for the record, is our favorite part of any work session! 

After using my handy laser level (if you don't have a laser level, get one!) to determine the height the new legs would need to be we got the 2x2 legs cut to length, including two spacers for each. My wife lent a hand as we lifted the section up, slid the sawhorses out from under the layout, clamped the first leg section in place, made sure it was level and screwed the legs into the L girders. 

Actually the first pair of legs went in and were leveled and installed quickly. The second set of legs took a lot longer to get lined up and leveled for whatever reason, but by the end of the day the Charlton section was up on its new legs. 

My task for this week is to get the wall behind the Charlton section painted the match the rest of the layout (sky blue above the benchwork, Riverway below). I've already removed the fascia "extension" in the junction corner of the existing layout and patched and sanded the screw holes. 

Jason had this layout section situated as a narrow peninsula - I plan to place one side against the wall since I think it will fit the space better. I do plan to make the scene a little wider (something like 6-10" or so) where the long side of the section connects to the wall. That way the track won't be 3/4" from the wall - there'll be some space for a transition from the modeled area to the backdrop. 

Another issue we noticed as we worked this weekend was the wiring - there's a LOT of wiring under this one layout section! Not surprising since Jason's layout was originally wired for block control. I know he had NCE for the last couple of decades - and I know the wiring worked with NCE, but frankly I'm tempted to take out everything but the feeders (and the wires to the powered frogs on the turnouts) and essentially rewire the section using my color coding and standard process. 

Sunday, July 31, 2022

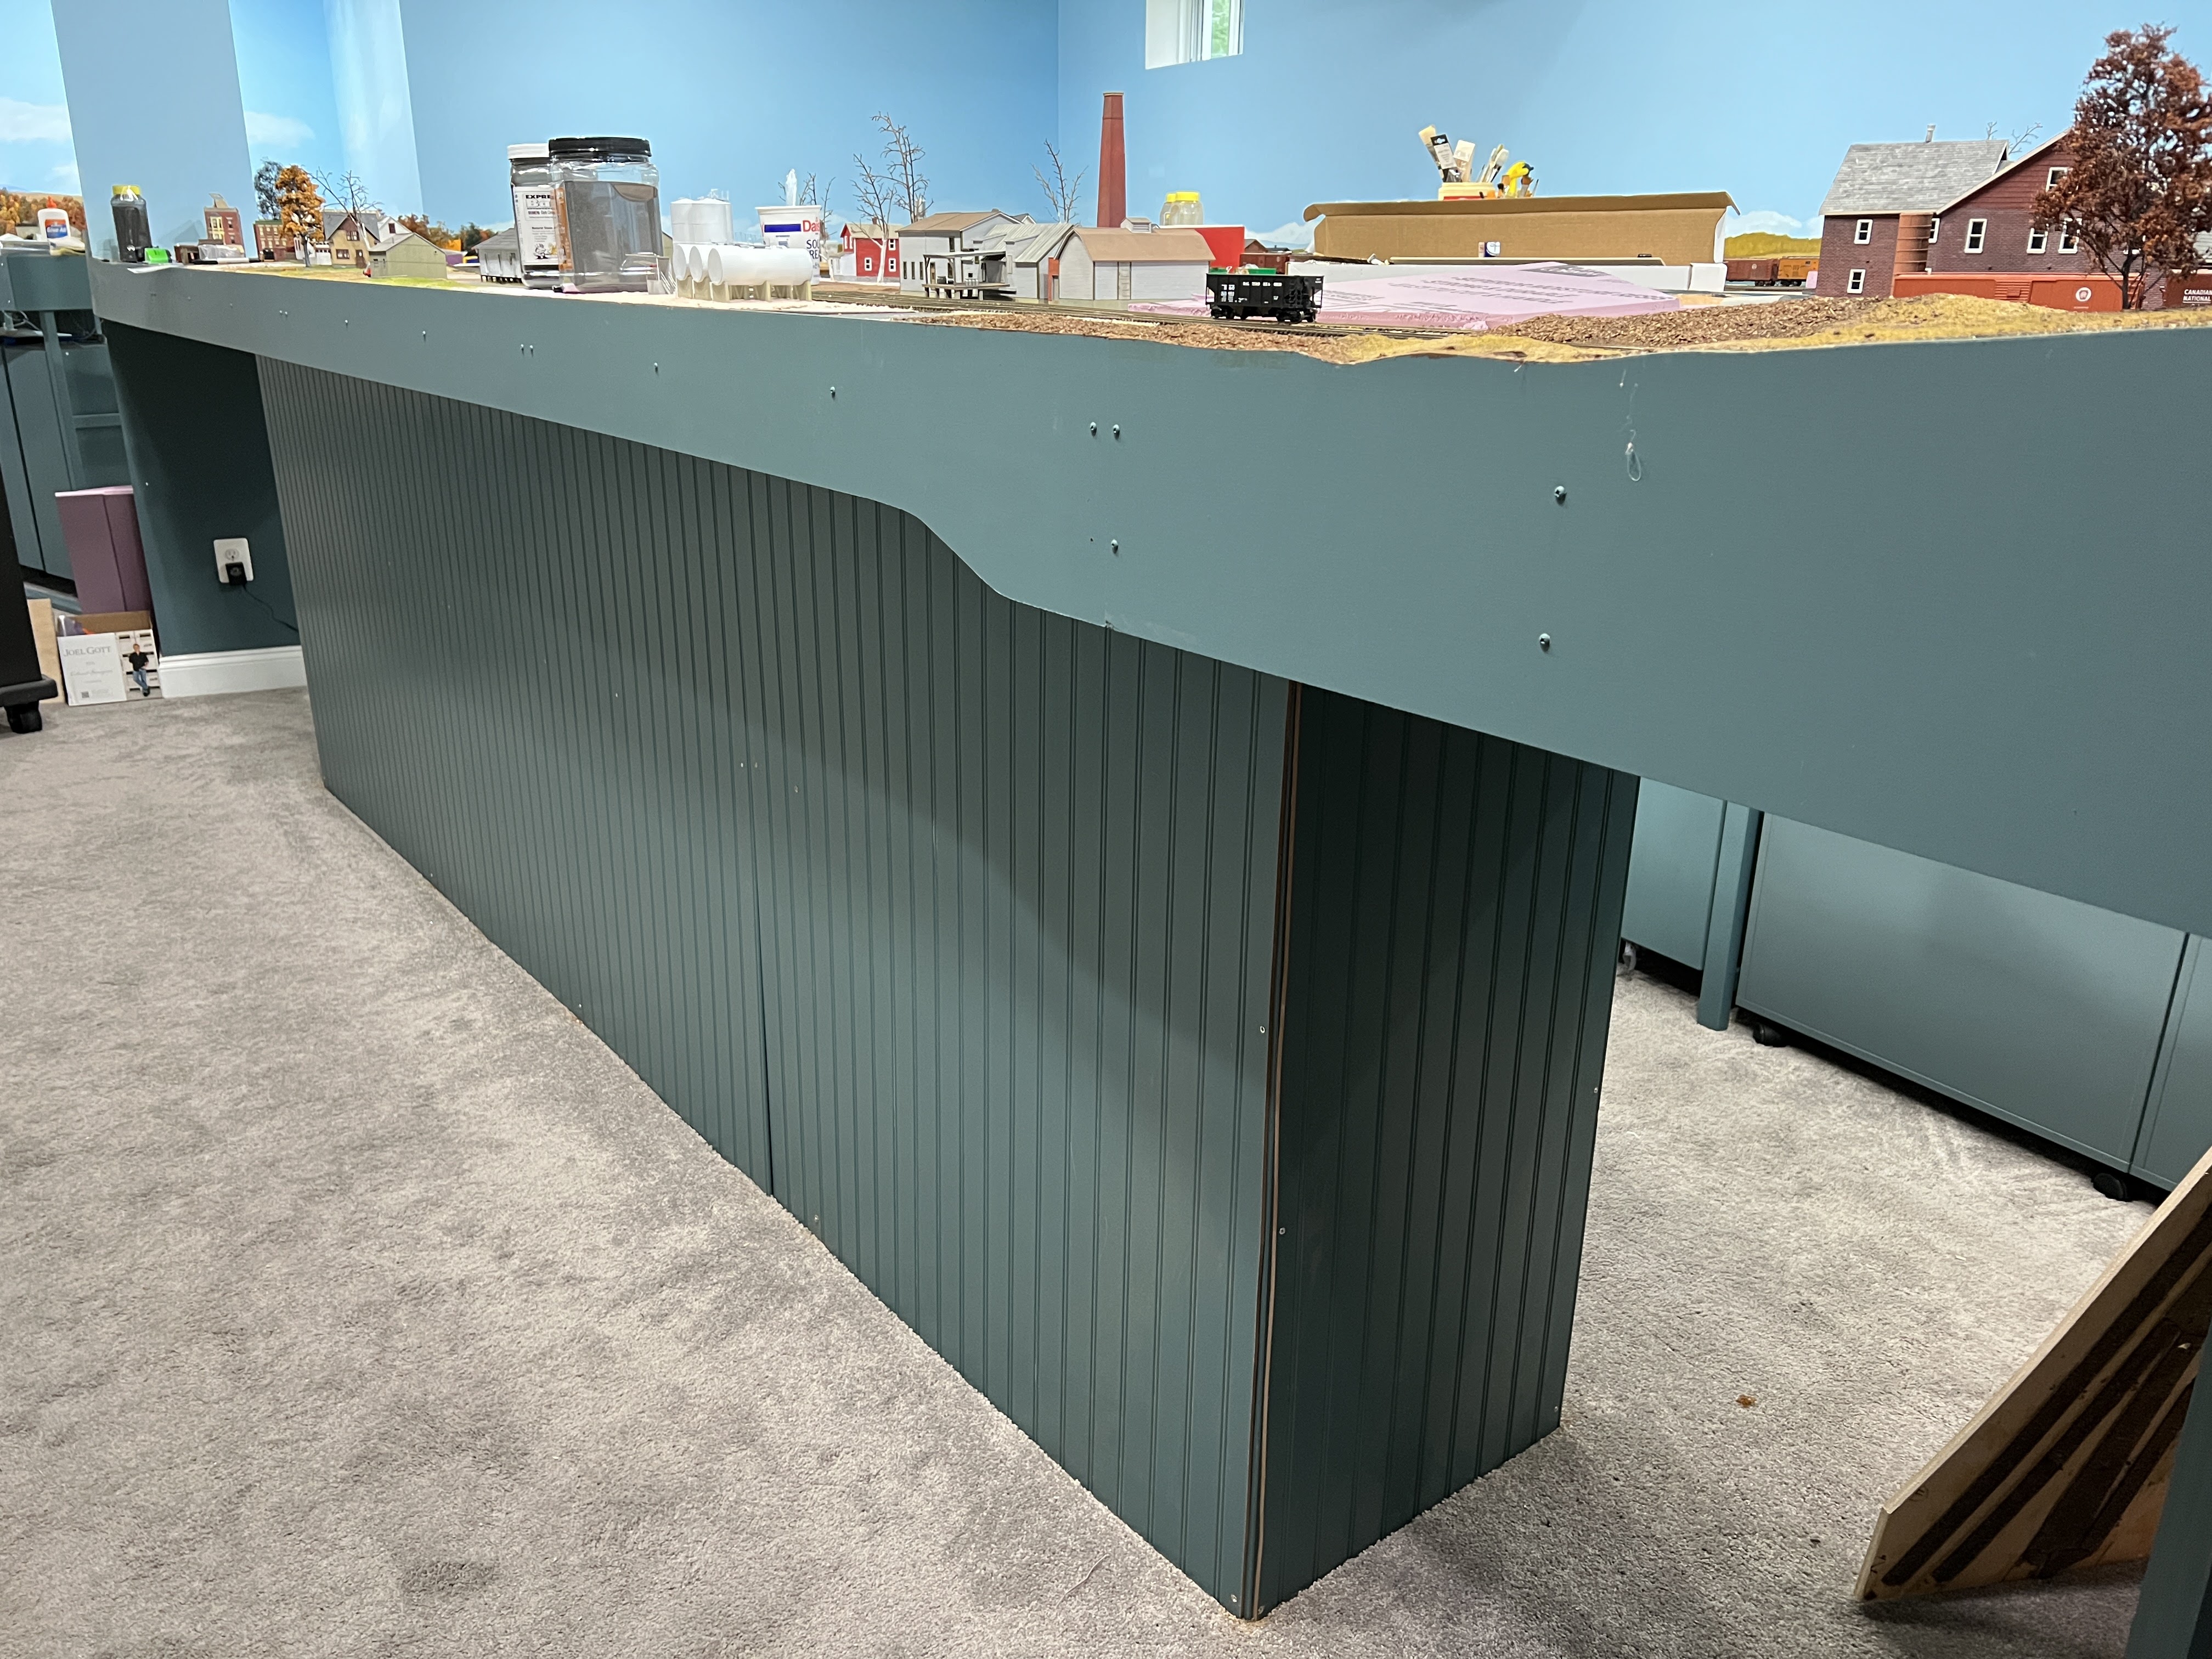
Below layout paneling

While it still needs some corner trim and perhaps base molding, the paneling directs the eye upwards at the layout. 

 I mentioned in my last post that I was on the docket for the MARPM meet layout tour. Although I've had the occasional visitor in the last couple of years, the last time I had an open house of any type was the first weekend of March 2020 - literally days before the Covid lockdowns started! 

I took a few minutes to look over my blog posts from March 2020 through the late summer. (As an aside, being able to record my progress - or lack thereof - is one of the main reasons I maintain this blog!). And while the alcove "Curve" scene is obviously much further along than it was then some areas of the layout have remained remarkably stagnant. So a couple of weeks ago I walked around the basement and made a list of things to do before the open house. I divided it into two parts - "Need to finish" and "Nice to finish". Almost top of the list on the former was "Do something about shelves under layout."

I don't know about you, but I've been to plenty of open houses over the years where people spent more time looking at and commenting on all the stuff under the layout than the railroad itself! We had a couple of neighbors downstairs a few weeks ago and while they didn't comment on the stuff under the railroad they certainly noticed it. Messy shelves with stuff stacked on them never looks neat or orderly - no matter what we tell ourselves.  

I intended to use the Ivar shelves in the "entry area" of the layout to display railroadiana and perhaps models that I've built or acquired over the years that don't really fit my New England branchline theme. But in the last few years that really hasn't panned out. I tell anyone who listens that the shelves aren't really at an ideal height for displaying or viewing anything. 

The "before" view in all its glory. 

But in reality those shelves have become the semi-permanent homes of a variety of jetsom and flotsam ranging from the boxes from half completed structures to old magazines and empty freight car boxes. 

So last weekend I bought a couple of sheets of beadboard paneling, painted them my fascia color and installed them on the "display" side of the shelves. At least that will eliminate the distraction when you first enter the layout area. My ultimate goal is to have nothing under the layout at all. For now, the "operating aisle" side of the shelves are open and usable for storage. Of course all the stuff that was on the shelves in now stacked on the other side of the basement - but dealing with that is the next project! 


Friday, July 8, 2022

Realigning the Sheldon Springs Mill

The paper mill complex at Sheldon Springs has always a key element of my Richford Branch. I built the benchwork and installed the track and got it working "fairly well." While the track in the mill yard itself functioned fine, the curve into the mill peninsula from the mainline didn't like steam locomotives. It was simply too sharp, or had a weird kink, or the curved turnout I incorporated as part of the curve was just a little out of whack. 

My trackwork nemesis....this turnout and that curve
I reworked that turnout twice, replaced it once, and tried re-aligning the curve. But nothing helped. I actually considered removing the paper mill peninsula altogether - and even extending the Richford yard peninsula to fill that space. Such plans were greeted with much groaning and subdued laughter. After all, the prime directive of this layout is to stay with the theme - ignoring all those great "what if..." ideas that constantly derailed progress on my previous layout. 

But something had to be done with the paper mill. 

The first issue I identified is that the track arrangement had gotten too complex and crowded. I won't really take a lot of blame for that - over the last few years I've come up with some more information on the complex that I didn't have a few years back. 

But although there are still some questions remaining about the purpose of some of the buildings (like exactly what is that "bunker" in the lower right hand edge of the overall shot of the complex for? And when did it disappear?)


I do have a pretty good feel for how the pieces of the puzzle fit together, and I'm fairly confident I know what the track arrangement should be. 

And of course comparing this newfound knowledge to the original track arrangement revealed a "close but no cigar" situation. Sure, I could freelance some buildings to fit the track arrangement as it was, but would I ever really be satisfied with that - especially when I'd turned up information on the real thing? 

Besides, reworking to reflect the prototype would give me a chance to really fix the operational issues with the lead into the mill. And it would reduce the amount of track and turnouts on the peninsula - I've come to the realization that the less track, the better. In fact I'm eyeing another spur (elsewhere on the layout) for possible removal.... 

The drawing shown here, which Bernie Kempinski did based on some of my sketches, shows the basic approach (although some of the specific structure footprints and track arrangements may change or evolve as the scene is constructed).  

The first step was to build a new, curved turnout for the lead into the paper mill. This replaced the original straight no. 6.

Once the turnout was finished and tested I removed the track and plywood subroadbed from the peninsula. I'll remove the fascia panels next - actually I might be able to swap the taller and lower fascia panels. But I ordered a couple of pieces of bendy board from Rockler just in case. 

While I'd love to have this scene basically looking complete in time for the open house scheduled as part of MARPM in October, I may not meet that goal. There are several other projects I want to get finished up - such as the background forest areas in a couple of other spots on the layout, and ballasting Enosburg Falls and Richford, that may be a better use of time between now and the open house. 

But on the other hand my layout progress has been somewhat paltry over the last year ... the MARPM open house (and our annual Holiday open house, which we'll be hosting this year after a couple of year hiatus, may be just that gust of wind I need to get a bunch of stuff done. 


http://centralvermontrailway.blogspot.com/search?q=Sheldon+Springs

Friday, October 18, 2019

Swing Gate v1.0

If you looked at Video Update #6 you saw a live demonstration of the swing gate. Actually, the gate in the video wasn't quite complete - so in the interest of full disclosure here are some photos showing that it is indeed more than just a "piece of plywood and a couple of hinges..."
The underside of the plywood "bridge" is braced along most of its length by a plywood brace. Note how the brace gets thinner as it gets further from the hinges - an attempt to minimize sag and at the same time minimize the pressure on the hinges!
That plywood brace is itself strengthened by a couple of pieces of 1 x 2 arranged in an "L".

The hinge end with the bridge in the open position shows the hinge arrangement - nothing fancy here, I told Stic to just be sure everything was really sturdy! I think there's two boxes of screws holding this thing together!
This shot shows the swing gate in its fully open position - it opens up enough to touch the fascia on the layout. 
Next trick is to figure out how to get the track in place. Stic tells me that's my problem. 
Thanks to Stic Harris for his help with this project, and with all the various thankless tasks I always seem to assign him! 
Today also happens to be his 50th birthday. He's taking a well-earned respite from model railroading to enjoy coastal Maine with his lovely wife. And he's officially joined the ranks of those us who complain we're too stiff, sore, or otherwise impaired to work on top of or under our layouts!


Friday, October 11, 2019

Just about reached the end ...

I've started to experiment with photo backdrops. Yes, I plan to trim it to the ridgeline and not have the white borders on the final backdrop!
... of the woodworking phase of layout construction! 
Two significant (at least to me) accomplishments in the model railroading realm this week. 
First of all, I'm happy to report that the significant benchwork construction is (at long last) completed - that means all the subroaded and fascia has been installed, See below for an overall view of the layout:


At this point the only construction left is to complete the swing gate and install a couple of shelves in some key locations. The shelves will prove useful for a place for visitors and operators to put their beverages - oh yes, and in case we ever operate the layout formally there'll be a place to store throttles and paperwork and the like that isn't the surface of the railroad!
There's still some track laying left to complete - primarily on the two peninsulas - the shot below shows the CV yard in Richford - obviously it's awaiting roadbed and track!
The other thing I finished was a clinic on the layout that I just presented at the NMRA Mid-East Regional Convention in King of Prussia, Penn. For those keeping score, this is actually the second all new clinic I developed in the last 6 weeks - I'm hoping that this one will be a layout progress clinic that I can regularly update. I'd like to get as much mileage out of this as possible! 
The clinic was well received despite the 10 o'clock start time (that's 10pm!) and some issues getting my computer to talk to the projector. 


Friday, October 4, 2019

Progress 2 - The Sequel

It's like seeing an old friend. The turntable is a Diamond Scale kit built for my Locomotive Servicing Terminals book, circa 1998 or so. It's the last remaining physical remnant of SNE #1, and is being recommissioned to serve as the Richford turntable.  
As I mentioned in a previous post, I had high hopes for completing the "major" benchwork construction this past weekend. And, though I made some significant progress on what will be the Richford peninsula, I didn't actually finish it. 
Frankly I spent way too much time figuring out how to support the turntable "module". In reality, this is the old Palmer turntable mounted to the same piece of plywood I cut from SNE #1 when we moved out of the Oconomowoc house. Getting it level, lined up, and supported took the better part of last Sunday afternoon. 
I managed a fair amount of time on the layout a couple of evenings this week - so I'm very close to getting the benchwork on the Richford peninsula checked off the to-do list. 
Hope springs eternal to get this task completed this week. In the meantime, here's a photo showing the current state of the Richford peninsula. 


Tuesday, September 24, 2019

Progress?

The only way to finish a project like fascia is to keep
plugging away at it one piece at a time. 
The clinic at MARPM seemed pretty well received - and I was pleasantly surprised at the number of people in the audience - especially when the show organizers saw fit to put me on opposite Paul Dolkos for both of my "performances" <g>!
Frankly prepping the clinic meant all kinds of half-finished (half started) projects now litter the modeling desk. 
And, preparing for the clinic meant there was virtually no progress on the layout itself for the last month and a half. 
I really need to focus on my next clinic, which will be a layout status report/update at the upcoming MER (Mid-Atlantic Region of the NMRA) Convention in mid-October. 
But first, one thing I'd really like to get completed sooner rather than later is the "woodworking" phase of construction. To that end I spend some time Sunday and the last two evenings away from the modeling desk and the computer and have been making sawdust. 
The only benchwork and fascia remaining at this point are the Richford peninsula. The basic L-girders and joists are in installed - meaning I have to mark and jigsaw the subroadbed, attach all that to risers, and install the fascia. 
I think I can get those done by the end of next weekend. I might even manage to get a coat or two of paint on the fascia. 
Once the heavy sawing is done I can at last thoroughly clean the utility room area which has served as the "sawmill" for the last six months or so. Truth be told, I'm looking forward to getting that place cleaned up almost as much as getting the benchwork finished!

Monday, July 15, 2019

Spanning the chasm

(16 July: Edited to actually upload the photos) 


Stic came by yesterday and after a somewhat slow start with the planned assembly of the last of the IKEA Ivar cabinets being deferred to a future date due to shortage of a unique piece of IKEA hardware best referred to as a "thing-a'mick- bob" we fell back to regroup and decided the best use of our time wasn't hanging more track lights but instead getting started on the gate that will permit access to the "interior" of the layout area. 
My original intention was to simply build a lift out - but in the end we decided a hinged access gate made more sense. For one thing the problem with lift outs (as opposed to hinged access methods) are when you remove it you're standing there with a board in your hand - and you need to put it somewhere. It's also necessary to connect and reconnect the power to the track every time the liftout is removed and installed. 
None of that is insurmountable, since the layout is designed to be operated "from the inside." meaning it would be a simple matter to get everybody in the layout area, put the lift out in place, and connect the wires, reversing the process at the conclusion of the op session. 
But I tend to get a lot of non-railroad visitors - they will want to see the interior of the layout area, and will most certainly want to see a train run - meaning I needed a solution that would be a little less clumsy than a basic liftout would be in practice. 
Hence, the swinging gate approach. And since this is such a critical element to the layout (the entire scheme hinges on it, pun intended) we decided to tackle it head on now....).
But keeping our priorities straight, we first broke for lunch. 
After lunch we stopped by Lowe's and picked up an assortment of hinges, screws and the like and set to work.
Honestly, we probably spent more time noodling through how to do this than we actually spent cutting wood. There was even a point where we realized we were overthinking this thing and were in danger of an over engineered monster. Luckily we caught ourselves before we started down that path.  
While we didn't finish the assembly or installation yesterday we did get the plywood bridge "surface" cut to fit, installed the "plate" that the hinges will ultimately connect to, and Stic routed a matching angled notch in the floating end of the bridge to support the bridge (and take pressure off the hinges). This will also ensure the track lines up properly. 


.

Wednesday, October 31, 2018

Room Paint Colors

I've had some inquiries about the paint brand and colors used for the sky and benchwork. 

For everyone's reference, mostly mine, they are shown here (click on image or caption to go directly to the Sherwin-Williams web page):

The room walls above the benchworkare Sherwin Williams #6793 "Bluebell"

The walls below the layout, and the legs of the IKEA Ivar units, are Sherwin Williams #6222 "Riverway." (I plan to use this color for the fascia).


Tuesday, October 23, 2018

Stubby Peninsula

A quick update on progress down in the basement. 

Most of the subroadbed in the "yard" and "town" areas - those sections where the terrain will be basically flat - has been installed. I temporarily propped up plywood in all the areas where the subroadbed will be cut to fit the track and taped large strips of paper to the plywood. I'll arrange flextrack on the paper, trace around it, cut it out and use the result as templates for cutting the plywood to shape.  
As I was positioning the track I realized it might help to have at least the first section of the peninsula in place to ensure the track curving onto the peninsula landed on benchwork and not on the floor. Luckily I'd pre-painted the components for the peninsula so when Stic stopped by the weekend before last we got the first 8 feet or so of the longer peninsula attached. In order to give some additional stability to the peninsula I used an IKEA Ivar cabinet. This will be useful for storing layout construction and scenery supplies - although the bottom shelf of the cabinet will house a couple of (heavy) boxes of magazines. 

Monday, September 17, 2018

Progress Report - 17 September 2018

Progress photo - September 16, 2018. It's starting to look like something other than a pile of wood!
After a seemingly endless process of painting and staining the legs, painting the walls, and then assembling the IKEA shelves, the layout has finally started to look a little less like a pile of lumber and more like a layout. Or at least the underpinnings of a layout. 
As I've mentioned before, one of the main goals for this layout (dictated by my wife - although I completely agree with her) is that it should "Look like a piece of art or furniture and blend in with the rest of the space."
We opted NOT to use the curtains under the fascia since decent looking curtains would not only be expensive, but they would actually detract from the non-cluttered look we're going for. 
Early tests with black for the IKEA shelf legs and under the layout was far too stark so I deferred to Christine's color sense. She chose a Sherwin Williams color called "Riverway" (SW 6222) for everything under the layout. The shelves are stained a light shade (Pecan) in order to allow them to pop a little. 
Ultimately I plan to use the IKEA shelves in the "entry" aisle shown here for display purposes for some other models and collectibles. But for now they're serving as staging spots for track, roadbed etc... 
There's one section where the benchwork is 12" wide - IKEA brackets secured to the inside of a 1"x3" "L" and painted to match the wall are more effective than individual legs or shelves.  
There's no need to have all the benchwork built on the IKEA shelves (which could get pricey). Using the IKEA Ivar shelf system is working out well - as you can seen here, most of the time you can use a short set of Ivar as shown here, and then bridge the gap to the next set of shelves or even a single support leg.  
A lesson learned from trying to string wire on previous layouts - lay in the buss wires now. ran a pair of buss wires and a second pair of wires (most likely for lighting and the like) around the entire layout now - before the subroadbed was in place. 
So far I'm quite pleased with how everything looks. 


. 


Monday, August 13, 2018

Making sawdust

I managed to find some time this past week to get a start on the benchwork for "Phase 1."
The Ivar shelves are working out pretty much as expected. I did need to lower the grid framework to clear a light switch. Murphy's Law saw to it that the height of the Ivar shelves would have put the benchwork dead center on the light switches! 
Since that area will be where two wood trestles are located, I needed to lower the base height slightly so it worked out well. 
If pressed I will claim that I planned it that way.... 
While the vast majority of the benchwork will be open grid as show here, since the Richford peninsula is kinda oddly shaped I'm going to use L-girder there since it will be easier to create a more "free-form" look than the myriad of angle cuts that would required for open grid. 
One thing I'm doing on this layout (lesson learned from last one!) is using pocket screws to make it easier to move the cross members when/if that proves necessary. I'm trying to avoid having access to any screws prevented by the screw ending up against the wall or buried behind scenery or behind the fascia where it would be very difficult to access.  

Thursday, June 28, 2018

Layout Update #1a

I've been busy working on the layout over the last week or so - although it doesn't feel like model railroading. Actually, doesn't feel a whole lot different than the painting we've been doing in other parts of the house. 
But all the IKEA leg sections have gotten two coats of paint, the shelves have been stained and varnished and most of those components are in the basement awaiting assembly. 
I also have some IKEA cabinets - those have gotten a coat of wood prep. 
On the docket for this evening is sanding the cabinets and getting a coat of paint on them. 
I've also worked up a benchwork plan and plan to start construction sometime over the July 4th week which promises to be a little slow at the office. 

Friday, May 25, 2018

IKEA Ivar Benchwork - User Report

I first saw the IKEA Ivar system used for model railroad benchwork at Bernie Kempinski's. (See his blog post HERE). 
Pricing dimensional lumber can be a bit of shock. And picking through the stacks of torqued/twisted and warped lumber at the home improvement center searching for straight lumber can drive you downright nuts. 
The IKEA Ivar turns out to be less expensive than clear pine - and it's precut and ready to assemble into a stable, good looking layout base. 
As I mentioned in my last blog post, I'm going to try the IKEA Ivar system for the basic structure of the layout. Greg Stubbings saw that and offered the following experiences he has had with the same system: 

Marty, 
We have a number a mutual friends and have met a few times over the years.  Last time was at Dick Elwell"s place, I was running trains and you were buying Dick's CV 2-8-0 ! Stic and Bernie were also there.  I model CNR in the Lindsay Ontario are in fall 1957.
Anyway, I follow your blog with interest and noticed that you were considering using IKEA IVAR bookshelves as a basis for your benchwork.  I did this 2 years ago and found they worked very well.  They go together fast, are temperature and humidity  stable, sturdy, readily available, cost effective and you can put them up with only one person.  Best of all, you have a lot of organized shelving that can be covered with drop curtains etc when guests are coming.
I used the 20 " wide shelves 48" high for most areas and 12 " wide shelves in a penninsula. On top of the L girders is 3/4 plywood and 2 X1" foam insulation board. Track ends up at about 51"
The only modification that I made was to use levelling bolts and tee nuts on all 4 corner posts.  I used 1X3 and 1X2 pine for the L girders - good quality plywood that you have already ripped will also work.  I set each shelf unit up with at least 2 shelves (you can add more later as storage need and budget permits).  I levelled each unit.  When I had a section / phase done with a number of units, I installed the L girder on the front edge and back edge with a level and clamps.  Depending on how level your floor is, the position of the L girder does not always match the top of the shelving unit.  I also used smaller L girders on a horizontal plane so that I could attach the plywood  top from below.  It is amazing how sturdy these are once the L girders are in place and the front fascia is attached.
I have attached a couple of photos.  I do not have a blog but a friend of mine, Chris Lyon has done a number of You Tube videos of my layout on his CNLVN channel. 

Take care

Greg Stubbings

Here's some photos of Greg's IVAR benchwork:


Thanks for writing Greg, and for allowing me to share your experience with readers of this blog.

I plan to follow the same basic approach as Bernie and Greg - with one exception. I'm going to use a couple of the Ivar cabinets on the "front" section of the layout. It will not only make that portion of the layout appear more finished, the points where the two sections of the layout are spanned by a removable section needs to be stable. I'm counting on the Ivar cabinets - which are plenty heavy - combined with books and magazines (or bricks!) on the shelves inside the cabinet to keep the end of the layout in place. 
Modelers lacking the tools, skills, or desire to build their benchwork from scratch might want to check out the Ivar system, perhaps combined with components from a company such as Sievers, to get their benchwork completed. I'm sure you could fill a spare room with such "screw together" benchwork in an weekend morning. 

Thursday, May 24, 2018

100% Started?

The June 10 "Benchwork Started By" date is looming closer. 
But that begs the question - exactly when does construction start? 
I've gotten a good start at the Phase 1 benchwork/framing plan - basically the Richford peninsula and it's approach tracks. In fact, I'm at the point where I could start assembling open grid "boxes."
Of course, benchwork building will require some wood - as I mentioned previously Bernie was getting some 3/4" "plywood ripped into 3" boards (essentially creating strong and straight 1x3s at less cost than dimensional lumber). So he was kind enough to tack on some to his order. A whole bunch of it in fact. 
The final photo I took of the previous layout showed the scrap in the back of a truck on its way to the recycling center, it seems fitting that the first photo of the new layout mimics that - in this case the wood in Bernie's wife's car.
Having seen some local modelers use the IKEA Ivar shelving system as a base for their layouts I decided to adopt the same approach for the Richford peninsula and the "front" section of layout running the length of the room. So yesterday I drove to IKEA and managed to completely fill a Mazda6 with a bunch of Ivar components. I also picked up some stain. Next step will be staining those legs and shelves. 

Philosophical query of the day: 
Can you ever be less than 100% started on benchwork?
Does obtaining the wood count as "starting construction?"
And, if not, does staining the legs and shelves count as "starting?"
Or, does sawdust actually have to be produced to be considered 100% started? 

Tuesday, May 22, 2018

Stuff to do BEFORE starting the layout

Things have been busy and hectic around the new digs. First of all, the garage is still home to a lot of "last minute pack" items - stuff that we shuttled from the apartment to the house as time, and mostly the weather, permitted. 
Adding considerably to the delays in household accomplishments, I severely sprained my knee a few weeks ago and ended up in a knee brace. I'm just now getting to a point where I can get up and down stairs in a reasonable manner. Very frustrating. 
I think both Christine and I are suffering from "moving burnout" - but we need one more push to get the main level of the house completed - something that has to be done by 1 June as we have house guests coming and it would be nice if they could get into the guest room!
We ended up at IKEA the other day, and I took a photo of a new line of utility room cabinets - likely not as nice as the kitchen cabinets, but seem like they would be plenty good for the workshop. 
Speaking of the workshop - although I planned to get it finished before starting the layout I really want to live with the space for a while before committing to a permanent arrangement. So I've set it up in temporary fashion with tables and cabinets I have on hand. A real dog's breakfast but workable, at least for now. 
We took a much needed break from house chores to walk around the Reston Art Festival last Saturday. We had a nice lunch with Stic and Stephanie (actually we brought them a bunch of empty moving boxes - only slightly used - since they are moving this summer!) 
It's not unusual to find railroad theme art - typically photography - at the show in Reston. I liked this large photo enough that I was tempted - but for the price I didn't LOVE it. So we passed. 
Last week Bernie Kempinski mentioned his idea for a PRR-based set of Free-Mo modules. He also mentioned he was going to Colonial Hardwood, a local lumber dealer, to get the wood for his two planned modules. I signed up for a module to connect with Bernie's. I'll have more details on that in the next couple of months. But since I still have a J-O-B and Bernie is now officially old and retired, he agreed to get some 3/4" birch plywood ripped for me - thanks to his help the core of the Richford Branch, phase 1, now resides in my garage. 
On Sunday Bernie, John Drye, and me got together at Bernie's house to have a module building party. See his USMRR blog for more detail. In the end we got five modules framed up - several are awaiting the hardware to install the legs.  


While I have a layout design for the Richford Branch, the plan doesn't really show how to actually build the thing. So the next step is to develop a benchwork/framing plan. This doesn't have to be overly complicated or elaborate, but on previous layouts I seemed to be constantly finding benchwork components in the way that needed to be moved. I'm going to try minimizing that this time around. 
I also still need to figure out a way to support the layout structure that looks good. My instructions from Christine is that this layout should look like a piece of built-in furniture. Anyone who's seen my woodworking knows that is a tall order. But I'll try my best.  
Speaking of benchwork, I was originally planning to wait until the fall to commence construction - but have now established June 10th as the official "ground breaking" date. Why June 10? Simple. It's exactly one year after my previous layout went down the street. 


Sunday, June 15, 2014

Work Session Report - 15 June 2014

Tom, John, and Ben stopped by a short work session this afternoon. 
About a year ago John made a yardmasters desk for White River Junction - he and Tom worked on installing it on the layout. John is an extremely talented modeler - his other hobby is making mandolins - so to say he went above and beyond the call with the YM's desk is an understatement!
But the finished desk looks great, and it's on drawer glides so it can be slid out of the way to keep the aisle clear when it's not needed. 
Tom and I spent some time discussing the station platforms and B&M track arrangements by White River Junction station. We have a plan for the area that will maximize the platform area around the station building and make the finished scene close to full size in HO. It's going to have to wait until after the operating sessions in the next two weeks. 

Ben worked on passenger car wheel sets. 
I did a couple of minor little tasks - adding another set of feeders near the creamery crossing and ballasting some of the mainline track. 
I also finished installing the phone system that Mat and Pete stopped by to help with on Tuesday night. The phone system deserves it's own post. 
Thanks to all for the help!
As for me, now I have to clean up the layout room and get things staged for the session next Saturday.

Tuesday, April 1, 2014

Re-Locating Williams Creek: 4


A look at the mocked up "downtown" scene adjacent to the Williams Creek bridge scene. Don't blink when driving through here, you might miss it! But sometimes a scene with very little can have a huge impact. 
- I'm sure the readers of this blog are getting plenty sick of seeing pictures of raw benchwork and the somewhat endless look at construction and reconstruction. I know I'm sick of looking at it! Hopefully this Williams Creek relocation project is the last of the "deconstruction" and we can do nothing but move forward! -
I got the plywood sub roadbed installed on Sunday afternoon. Since then I've been playing with various arrangements for the Williams Creek scene. The Williams Creek project really includes the bridge scene and river itself as well the mainline on either side of the bridge – a total of about 17 feet of single track mainline. I've played around a lot with this section of the layout for several years, and I found it the least satisfying area on the entire railroad both visually and operationally. 
I  considered all kinds of possibilities ranging from a large water-powered mill complex, to a small town, to a large “destination industry” like a paper mill or plywood plant. I’ve arranged, and rearranged structures and track so many different ways I’ve lost track. 
In the end, the answer became clear – simpler is better – “Less is More” as some of my friends are fond of saying.
 The photos above show where I am at this point, a country lane coming down the hill with a Greek Revival country store (red with white trim). There’s a small frame station - preferably a CN/GT/CV standard design (frame because every other station on the layout is brick). The station is well-weathered and even somewhat neglected in my 1954 era. Perhaps the bridge and building gang use the baggage section for storage of tools. There's still an operator stationed here, but the office is only open for a few hours a day. 
Behind the station a single spur comes off the main at an angle and services a small - very small “industry.” Perhaps a small freight house - or the freight house that's been leased by a local lumber company. Or maybe a team track that’s currently being used by the State Highway department to receive road-building materials. Perhaps it’s used to store MofW cars. In any event, it’s going to be something very simple.

Bill Schamburg said it more poetically:
“There is a need for counterpoint on a layout unless you are in a Jackson Pollock mode. The natural and built landscapes exist in an organized manner. Leave breathing room, cluster things, create "high visual elements," and remember that human activity is often nodal, then provide visual relief. After all, why do city folks go for "a ride in the country?" (And, country mice have been known to head for the city for a weekend.) Some call it negative space, but it it has a positive influence on the impact and realism of a model RR, be it prototype-specific or a derivation.”

 So while the structures in this scene – the general store, bridge, and old depot, will be interesting there’s going to be a lot of other elements needed to create a realistic scene. Telegraph poles, fence posts, the agents automobile parked next to the station, track details like joint bars and switchstands, the variations in ground textures, grasses, and specific trees are the elements I’ll be focused on here. Taken by themselves they aren’t that noticeable. When combined they should produce something special. And it should be fun. And lest you think I made this scene up out of whole cloth, here’s the prototype photo that provided more than a little inspiration for this scene: