


Nothing particularly noteworthy about the assembly process. I did note that all of the window openings (and there's a LOT of them!) are cut just slightly undersize - meaning I had to enlarge them just a little to get the plastic windows to fit. Also, the stone foundations on a lot of these BEST kits seem to be a just a little undersized - leaving an exaggerated amount of overhang between the wood structure and the stone foundation. In this case not a big deal and an issue that can be disguised with foundation plantings. I did a pair of Woodland Scenics carriage lamps on both sides of the front door. Other than that this was a real basic build.

It's shown in the drone shot above in the approximate location on the Stafford Mills town area. I'm thinking on one or two more buildings for the upper street - perhaps a church or maybe a small town garage? Another option is a house or perhaps a cafe????
On the other hand I want this to look like a New England country lane, not a downtown Main Street!

One additional detail needed before this is planted in place - a sign:

Extra points to anyone who gets the reference ...
 |
| This aerial view shows the basic layout of the streets in Stafford Mills |
The first step was cut away the area for the country store. Since I'd installed the store on its own rectangular base this was simply a matter of determining the stores final position (It's in a slightly different spot than in the previous blog post), marking the outline of the base, and sawing out the scenery.
Although I planned to use sheet styrene for the roads, I didn't have any larger sheets of plastic so I opted to use cardboard instead. The first step was to take the paper templates (see previous blog post) and cut them apart to arrange them on the large sheet of cardboard in order to minimize wasting any material. I ended up with four sections.
 |
| I used a saw to create a smooth path for the roads. |
I did narrow the roads as they got closer to the wall.
 |
| On the left side the road climbs to a slight crest before heading down towards the rear. |
 |
| On the right side the road will disappear into the trees. |


 |
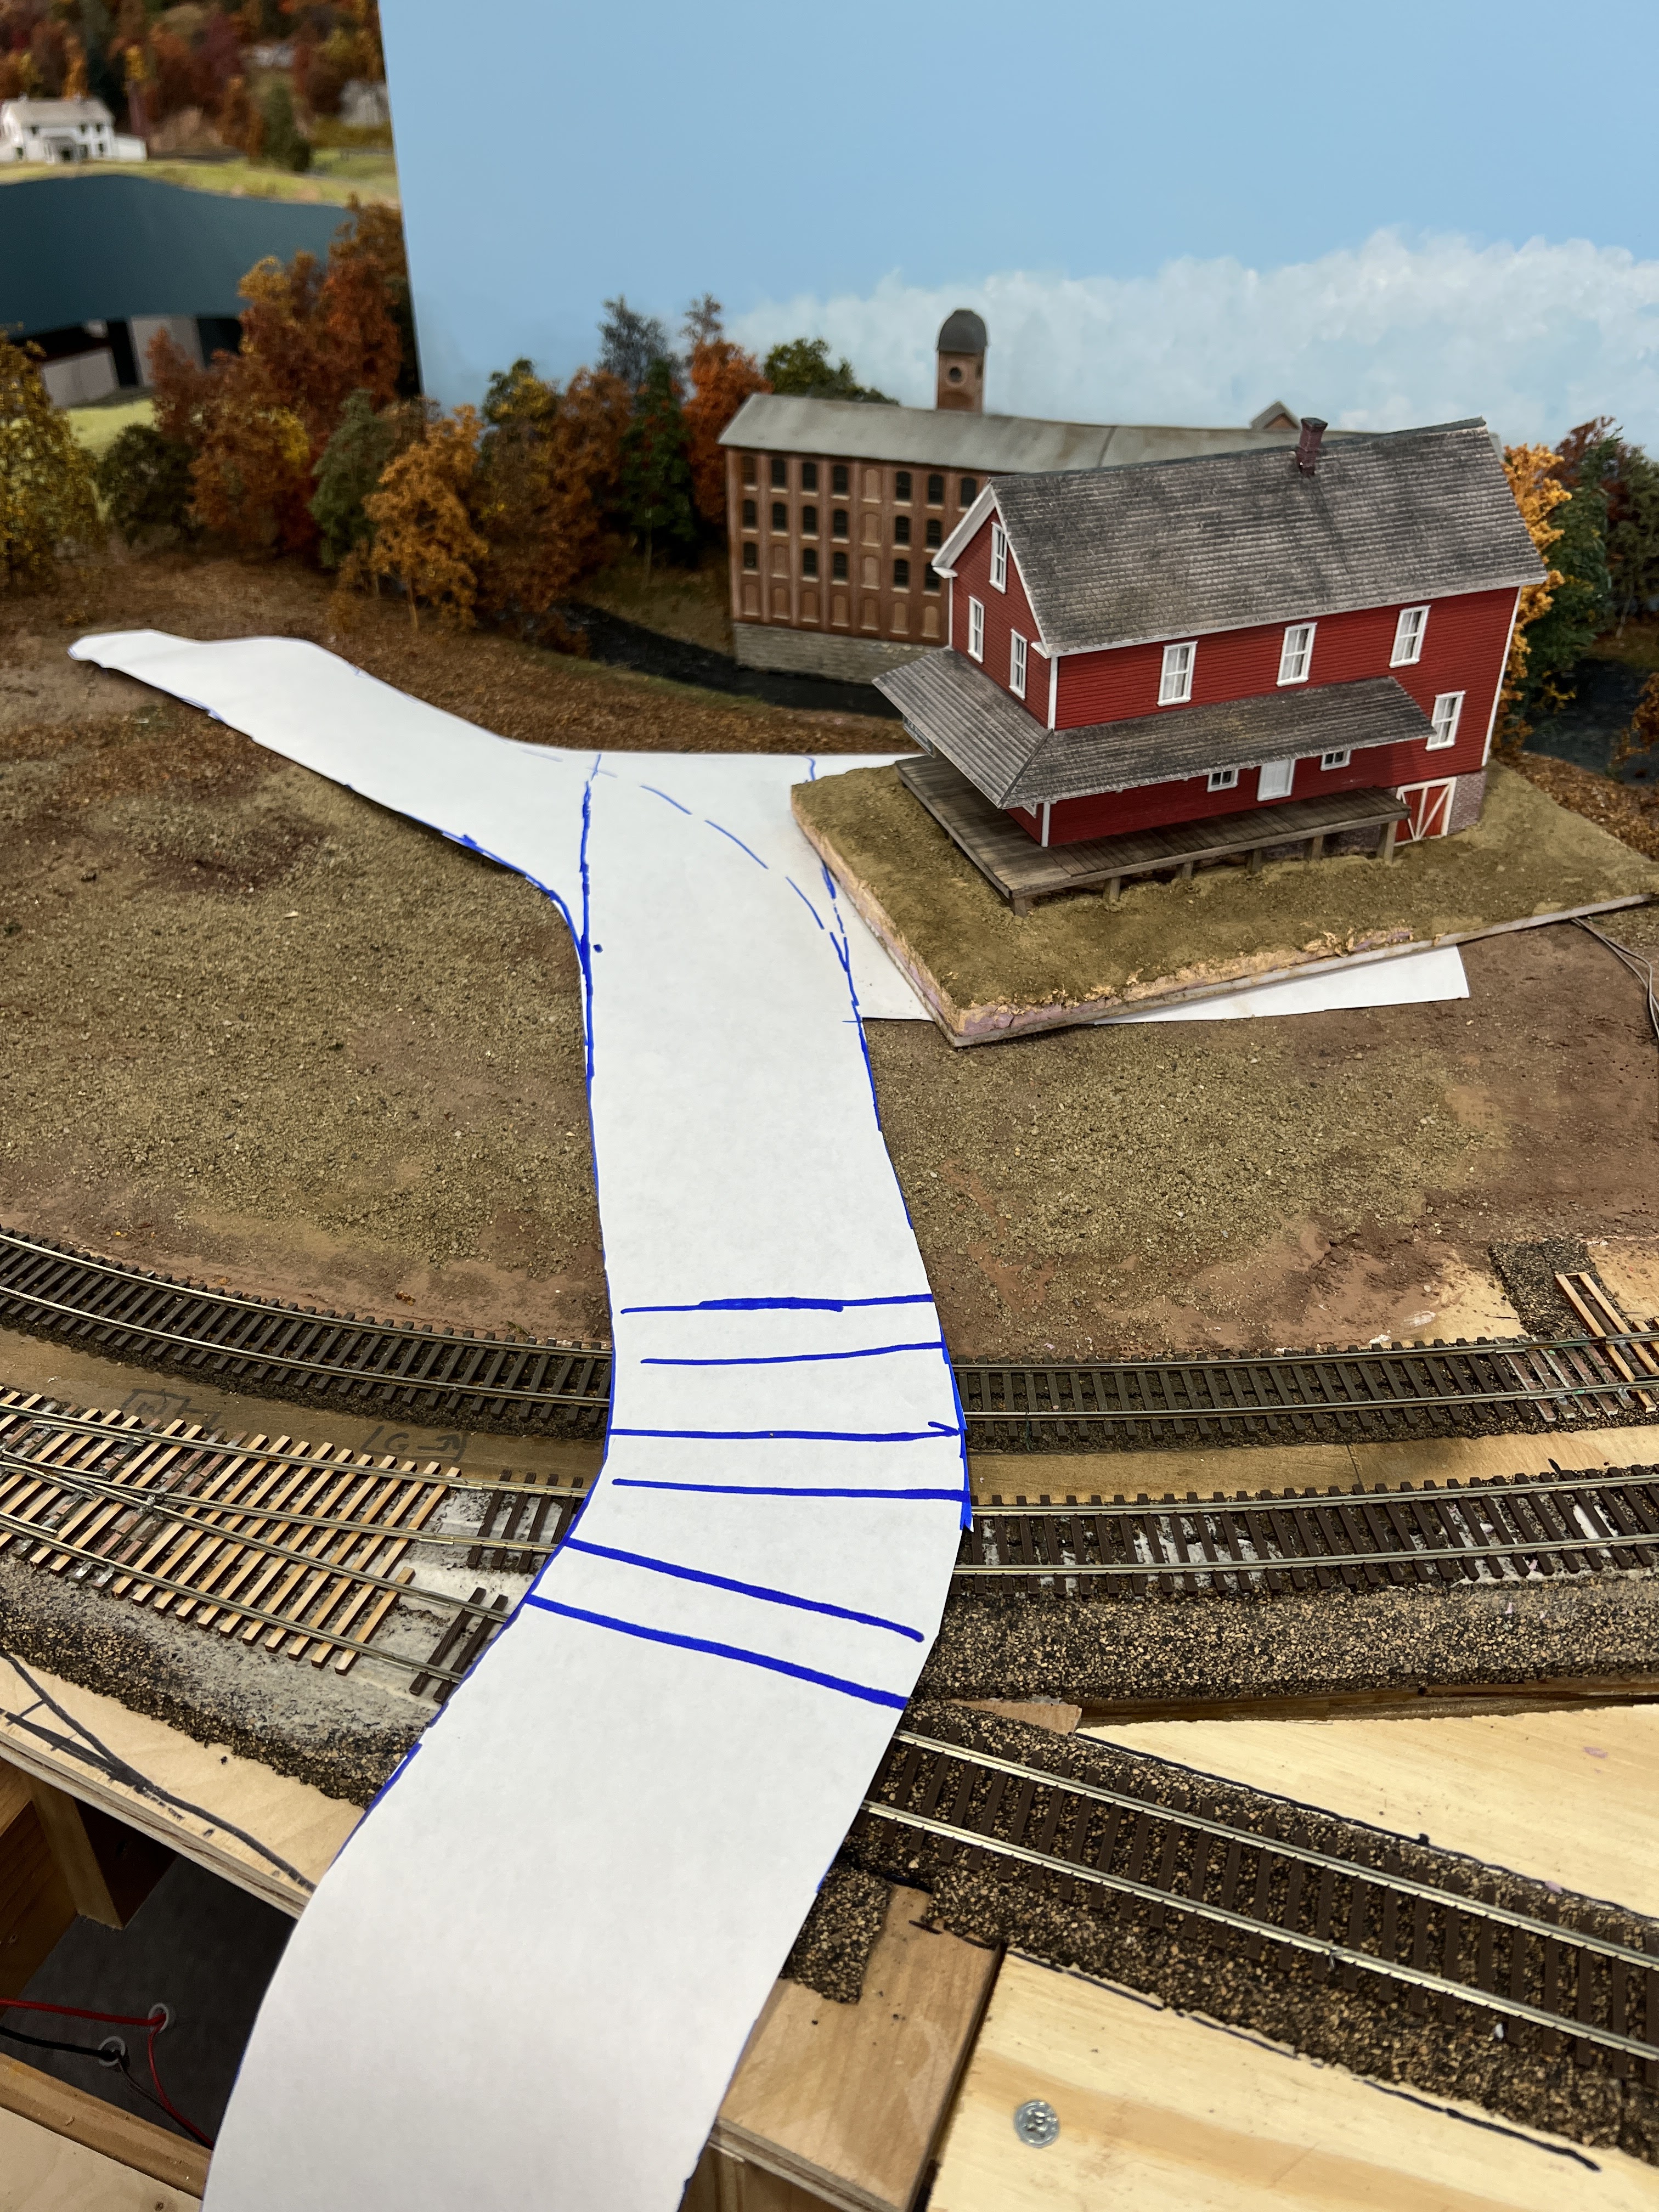
| This is the approximate position of the Magoun Store. |
I could give you some long explanation that I was concerned that two or three operational locations on the layout named "Sheldon something" - would confuse operators. Or how I wanted to include some elements that weren't part of the prototype scene so I couldn't say I was "modeling Sheldon Springs."
The real explanation is pretty straightforward: "Stafford Mills" is a town name I dreamt up back in high school while trying to look like I was paying attention in Father Brisette's chemistry class and I kind of like it... (the town name, not chemistry!)
For some details on how Stafford Mills got to its current state you can look at this blog post. You can also check out the two videos on "Forced Perspective" on my "CVSNE" YouTube channel.
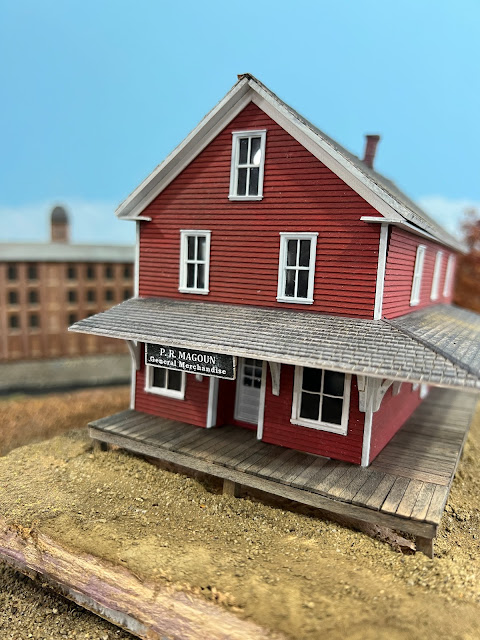
The impetus to work on this section of the layout was digging out the half (okay, maybe 3/4!) finished BEST Trains Trussell store kit. Long time blog followers will recall I planned to include this building in Williams Creek on my former Roxbury Sub layout. I got the building mounted to a Gatorboard base, stained the roof, and added a couple of Woodland Scenics Easy Lighting LEDs. I also created a poor man's interior using photos of General Store interiors I found online.
I made a sign for the front of the store - christening it "P. R. Magoun's General Merchandise" - named for a former NMRA president and (more to the point) fellow Navy veteran and long time friend and strong supporter of the SNE. Friends of the SNE get buildings named after them - enemies of the SNE get their names on a plaque in the SNE HQ men's room ....(!)
The first step in getting the store in place was to find a spot that it looked right. This was a little tricky with the N scale brick mill in the background. In the end I settled on the spot shown in the photo above.
 |
| The N scale brick mill in the background of the scene. |
I also wanted to add a road in front of the store that would ultimately run towards the paper mill complex and tie these (and some future elements) of the scene together.
I started by removing a lot of the trees that I'd installed along the front of the background mill river. Then I carefully placed a large sheet of paper and marked the approximate location of one side of the road. Then I removed the paper and cut out the roads themselves.

I'll use the paper road as a template to cut the road base itself out of sheet styrene. But that's for the next blog post.
 |
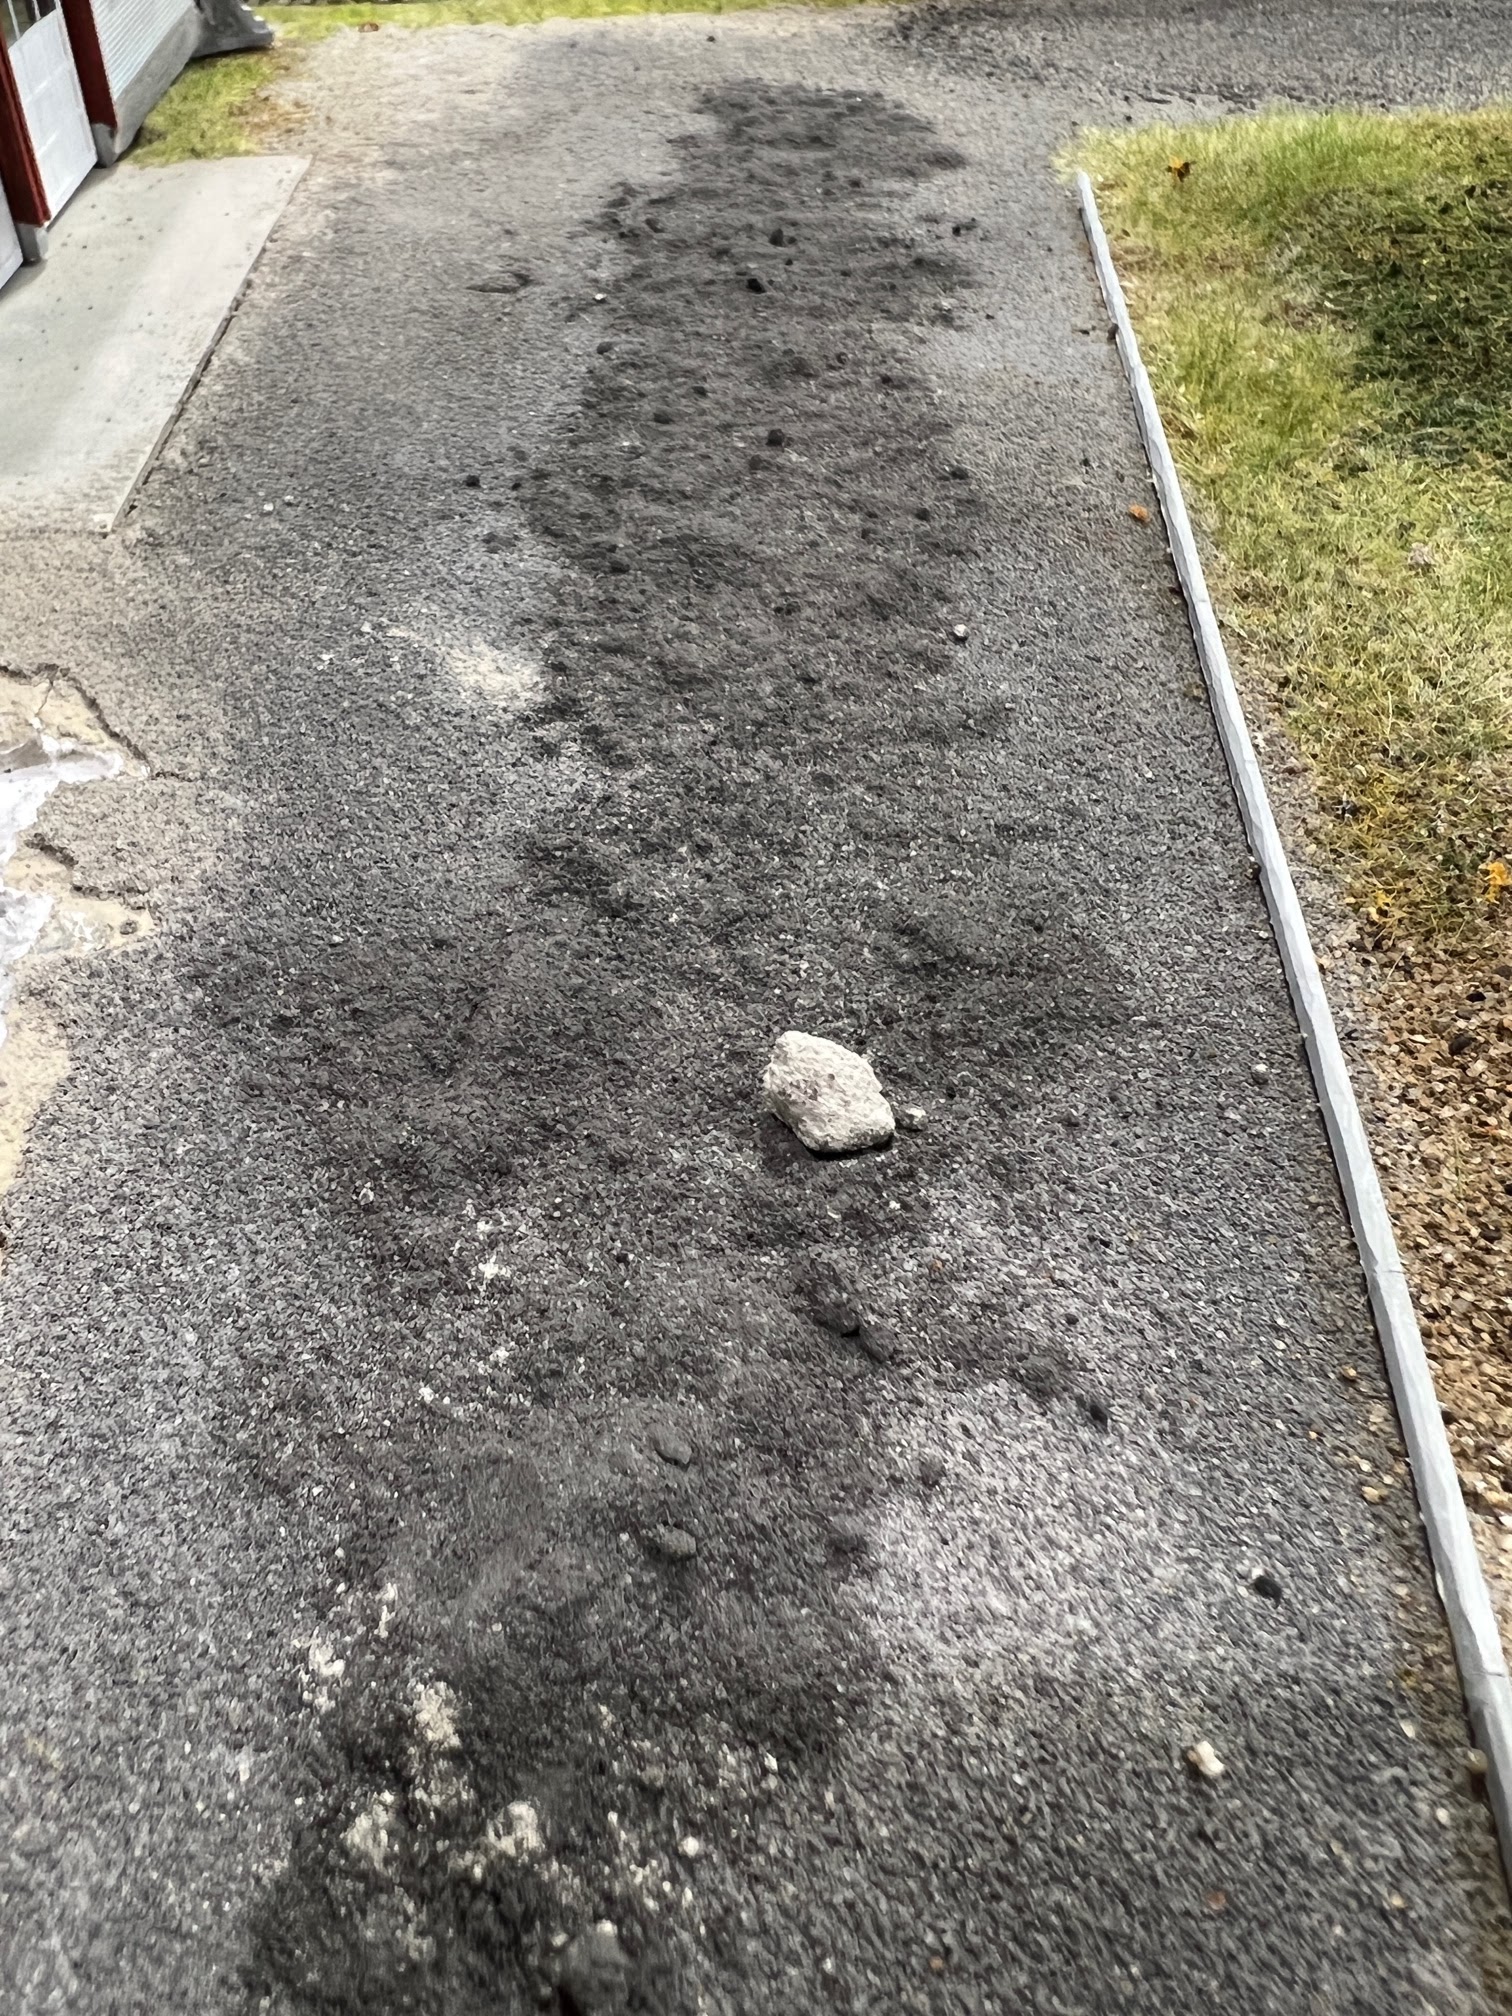
| Sanded tile grout pavement in place. Note the subtle variations in color and texture in the "older" pavement on the left. This was done by "stirring in" small amounts of darker and earth-tone grout when still dry. |
Since I built the basic benchwork going on three years ago, the town of Enosburg Falls, which is right up front when one comes down the stairs into the basement, has remained a partially scenicked, half done repository for stand in structures, surplus rolling stock and an assortment of tools and modeling supplies. And that's on top of the layout!
Getting the underside of the layout looking presentable was step one. The next item on the to-do list was to get the top of the railroad cleared off and at the very least ballast the track and install the roads.
I won't elaborate on ballasting the track. I used pretty standard techniques. One thing I'll add about ballasting - a little ballast goes a LONG way, and too much ballast can reduce a well running layout to an engine stalling, derail inducing, mess. So when you ballast track use about half the ballast you think you need - and be especially careful with it around turnouts!
I've tried all types of methods to make roads in the past. For smooth paved roads I think styrene may make be the best choice. But in this case I was looking to create an older, faded somewhat rough road. I tried Ceramic Stucco texture - which I've used with some success on building foundations - but that stuff is pricey. I also tried AK Interactive asphalt and concrete texture. I found the texture just a little too gritty for HO scale (it's great in larger scales) and if you think the artist medium like the Ceramic Stucco is expensive, just wait until you see the price for a very small tub of the AK stuff!
 |
| Oyster Gray - much lighter than it appeared on the label. |
I went to Home Depot and ended up with two bags of sanded grout - one was a light gray color called Oyster Gray, the other a very dark gray (almost black) called Charcoal.

Since neither color looked right I started combining them together. I worried I'd get a "salt and pepper" effect but frankly the stuff is fine enough that it really blended into a single color.
 |
| About a 70-30 blend of Oyster Gray and Charcoal produced a faded pavement color. |
Applying it is simple. I put masking tape to mark the width of the road and create a sharp transition from paved to unpaved areas. After mixing the grout to the desired color apply it dry to the area of the layout you want to pave. Then use a disposable foam brush to smooth the grout. I noticed the lighter gray grout tended to have clumps - these were easy to break up during the smoothing process.
The last step is to secure the pavement in place. For this mist the grout with a mixture of alcohol and water (about 25% alcohol/75% water). Start with a gentle mist to "lock" the grout in place and then completely soak it. The next day it will be rock hard.

 And I've gotten most of the basic landforms in place around Kempinski Curve. It's ready for grass, foliage and some trees.

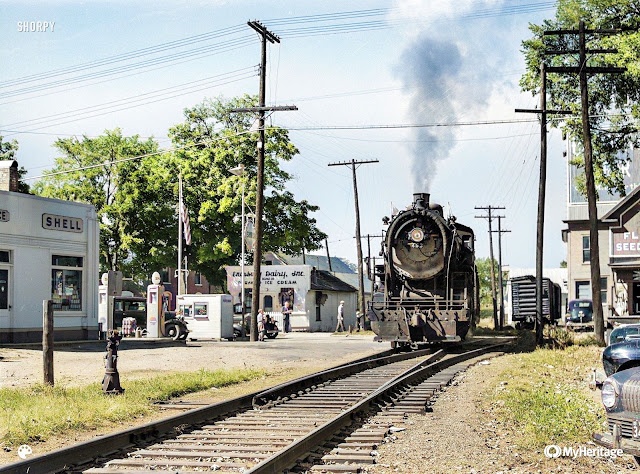
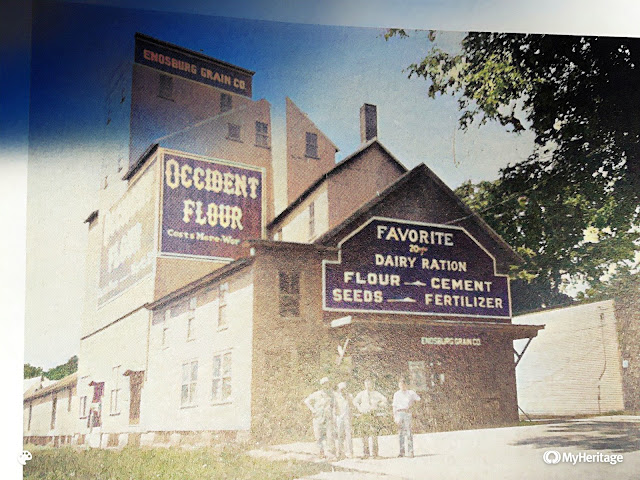
I also ran a photo from an Enosburg Falls town history that showed the Enosburg Grain Co - about the same time as the Delano image.
I originally thought the grain company building was painted some sort of "barn red" - but I'm not leaning towards an earth tone or perhaps a slightly browner version of yellow ochre.
But the one thing I don't trust about the colorizer is the shade of the Shell signs - I would think they should be a much brighter yellow.
 |
| A pasture scene almost ready for static grass and foreground trees. |
Super trees, marketed by Scenic Express, are perhaps the best looking tree armatures on the market today - at least if the goal is a tree covered hillsides. The weakest part of the Super Tree is the slender trunk compared to the rest of the tree. Planting them in mass effectively minimizes that limitation. Of course, the scene will benefit immensely from some true foreground trees. I have a couple of ways to construct this that I may cover in a future blog post.
But there's one other issue with Super trees that I haven't seen addressed in any of the videos, articles, or other tips I've seen published about using them.
Look carefully at the top of most of the armatures and you'll notice a "crown" at the very peak of the tree. Look at the dark orange tree in the center of the image below:

Typically there's a gap between the top of the main "mass" of the tree and this little extra crown shaped branch. While it's acceptable sometimes it's usually something that doesn't look much like the growth pattern of a real tree, and therefore makes it obvious that this is a Super tree and not an oak, maple, elm, or whatever.

The easiest solution is to nip off the crown. I usually do this after the tree is planted. I simply look over the trees, identify the odd-shaped or unusually large "crowns" and snip them off the tree.
Only about 70% or so of the material in any average Super Tree box is really usable. But don't throw the bits and pieces and oddly curved armatures away - they're useful for making those foreground trees.
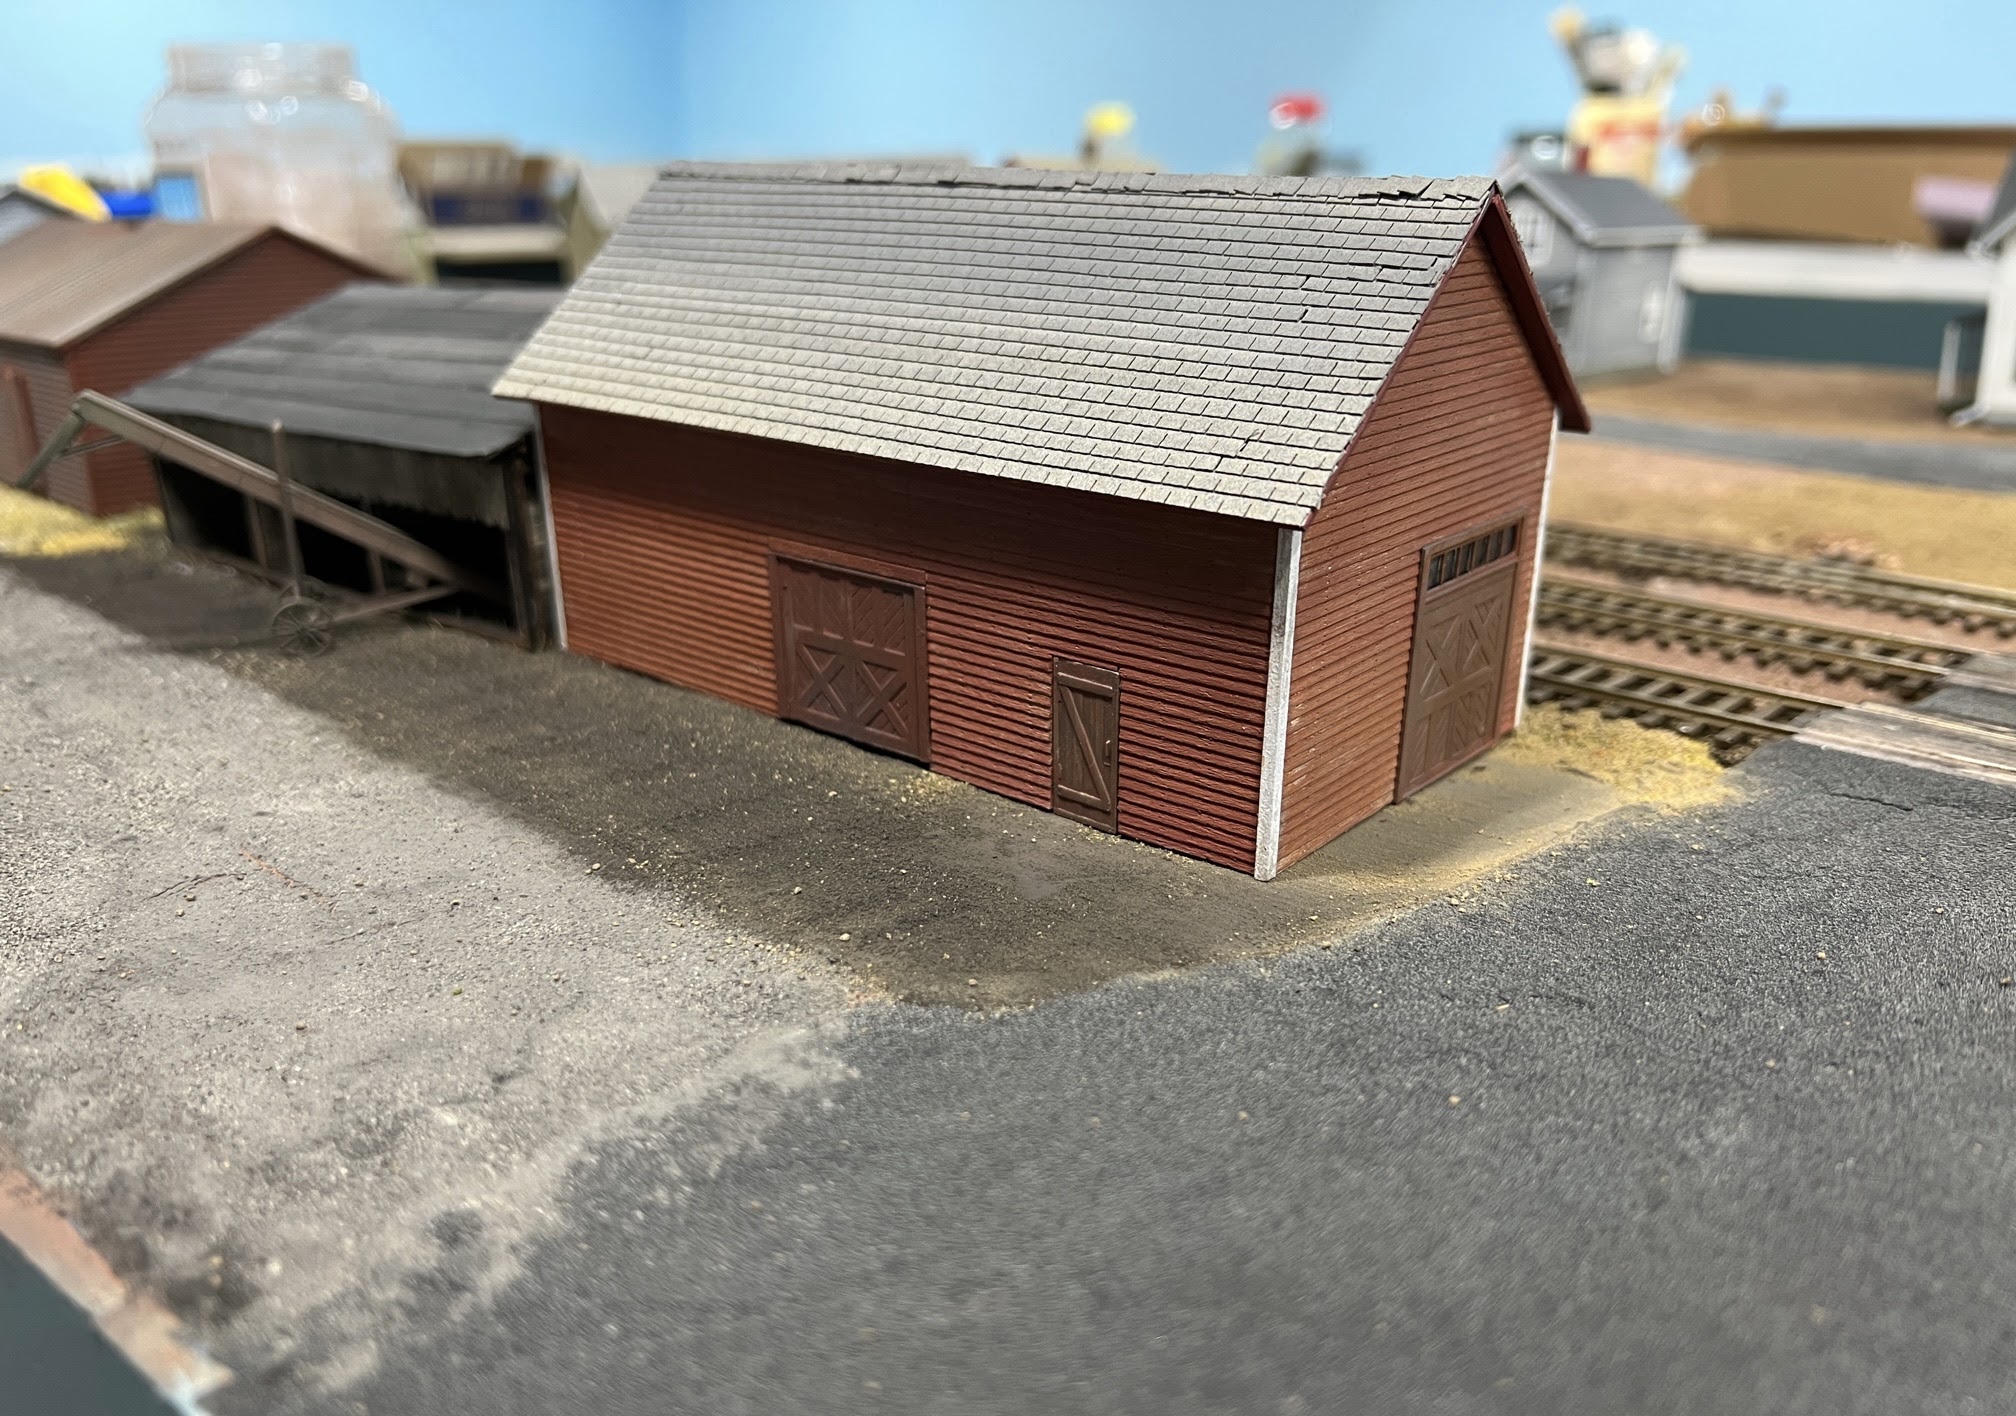
Dirt Roads
I've been experimenting with using sanded tile grout for a dirt or gravel road. This is a mixture of a dark and light tan, as well as a medium gray. I simply applied it to the surface of the layout, smoothed it with a putty knife, and then misted it with water mixed with alcohol. This is the first layer to build up the basic road. I need to go back and add a second finish coat - at the that time I'll add some planks to between the rails to create a road crossing.


 |
Prototype scene. Note how overexposed the church steeple is in this image.
|
 |
This photo shows an early “sketch” (the structures are not complete) temporarily tacked to the wall.
|

 |
The Illustrator "sketched" buildings aren't as realistic as photographs, but they don't have to be. This is how the backdrop image looks from the aisle.
|
 |
| The grade crossing on Park Row in Waterbury. Still needs a final sanding and the track needs final ballasting. |
 |
Park Row after the initial coat of lightweight
joint compound. Although this looks like
a rough road, the prototype was never a
very smooth ride!
|


