Showing posts with label Other modelers. Show all posts

Sunday, February 26, 2023

Bill Welch Freight Cars


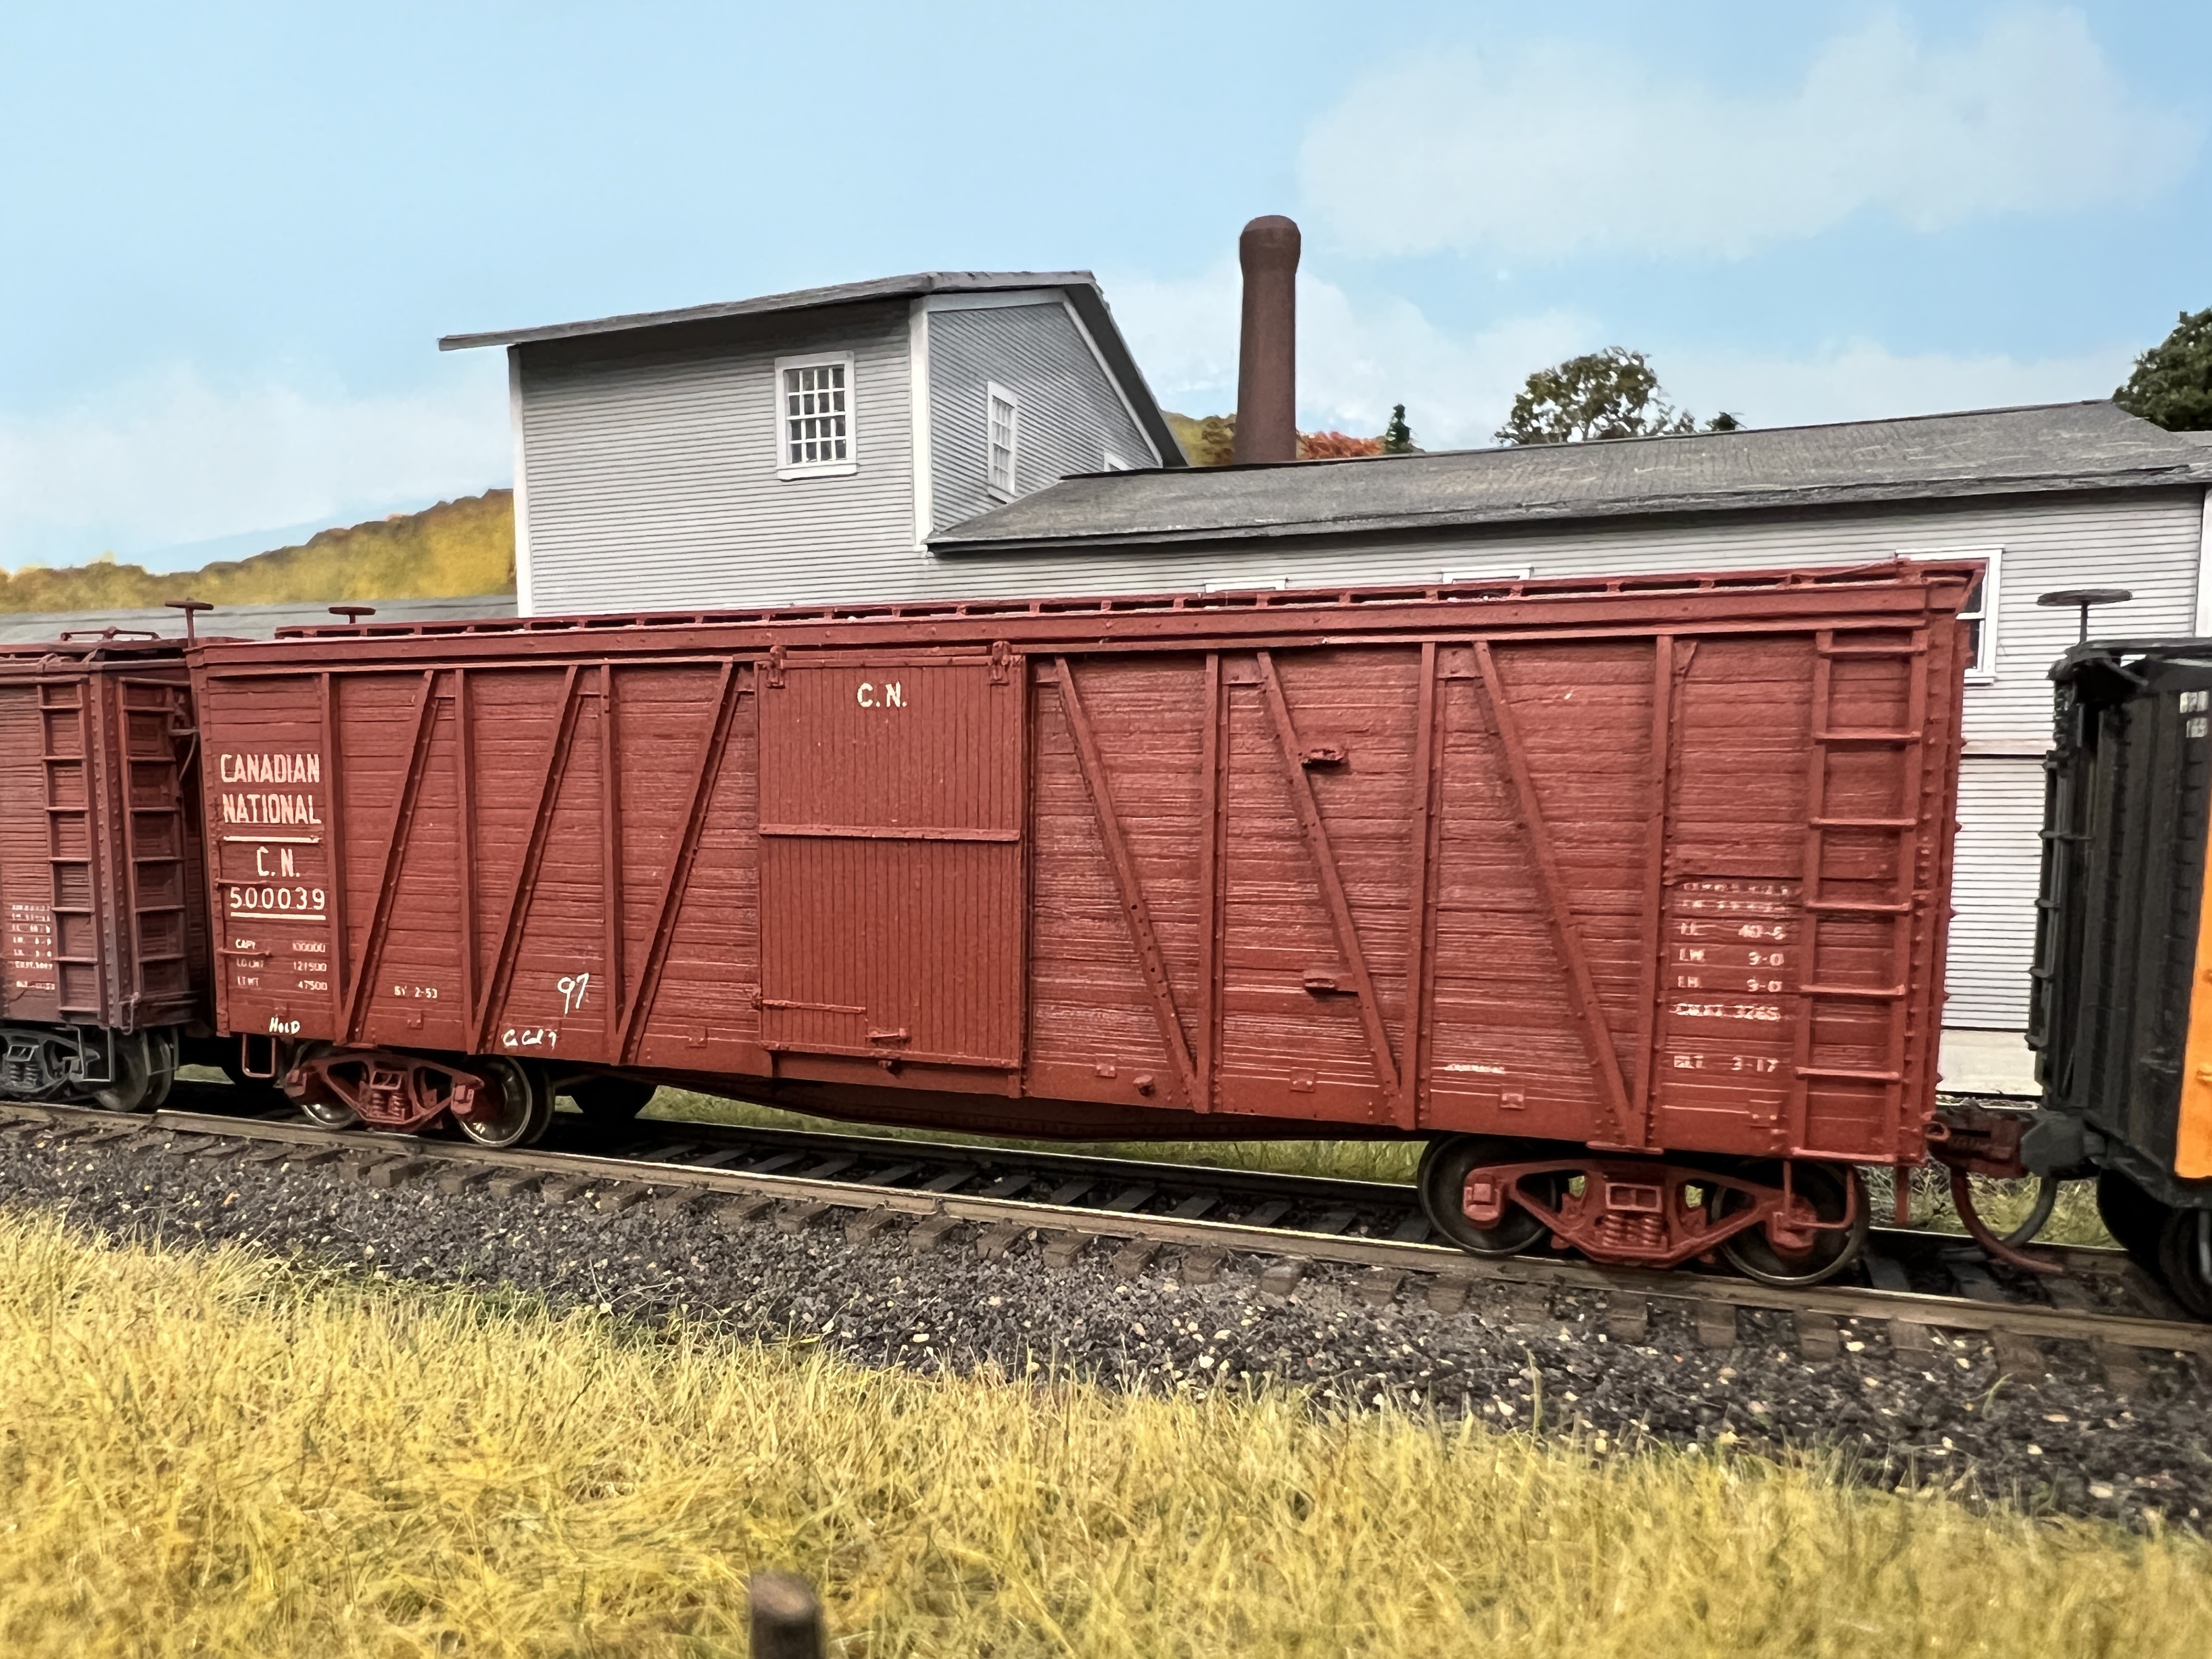
Ted Culotta  is handling the late Bill Welch's modeling estate. So when I saw Ted at Timonium a few weeks ago I was thrilled when he presented me with two of Bill's completed models. They're shown here posed on the Richford Branch. Note like most of Bill's models I've seen these two are beautifully modeled - and wear pristine paint jobs. 

Currently these are in a display case alongside alongside other models from friends who have passed away - including Andy Sperandeo, Richard Hendrickson, Jack Ozanich, and Dick Elwell. I'm more than a little torn - should I weather these and run them as part of the operating fleet, or leave them as Bill built them?  

Friday, May 25, 2018

IKEA Ivar Benchwork - User Report

I first saw the IKEA Ivar system used for model railroad benchwork at Bernie Kempinski's. (See his blog post HERE). 
Pricing dimensional lumber can be a bit of shock. And picking through the stacks of torqued/twisted and warped lumber at the home improvement center searching for straight lumber can drive you downright nuts. 
The IKEA Ivar turns out to be less expensive than clear pine - and it's precut and ready to assemble into a stable, good looking layout base. 
As I mentioned in my last blog post, I'm going to try the IKEA Ivar system for the basic structure of the layout. Greg Stubbings saw that and offered the following experiences he has had with the same system: 

Marty, 
We have a number a mutual friends and have met a few times over the years.  Last time was at Dick Elwell"s place, I was running trains and you were buying Dick's CV 2-8-0 ! Stic and Bernie were also there.  I model CNR in the Lindsay Ontario are in fall 1957.
Anyway, I follow your blog with interest and noticed that you were considering using IKEA IVAR bookshelves as a basis for your benchwork.  I did this 2 years ago and found they worked very well.  They go together fast, are temperature and humidity  stable, sturdy, readily available, cost effective and you can put them up with only one person.  Best of all, you have a lot of organized shelving that can be covered with drop curtains etc when guests are coming.
I used the 20 " wide shelves 48" high for most areas and 12 " wide shelves in a penninsula. On top of the L girders is 3/4 plywood and 2 X1" foam insulation board. Track ends up at about 51"
The only modification that I made was to use levelling bolts and tee nuts on all 4 corner posts.  I used 1X3 and 1X2 pine for the L girders - good quality plywood that you have already ripped will also work.  I set each shelf unit up with at least 2 shelves (you can add more later as storage need and budget permits).  I levelled each unit.  When I had a section / phase done with a number of units, I installed the L girder on the front edge and back edge with a level and clamps.  Depending on how level your floor is, the position of the L girder does not always match the top of the shelving unit.  I also used smaller L girders on a horizontal plane so that I could attach the plywood  top from below.  It is amazing how sturdy these are once the L girders are in place and the front fascia is attached.
I have attached a couple of photos.  I do not have a blog but a friend of mine, Chris Lyon has done a number of You Tube videos of my layout on his CNLVN channel. 

Take care

Greg Stubbings

Here's some photos of Greg's IVAR benchwork:


Thanks for writing Greg, and for allowing me to share your experience with readers of this blog.

I plan to follow the same basic approach as Bernie and Greg - with one exception. I'm going to use a couple of the Ivar cabinets on the "front" section of the layout. It will not only make that portion of the layout appear more finished, the points where the two sections of the layout are spanned by a removable section needs to be stable. I'm counting on the Ivar cabinets - which are plenty heavy - combined with books and magazines (or bricks!) on the shelves inside the cabinet to keep the end of the layout in place. 
Modelers lacking the tools, skills, or desire to build their benchwork from scratch might want to check out the Ivar system, perhaps combined with components from a company such as Sievers, to get their benchwork completed. I'm sure you could fill a spare room with such "screw together" benchwork in an weekend morning. 

Wednesday, February 22, 2017

Wordless Wednesday #148


I've been sick on and off for several weeks. But the fascia is complete (Thanks Stic!). And pictures of me laying track aren't that interesting....so here's a treat from Dick Ewell's magnificent Hoosac Valley. 


Tuesday, January 31, 2017

Trip Report - Going 'round the Southern New England Loop

Long post, but an action-packed weekend!
Stop #1: Jim DuFour's HO B&M
Stic Harris, Bernie Kempinski and I flew from DC to Hartford, Conn. early last Friday morning to attend the Springfield show and visit some layouts. We arrived back in town late last night after having a great time visiting some of the best layouts I’ve ever seen and sampling some of the local grub. 
The trip hit an early glitch when the airline decided we had everything we needed to take off, loaded everybody onto the shuttle to ride out to the plane, until someone remembered that a pilot would come in handy. So it was back to the terminal while we waited for the flight crew to be united with the aircraft. Then it was off to Springfield. 
We got a rental car “upgrade” – which apparently means “Here’s a Passat with high mileage and not-so-great brakes.” But we survived. Thanks to Bernie for driving. 

Jim DuFour's B&M Cheshire Branch
The Friday marathon continued as we bypassed the hotel and headed directly to Jim DuFour’s to visit his HO scale Boston & Maine Cheshire branch. When we arrived the sign on the door said “Come in” so we did. As I turned the corner I overheard Jim and Don Janes talking about me behind my back (happily it was all good!). I think I gave Jim a heart attack when he turned around and saw me standing in his kitchen. We headed to the basement where I got to run some trains (his steam locomotives are some of the best running, and sounding, I’ve heard). 

Also had a chance to visit with George Corey (above), whose prototype photos have provided Jim, myself, and countless others with lots of inspiration. George is not only a fantastic photographer he has a real Yankee sense of humor (translation, he’s a wise-Alek – though he uses a different term!). 
Stop #2: Old Saybrook, Conn., on Chris Adam's HO Scale New Haven Valley Branch
After we left Jim’s we headed for the coast and Chris Adam’s New Haven Valley Line in Old Saybrook. After Bernie managed to almost get us trapped by a 53-foot tractor trailer behind a mini-mart (he was hungry and wanted to stop for chips....) we arrived in Old Saybrook. 
Despite the chips, Bernie and Stic complained about being hungry, so we went to a sandwich shop in Old Saybrook and Bernie ate a five-pound Cuban sandwich (constantly commenting about how big it was as he continued devouring the thing). 
We then headed over to Chris’, but not before we met his  next door neighbor (Stic went to the wrong house…). When we got to the correct door Chris immediately reminded us that pizza was on the way. For the record, Chris had told us about the pizza, and though Bernie and Stic got the same email it was somehow my fault they chose to eat sandwiches instead of waiting 30 minutes to have some pizza. 
We had a great time meeting Chris’ operating crew, and enjoyed running his layout. He’s just getting started on scenery, but the scenes that are finished (including Old Saybook proper, above) are excellent. I look forward to returning – if Chris will let us back in. Apparently, there’s still leftover pizza. I blame Bernie. 
We left Old Saybrook and headed to Springfield and arrived at the hotel just in the nick of time to avoid turning into pumpkins at midnight. We then retired for the evening. 
Saturday was taken up at the train show. I bought some things – luckily most of what I bought was pre-order (including a Bethlehem Car Works upcoming model of the CN Café Car – the one car needed to fill out the Ambassador consist!) so I didn’t have to figure out how to take a bunch of stuff back on the airplane! Saturday night dinner was in an old parlor car alongside the Palmer, Mass., former CV and Boston & Albany station. 
Stop #3: Jason Fontaine's Southern New England Railroad
Sunday morning we headed to Charlton to visit the next two layouts. Although they represent two different approaches to the hobby, they are both outstanding. 
Now there's something you don't see everyday on a model railroad! 
Our first stop was to see Jason Fontaine’s Southern New England. Like my prototype freelance roadname, Jason’s railroad is based on the famed “Titanic Railroad” of New England rail lore. Jason’s layout is populated with wonderful craftsman kits, has some excellent photo backdrops, and two things I’ve never seen on a layout – a lift up lake (for access) and a stock car track. 
Bernie is wondering where the lake went. 
Presently he’s working on installing touch toggle switch motor controls (we got a rundown on how they work and how easy they are to install) and finishing up a staging yard (he expanded the railroad a few years ago) in order to start hosting operating sessions. 
We left Jason's a little later than we planned, meaning we had to postpone lunch and headed for Neil Schofield’s layout. Neil's layout accurately represents railroading in and around Richford and Newport Vermont circa 1980.
Stop #4: Stic made a new friend (for the record, so did I!). Left to right: Finn and Stic. 


Neil has truly and accurately captured the structures, scenery, and rolling stock. Although the layout is only about 1/3rd done compared with the final grand scheme, what is there is outstanding. 
After leaving Neil’s we stopped for a late lunch. I forgot what Bernie ordered, but he ate all of it, once again complaining about how it was too much food. For the record, Stic and I ate everything as well, we just didn't discuss it. 

Stop #5: Dick Ewell's Hoosac Valley

Monday morning we checked out of the hotel, and since our flight wasn’t until 1930 and it was a beautiful (cold, but sunny) day we headed west to visit Dick Elwell’s Hoosac Valley. I’ve always been a fan of Dick’s layout and it never fails to disappoint. I think we each took 100 photos...Dick is simply one of the nicest people I’ve ever met – in the hobby or otherwise – and we really appreciated him hosting us on relatively short notice.  I even ended up leaving Dick’s with something truly special – a beautifully painted and great-running Central Vermont 2-8-0. Gosh, I hope he doesn't look for it any time soon. 
We stopped at a UPS Store so I could ship my newest acquisition to myself. The guys working there recommended a place called Local Burger – best burgers and fries in town. They were right – the burgers were excellent (Bernie complained about big his meal was, and proceeded to eat all of it in record time…okay, he left 3 or 4 fries in the basket). We did consider splitting the “Captain Crunch Hot Dog” just to say we tried it but we weren’t that daring. 
We drew the line at the Captain Crunch deep-fried hotdog....
The flight home was uneventful (pilot showed up this time…) and I arrived home before 2200 last night tired, but having spent a wonderful weekend with some great friends.
Thanks to all of our wonderful hosts - Jim, Chris, Jason, Neil and Dick. Y'all are welcome to visit us any time!  

Friday, December 2, 2016

Inspiration and a clear path


While my approach to building, and rebuilding, my layout has given me a reputation of taking the “Ready, Fire, Aim!” approach, that’s not really accurate. 
Think things through before taking action, lest you find
yourself in an untenable situation.

I tend to approach designing layouts by defining a particular location in the basement where a specific scene will go, and then design and build that scene before moving to the next.  There is an inherent risk here – you can quickly end up with a finished layout where all the various segments don’t necessarily function together as a cohesive whole either operationally or visually.
The subject of much discussion on this blog, and in private emails with some of my friends, has centered on the section of the railroad where the White River Jct. yard had been located.  Although I’d made some modifications to the area it really wasn’t working (I won’t dwell on those issues here, as “whys” have been discussed ad nauseam in previous posts).
Prior to the inclusion of White River, the original plan layout design called for some form of Essex Junction, Vermont, certainly a CV signature scene, in this area. I ended building a version of Essex at the other end of the modeled railroad (Essex Junction v1.0?). This was subsequently removed when the neck of the peninsula was rearranged earlier this year). Through most of the summer and fall, while things have progressed well on the other end of the layout, I couldn’t really get the plan for Essex Jct. v2.0 to “gel.”  The solution, I thought, was to forego Essex and all its appeal entirely and instead include a “yard” (you know, since model railroads apparently have to include a “yard” if for no other reason to give the yardmaster something to do).
I worked diligently on designing this new yard over the course of several weeks starting back in the early spring.  Luckily, I realized what a mistake it was before committing to actually building the thing.  Prototype yards, even small ones, are massive.  Model railroad yards tend to be fairly imperfect depictions of the prototype - 90% of the time we basically fill a shelf with parallel tracks.  I was in real danger of simply repeating the issues I had with the White River yard in slightly modified form.  Unlike the other sections of the railroad, this would have forever looked like nothing more than a shelf full of parallel tracks at best, or at worst some sort of out-of-place appendage to the rest of the railroad.  It would do nothing to complete the picture.
So there this section of the layout sat, a sea of bare homasote awaiting some inspiration.
That inspiration arrived a few months ago in the form of some layout photos from Neil Schofield, showing his scene at Orleans, Vt. You can see one of them (taken by Neil and used with his kind permission) below.
Orleans, Vt., in HO scale as modeled by Neil Schofield.  N. Schofield photo, used with permission.
What inspiration could I draw for my transition era CV from a scene showing a street running in front of a couple of stores and clearly set in a different era?  Turns out, plenty of inspiration. Although there’s no denying the wonderful job Neil is doing creating his vision of upstate Vermont in the 1980s, what I found most inspiring was the sense of place they evoked and the way the prototype is driving the modeled railroad. 
A Google street view of the scene Neil has modeled.
This sent me back to the layout to determine if perhaps I gave up on Essex Junction too quickly, dismissing it as “too hard” to fit in my space.  I’ll likely do another blog post with more details on Essex Junction v2.0, but essentially the scene has two “sections” – the trainshed/station area, and a couple of blocks away a wye with several industries inside it and alongside it.  I know there’s an effective way to model the “wye” – simply leave off one leg of the thing.  After all, that’s exactly what I did with Essex when it was located on the other side of the basement.


Kurt Thompson works the Essex Junction switcher job in Essex Jct. v1.0. A workable track arrangement that captured the look of the prototype, it lacked room for the structures themselves so wouldn’t ever visually capture the look of the prototype.
The crews that operated "Essex 1.0" found it was an enjoyable job with the right blend of action and down time.  If I duplicated the basic approach to a "two-legged wye" in the new location for Essex I found I could include many of the buildings that had to be left out of Essex 1.0.
That's perhaps the biggest inspiration I got from Neil's photos. His railroad is firmly in context with the other elements that make the scene recognizable. I suppose he could have included a spur and yet another place for his crews to switch, but the resulting scene would have looked model railroad and not created the same sense of place.
Thanks Neil. I feel like I've gotten over a bad head cold!

Tuesday, August 11, 2015

The miniature world(s) of John Ott

On occasion I run across a model railroading blog or web site that's just so cool that I feel compelled to share it. 
The web site is John Ott's model railroading web site - it includes a number of sections devoted to his previous layouts, and his current effort (if you're a fan of H. P Lovecraft you're in for a big treat!)
What I admire about the layouts is not only the modeling chops John displays but how creative he is with both the themes and techniques. That model of the Salem, Mass station is alone worthy of close study! 
The presentation and design of the web site are also top-notch. 
I hope you enjoy exploring this site as much as I have. Pour yourself a beverage and click on the image of the home page below to start exploring this truly outstanding model railroad site: 

Sunday, May 3, 2015

Operating the Virginia Midland


Yesterday had a great time operating Steve King's Virginia Midland in Germantown, Md. 
For many years we've gently kidded Steve for the …uh, "lack" of VM painted locomotives. In fact he ran the railroad for many years with a fleet of undecorated locos, which he jokingly refers to as the "Appalachian Stealth" scheme. 
There is one VM-painted Appalachian Lines locomotive on the roster, shown here. 
Over the last few months Steve has gotten 46 locomotives painted in the VM's own olive green scheme. 
There's even a little bit of scenery on the railroad. 
I was too busy having a great time running trains to do a lot of photo, but I did manage to get a photo in one of the staging yards showing the original VM "paint scheme" (on the left), the Appalachian Lines unit, and the two VM units in the original VM second generation scheme. 
Steve operates the railroad using Timetable & Train Order, which he is an expert at. 
A great time with good friends. 

Thursday, May 1, 2014

White Space and the Model Railroader


This is clearly a working business – anyone can open a bunch of packages of “bits,” paint them and scatter them about the countryside. Purposeful placement of details is much, much more difficult. I especially like the half barrel planters – a very common site at many industries both in the 1950s and today. When was the last time you saw those modeled?
Negative or “White Space” is a concept familiar to graphic designers and fine artists. I think it’s a concept that more model railroaders should grasp.
As I continue building, and rebuilding, my layout I’m finding that less is usually more. The whole idea of not cramming every available square inch with track, structures, and the like is foreign to many modelers. But as I do the final planning or get the initial scenery completed on an “open country” scene I’m finding the less I include the more impactful the finished scene will be.
Two New England modelers, Mike Confalone (Allagash) and Jim DuFour (B&M Cheshire Branch) are prime examples of how state-of-the-art New England modelers are approaching modeling our favorite region and railroads in 2014.
Florence, Vt., on Randy Laframboise’s HO scale Rutland.
Another, perhaps less well known example is Randy Laframboise’s Rutland. Randy, along with his friend Mike Sparks are, it’s safe to say, experts on modeling not only the Rutland but Vermont.
If model railroading can be an art form (and I think it can be) then we need to approach it like an artist. And one thing an artist must have is a respect for his or her subject. Some, or perhaps a lot of this, is about modeling “home.” Mike, Jim, Randy, and I all either lived in, or live in New England. And there’s some things that are very special to each of us about that region, it's history, and railroads that compel us to recreate it in miniature.
This isn’t fantasy modeling. By that I mean you won’t find dozens of overly compressed structures, most sporting an assortment of unusual (and often implausible) architectural elements scattered throughout the countryside.
But it’s not “rivet counting” either.
The buildings are, as a rule straightforward, purposeful, and close to scale size. The familiarity and respect for the subject matter extends beyond the trains to the buildings, fields, farms, trees, fencelines, and a host of other details.
Make no mistake about it. The trains and structures are, by their very nature, the stars of the show. But they are incorporated into the scene with breathing room around them.
You focus on one building in its natural habitat, and, as your eye scans the landscape some “negative space” - a stand of trees, or a field, or even a country lane – gives the eyes, and brain, some respite before you focus on the next “star.” All the while through this agrarian landscape you might catch a glimpse of a train.   
Randy was kind enough to allow me to share a couple of photos to illustrate this post. These photos show the Florence, Vt., section of his layout.  He estimates the distance between the street on the left and creamery building on the right is about five feet. When was the last time you saw a layout that had that much “negative” space? It is accurate to the prototype, as he measured the distance.  

Monday, March 26, 2012

John Paganoni's East New London roundhouse


Believe it or not, there are actually TWO Central Vermont Railway modelers in Manassas, Va., me, and my good friend John Paganoni. 

John is well known in CV modeling circles - although he hasn't built a huge number of models, the ones he has completed are universally excellent - and his latest, this roundhouse, is no exception. 

The model is completely scratchbuilt, and accurately reflects the appearance of the structure in John's 1950s era. 
Close study will reveal this is a building with history - the older arched stalls on the left side date to the pre-Civil War era (by John's era this section of the building had been converted to a shop area since the doors were too small for the power in use on the line at the time), the middle section - with the larger doors and longer stalls - built as six stalls but four of them burned down. And finally, the "new house" - the wooden section to the right with the larger windows and doors. 

This was the last major component of the New London facilities John needed to complete - he's already built the coaling tower, water tank, and turntable.  

Here's John's description of the project:
            
"Marty: 
The New London roundhouse project is about complete except for some interior 
detail in the newest section (4 stall section)that I will do before putting 
the structure in place. The machine shop will be fully detailed inside, and 
I have already completed the machines and floor as an insert when I put the 
structure in place. Lighting is already installed. 

There are a lot of things I would have liked to come out better, but I am 
tiring of this project (it has taken far more time than I thought it would) 
and want to get on with bench work. 

John" 

Monday, December 5, 2011

Garden State Road Trip


Naturally I had to kick off the trip report with some CV RS-11s!

St Johnsbury, Vt., on Mike McNamara's HO railroad. 
Just back from an enjoyable weekend tour through the New Jersey countryside with Bernie Kempinski.  We started out early Saturday morning, heading north towards the Garden State. After paying homage to the governors of both Maryland and Delaware (it takes about 15 minutes and $9 to get through Delaware – Maryland is almost as expensive but at least you’re in the state longer) we arrived at Mike McNamara’s “Northeast Kingdom” HO layout.  Mike models the railroads in an around St. Johnsbury, Vt., in 1980.  Lots of colorful engines and freight cars.  Mike was a great host and we had a good time looking at his layout, taking some pictures, and shooting some videos of trains in action. 


After lunch – at a local pizza joint, where surprisingly no one was named “Tony” (for the record, we did ask . . .) we headed north.  Lola, the GPS in my wife’s Honda Accord, decided to take us on a circular tour through downtown Princeton – but at least we saw a horse in the middle of the road. 

When we arrived in Newton we checked into the hotel and Tony Koester picked us up and took us on a tour through the northern New Jersey countryside.  Tony pointed out all the old railroad archaeological artifacts and abandoned right-of-way.  It was very interesting, but difficult to see in the dark. 

From L to R: Bernie, Perry Squier, and Tony Koester. 
The St. Mary's Penn., scene on Perry's P&S is a great example
of prototype modeling. 
We stopped first at Perry Squier’s house.  After meeting “Richie” – a rather large (and hungry) horse, we went to the basement to look at Perry’s Pittsburg & Shawmut.  Set in 1923 this is a very nicely done coal-hauling railroad in the mountains of Pennsylvania.  I especially liked Perry’s signature scene of St. Mary’s Penn.  I also think Perry has done a wonderful job modeling what many consider the “Golden Age” of railroading – the era just before the “super power steam” of the early 1920s. 

I really liked how Perry's layout fit the space. 
From Perry’s we headed to Ted Pamprin’s Chesapeake & Ohio.  Set deep in the New River Gorge in West Virginia I especially wanted to see for myself how Ted’s leafless trees look in person when covering a large mountainside.  I’m happy to report they look just fine. Ted had some great tips on landform modeling, including using leveling sand, secured with this thin adhesive, for basic ground cover.  Neat layout – his Thurmond, W.V. scene is right on – and looks great. 

Ted Pamprin's HO Chesapeake & Ohio New River Sub. 
Ted's Supertree-filled mountainsides look great!
A look at Thurmond, W. Va. 
After a very nice dinner (although the wait was so long Bernie was able to do an impromptu version of his USMRR clinic on his iPad while we waited in the bar!) we headed over to Tony’s for an tour/indoctrination on his Nickel Plate.  This is a BIG layout – having edited the article on the track plan back in my MR days this was the first time I’d seen the layout basically in place (I visited Tony a few years ago before he had finished most of the basic infrastructure.  The NKP Clover Leaf is a big project – very impressive. I’d classify it as “industrial strength” model railroading – everything  – locomotives, throttles, freight cars, wheelsets, etc . . . has to be done in bulk.  It’s really quite a project, and I admire Tony for his dedication to bring his favorite railroad to life in his basement, and appreciate the chance to operate on it - I had a great time.   

Go faster, Bernie, this is supposed to
be a "Fast Freight" route!
Frankfort Yard on Tony's NKP.
Yes, this yard is 60 feet long!


While we completely enjoyed the operating session, I, for one, left secure in the knowledge that style of layout was just not right – for me, anyway.  Seeing Mike’s, Perry’s, and Ted’s layouts confirmed, to me at least, that I really prefer the single deck layout arranged with a “panoramic” view over the multi-deck, long mainline at the expense of all else approach.  I felt completely vindicated in my decision to remove the upper deck from my own railroad.  I’m also continually tempted by an earlier era than I presently model – then I realize how much inventory I have on hand and think I should stick with the 1940s/50s era. 

Overall, a great trip that left us motivated to work on our own railroads. Now that I have a few weeks at home, the weather is cold outside, the days are short, and it’s time to get something done on the Central Vermont!