

 |
| The church in the approximate location on top of the hillside. I'll add a small fenced grave yard alongside the church when the building is installed in place. |
I've just about completed another building, in this case a small wood frame church, for Stafford Mills. This is the classic Campbell Scale Models Community Church.

I don't know when this kit was introduced but I remember seeing it when I was a kid on layouts and in advertisements. I picked this up for a song at a Timonium show a few years ago. Frankly, it remains one of the few church kits on the market. It's really too small to a be represent a small town New England church, but it certainly looks like a church. I shingled the overhang above the door but as you can see from the photos I haven't installed it yet. I'm thinking leaving it off may help it look a little more like some of the New England churches I'm using for inspiration.
I built it pretty much according to the instructions - even using the stained glass windows which are essentially images of stained glass on 35mm film strips. I've built a number of these kits over the years (this is the first time I built the church) and found the text in the instructions is somewhat lacking. I tend to read through the steps once or twice to get a feel for the approximate order and then use the exploded diagram(s) to actually get the pieces in the right place!

I found the wood shingles in the kit were kind of stuck together. I've also tried to use the Campbell shingles in the past and found they were almost impossible to straighten and get to lay flat so I pitched them and substituted Northeastern Scale Models pre made shingled roofs instead.

The roof does need just a little bit of weathering to tone it down a bit.
I think there's room for one more structure along this street in Stafford Mills, then I can proceed with planting the buildings, finishing the road surface, and getting the scenic textures in place.

Nothing particularly noteworthy about the assembly process. I did note that all of the window openings (and there's a LOT of them!) are cut just slightly undersize - meaning I had to enlarge them just a little to get the plastic windows to fit. Also, the stone foundations on a lot of these BEST kits seem to be a just a little undersized - leaving an exaggerated amount of overhang between the wood structure and the stone foundation. In this case not a big deal and an issue that can be disguised with foundation plantings. I did a pair of Woodland Scenics carriage lamps on both sides of the front door. Other than that this was a real basic build.

It's shown in the drone shot above in the approximate location on the Stafford Mills town area. I'm thinking on one or two more buildings for the upper street - perhaps a church or maybe a small town garage? Another option is a house or perhaps a cafe????
On the other hand I want this to look like a New England country lane, not a downtown Main Street!

One additional detail needed before this is planted in place - a sign:

Extra points to anyone who gets the reference ...

Compare the photo above with the one below - note how the trees help push the brick mill further into the distance and frame the building.

But before I left I did spend a few minutes Thursday evening playing around with the forced perspective scene in Stafford Mills. Something was bugging me about it, but I couldn't quite get a handle on what it was.
I liked how the HO scale store and N scale brick factory looked - the forced perspective trick seemed to be working well - but the mill looked just a little too close to the store.
I added a couple of vehicles and they didn't seem to all that effective at making the factory seem further away. I planned to replace the shorter trees (each tree about 3"-5" tall in the strip of land between the road and mill stream in front of the factory. But first I dug out some larger (7"-9" tall) "full size" trees and placed them along the road. I started with two trees to the right side of the scene. Then, remembering I'd heard along the way that an odd number of trees always looked better than an even number I added a third tree to the grouping spaced a little further to the left. I think the fact they're taller than the top of the tower on the brick mill helps make the brick structure seem further away. And I like the way the trees "frame" the tower on the building.
Next step will be to add some leaf texture - but not a lot - the idea is these trees have gotten a gust a wind that shed most of their leaves - and then "plant" them in place.
Speaking of trees, I also received a shipment of MBR trees. These are true foreground models. I saw them used with great effect on Tom Johnson's Cass County Railroad and ordered a few specifically to help frame some scenes in town. They really are quite nice. That's one to the left in the picture below.

 |
| This aerial view shows the basic layout of the streets in Stafford Mills |
The first step was cut away the area for the country store. Since I'd installed the store on its own rectangular base this was simply a matter of determining the stores final position (It's in a slightly different spot than in the previous blog post), marking the outline of the base, and sawing out the scenery.
Although I planned to use sheet styrene for the roads, I didn't have any larger sheets of plastic so I opted to use cardboard instead. The first step was to take the paper templates (see previous blog post) and cut them apart to arrange them on the large sheet of cardboard in order to minimize wasting any material. I ended up with four sections.
 |
| I used a saw to create a smooth path for the roads. |
I did narrow the roads as they got closer to the wall.
 |
| On the left side the road climbs to a slight crest before heading down towards the rear. |
 |
| On the right side the road will disappear into the trees. |


 |
| This is the approximate position of the Magoun Store. |
I could give you some long explanation that I was concerned that two or three operational locations on the layout named "Sheldon something" - would confuse operators. Or how I wanted to include some elements that weren't part of the prototype scene so I couldn't say I was "modeling Sheldon Springs."
The real explanation is pretty straightforward: "Stafford Mills" is a town name I dreamt up back in high school while trying to look like I was paying attention in Father Brisette's chemistry class and I kind of like it... (the town name, not chemistry!)
For some details on how Stafford Mills got to its current state you can look at this blog post. You can also check out the two videos on "Forced Perspective" on my "CVSNE" YouTube channel.
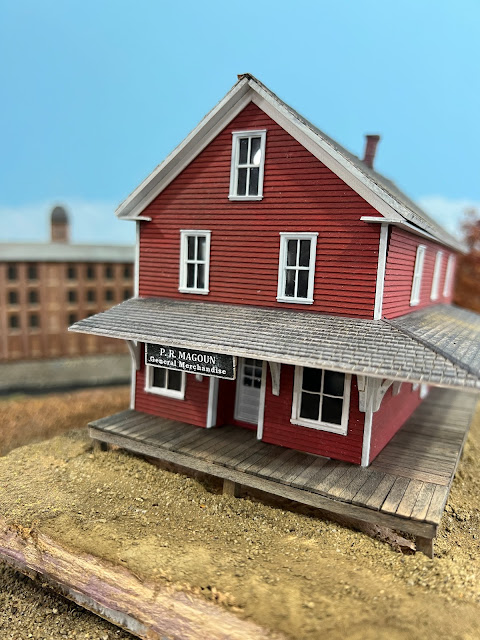
The impetus to work on this section of the layout was digging out the half (okay, maybe 3/4!) finished BEST Trains Trussell store kit. Long time blog followers will recall I planned to include this building in Williams Creek on my former Roxbury Sub layout. I got the building mounted to a Gatorboard base, stained the roof, and added a couple of Woodland Scenics Easy Lighting LEDs. I also created a poor man's interior using photos of General Store interiors I found online.
I made a sign for the front of the store - christening it "P. R. Magoun's General Merchandise" - named for a former NMRA president and (more to the point) fellow Navy veteran and long time friend and strong supporter of the SNE. Friends of the SNE get buildings named after them - enemies of the SNE get their names on a plaque in the SNE HQ men's room ....(!)
The first step in getting the store in place was to find a spot that it looked right. This was a little tricky with the N scale brick mill in the background. In the end I settled on the spot shown in the photo above.
 |
| The N scale brick mill in the background of the scene. |
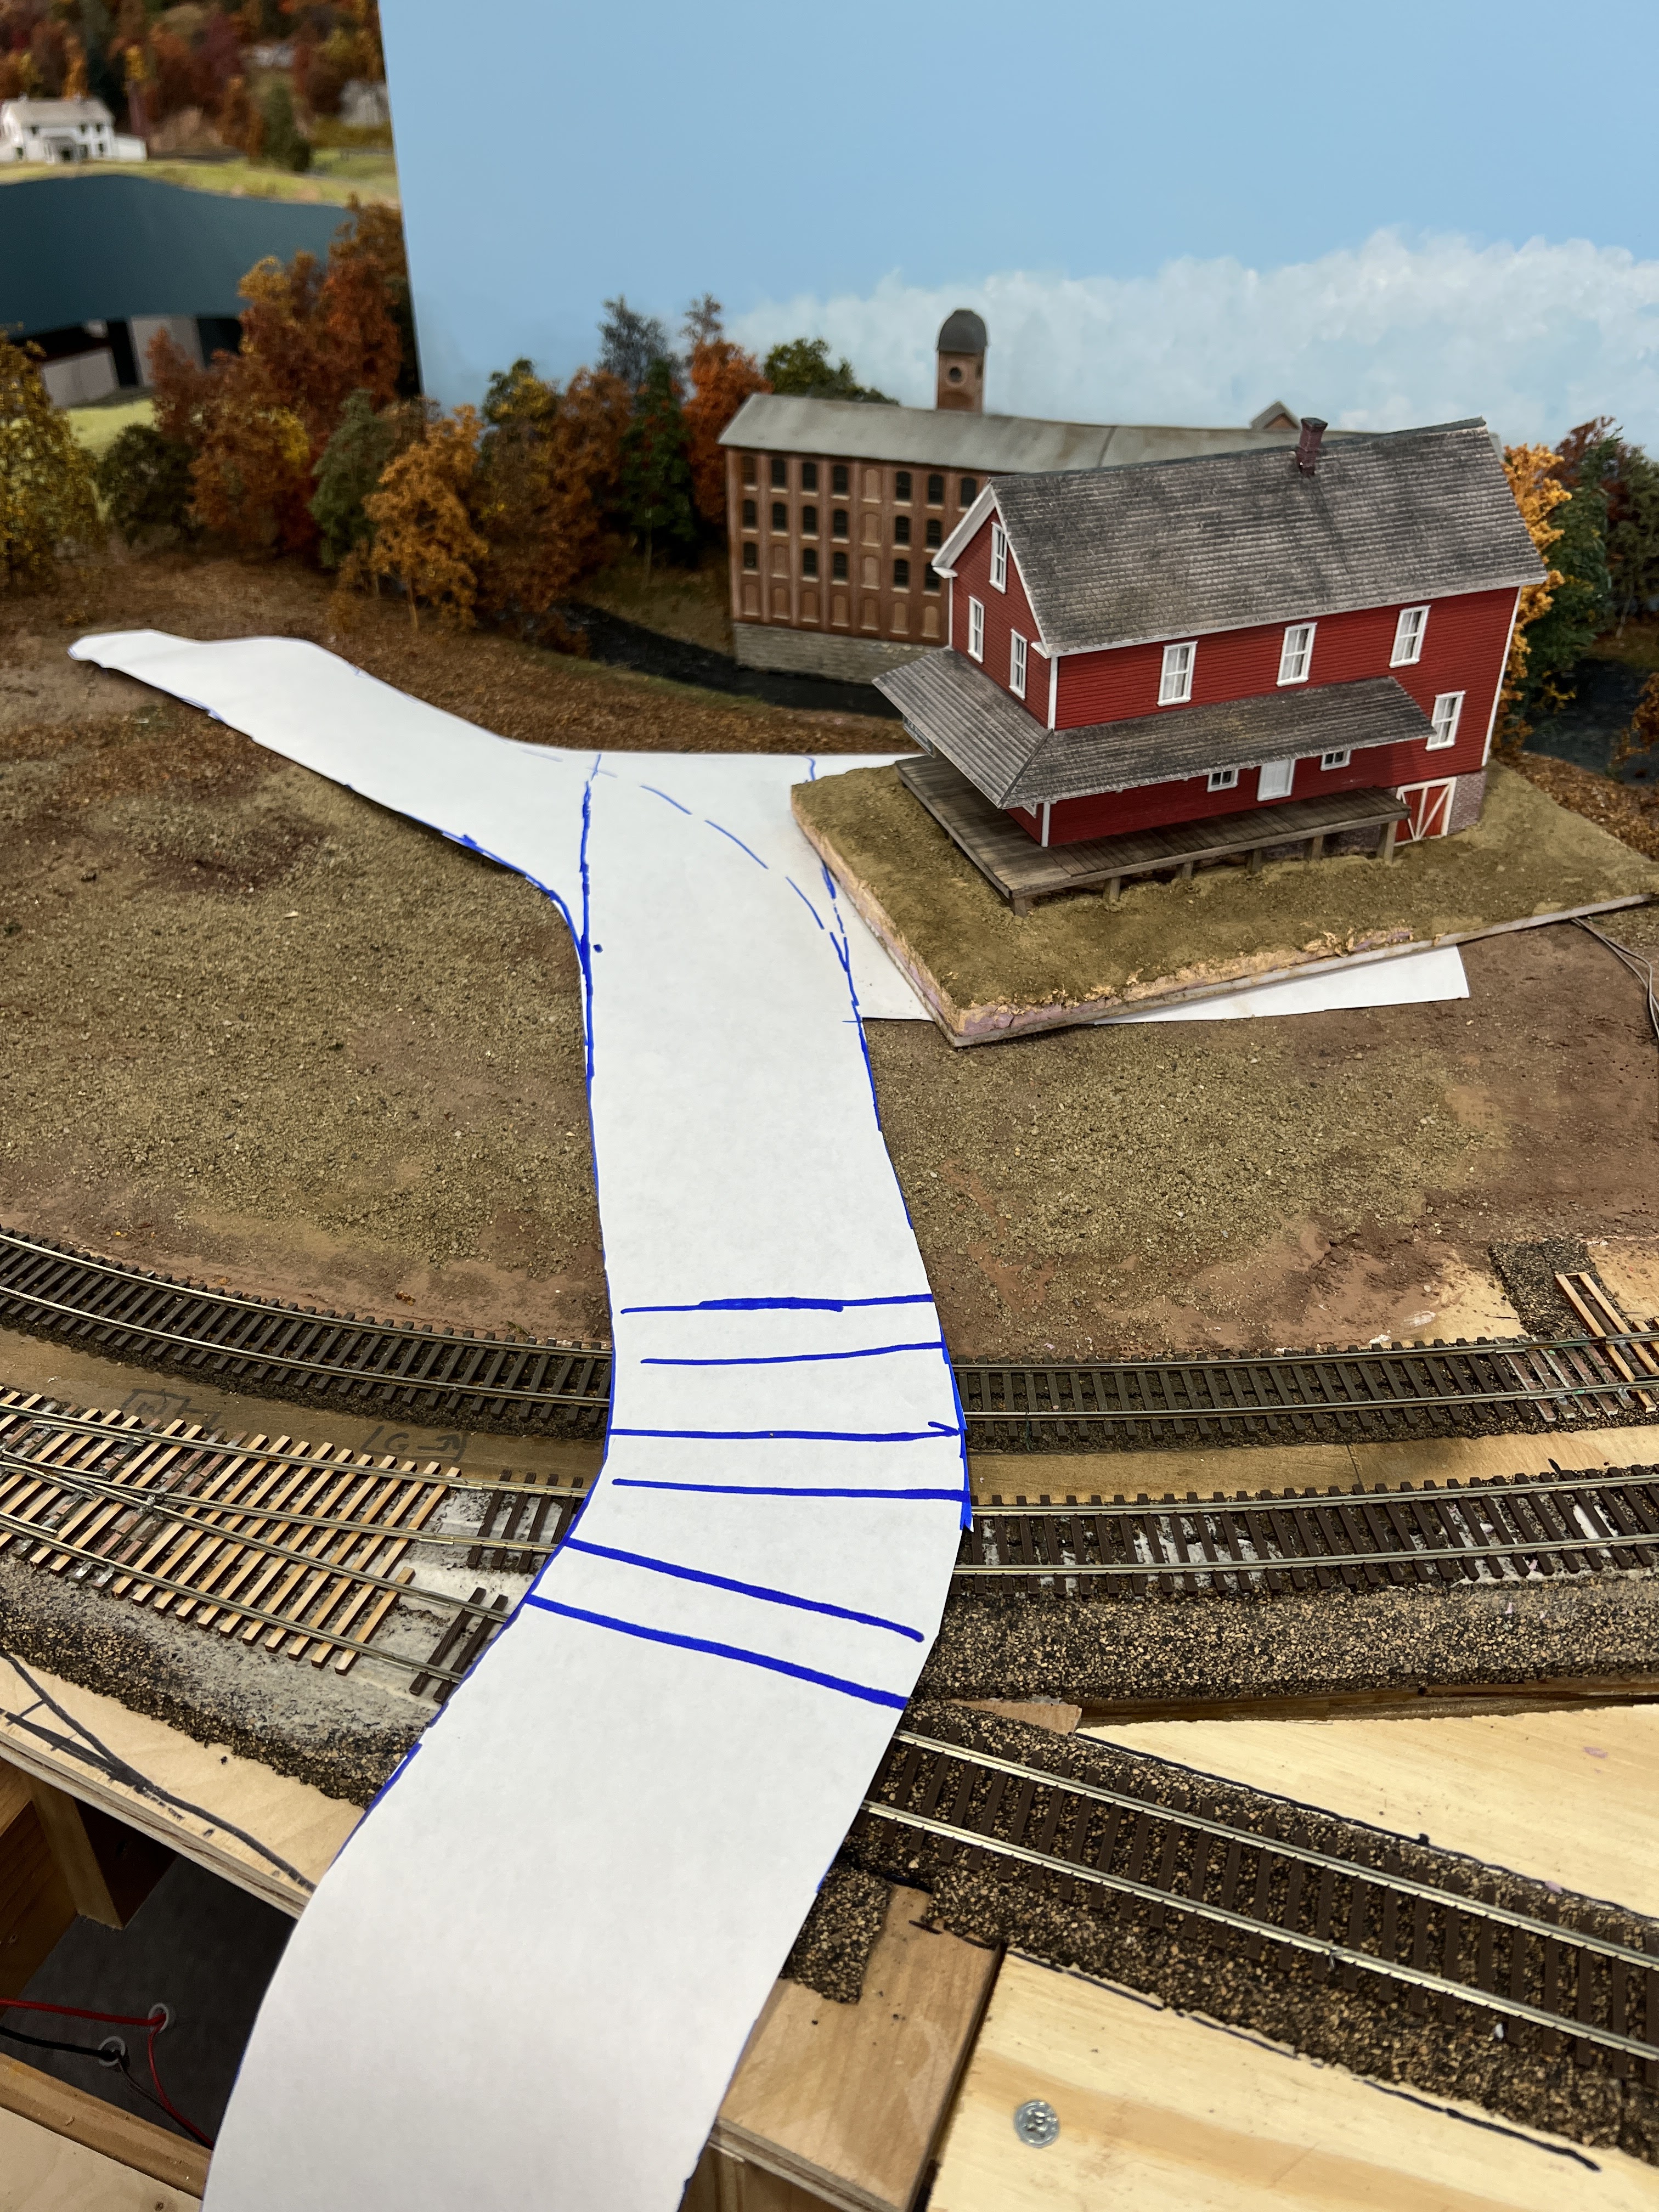
I also wanted to add a road in front of the store that would ultimately run towards the paper mill complex and tie these (and some future elements) of the scene together.
I started by removing a lot of the trees that I'd installed along the front of the background mill river. Then I carefully placed a large sheet of paper and marked the approximate location of one side of the road. Then I removed the paper and cut out the roads themselves.

I'll use the paper road as a template to cut the road base itself out of sheet styrene. But that's for the next blog post.
The first image is a horribly unrealistic angle "helicopter view" to give some context to how all these pieces fit together on the layout. It's an overview of the area between Williams Creek (you can see Thresher's Mill to the left of the photo) and Stafford Mills.

 |
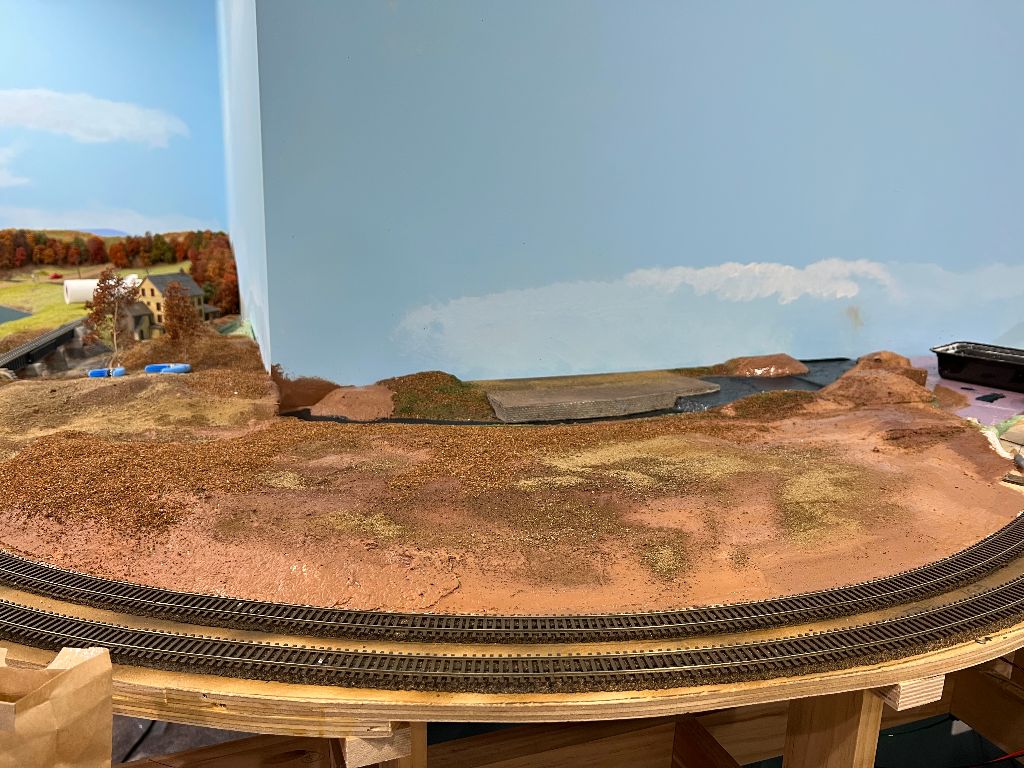
| The fact that even the "first coat" of the backdrop painting stops here is a clue that the Stafford Mills area of the layout is unresolved. |
In this case I didn't have to remove anything so this wasn't so much a "rework" as it was an addition or an enhancement. I could even make the argument this didn't add any additional track to the layout since I'd removed a turnout and a siding from the junction area as part of the rework of that trackage I described a few months ago.
I was out of Micro Engineering no. 6 code 70 turnouts - as is everyone else. So I decided to handlay the necessary turnout. Although this added a couple of evenings to the project I'm glad I did - the turnout works perfectly, and cars and locomotives (even brass steam locomotives!) pass through both routes without so much as a click! I'm not wishing any additional work on myself, but if any of the Micro Engineering turnouts on the rest of the railroad fail or prove troublesome I'm simply going to replace them with handlaid ones.
The buildings shown in the photos are strictly placeholders and may, or may not, end up in these locations permanently. I kind of like the idea of a station in between the mill lead and mainline, so that will likely stay (I may build a different station for the spot. The one shown is a model of the Richmond, Vermont station - although that perhaps the closest to a "standard" CV small depot design as the railroad had. But there are a couple of Grand Trunk (NEL) stations I've always liked and may well scratchbuild one of those for this spot.

The freighthouse is a Walthers cheapo model that I painted and lettered in "close enough" CV colors. It's not bad .... but the weakest point is the platform - despite my best efforts it's still too bulky. I should have replaced it with a scratchbuilt wood one. I do have a BEST Trains kit that may work better in this spot, if I decide to stick with the freight house.
The red rectangular building is simply there to fill space and see how a larger industry would look in that spot. I'm not convinced it's going to work there - especially with the freight house. The answer is looking like (1) freight house and something that isn't a large building - a coal yard for example or team track OR (2) a larger building industry with no freight house. Since there's going to be plenty of large buildings in the mill complex I'm leaning towards option #1.

My ultimate plan for the area with inside the mainline curve (with the yellow building) is to ultimately have a mill river with one or two larger wooden mill structures over a mill stream, complete with mill falls, etc. ... But that sounds like it may take months/years to get completed. This may well simply end up as some open fields and a tree line "for now" to get a large portion of the landscape to look finished with the idea I could revisit it at some future point.