

Showing posts with label Williams Creek. Show all posts
Showing posts with label Williams Creek. Show all posts
Wednesday, April 5, 2023
Wednesday, May 11, 2022

Sunday, May 1, 2022
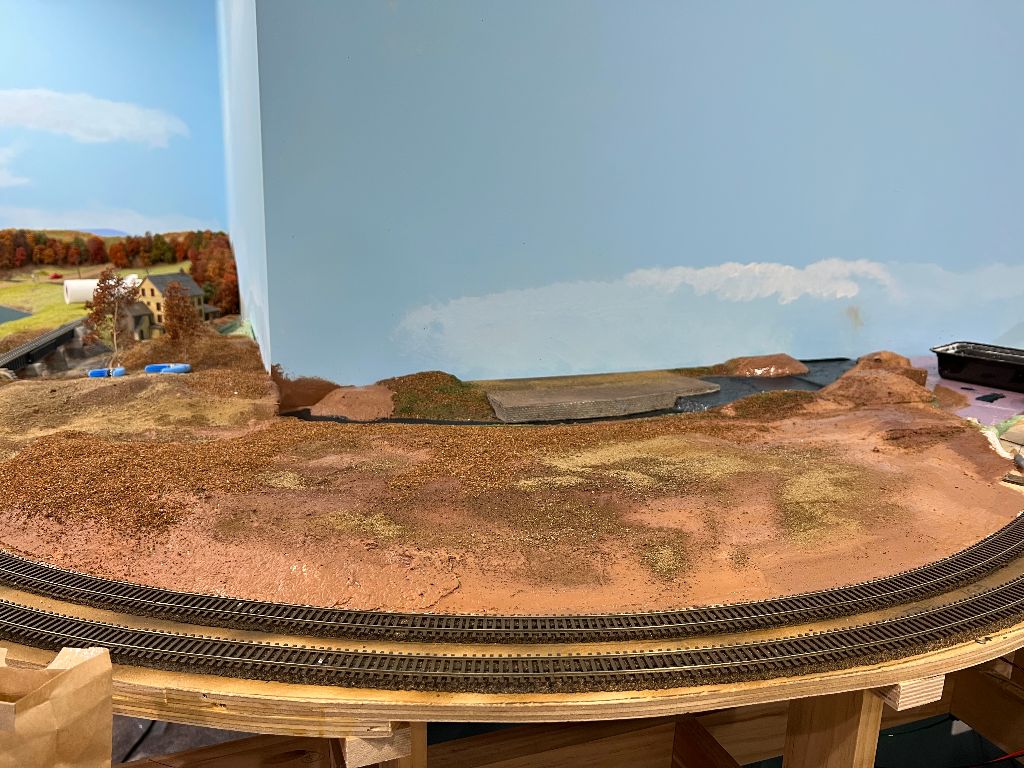
Blending Williams Creek and Threshers Mill - More Progress

Planted the trees on the hillside behind the Williams Creek trestle. These represent the last of the trees my dad and I salvaged from the last layout - hope he's pleased with how this looks! I tried to gradually increase the height of the trees from the background to the foreground (left to right in the photo above). I think it adds to the effect of distance. I also cleaned off the water using warm water and a makeup sponge. I was shocked at how dirty the water was! But the stream itself looks better than it has in a long time.Still need to do some additional textures on the bank opposite the mill building proper - and to add the details to the front of the mill building.


Tuesday, April 26, 2022
Blending Williams Creek II
The first image is a horribly unrealistic angle "helicopter view" to give some context to how all these pieces fit together on the layout. It's an overview of the area between Williams Creek (you can see Thresher's Mill to the left of the photo) and Stafford Mills.

I've added the first coat of Minwax Polycrylic - my go to water surface - to the blended river in Williams Creek. This will be followed by at least 3-4 more coats throughout the day. Hopefully this area will be ready for final textures and trees shortly.
Monday, January 27, 2020
Quick (very quick) Progress Report
 I've been spending time trying to locate the structures I do have into logical places on the railroad. Getting water served mills located correctly (so they look right, and fit the layout!) can be a considerable challenge. My admiration for Bob Van Gelder and Dick Elwell's abilities to do this on their railroads has increased ten fold as I try to do the same with mixed success.
 Short work session yesterday led to determining the logical place to locate Ben Thresher's mill. I like how the model came out, and want to use it on the railroad. I've plopped it down in a number of locations over the past few months, but in the end the most logical place to locate it was between the track and backdrop by the Williams Creek Bridge. Not only does it seem to fit here, it will also give a different look to the scene which has been photographed and featured perhaps a little too much!
 |
Williams Creek, stripped of its landform, trees,
and even some of the riverbed.
|
 After determining the best position to place the building, the footprint served as a template to trim a piece of foamboard to fill the somewhat odd-shaped site of the building.
 The piece of vertical black foamboard is a stand in for the dam. It needs some tweaking but I think the final location looks pretty good. I've included a test shot to show how the various elements will (hopefully) work together.
Monday, July 29, 2019
Replace a steel bridge with a wood trestle?
One of the most familiar scenes on my old layout was the Williams Creek* bridge. It was featured on the blog header several times. I also blogged about it on many occasions, including this post, which illustrates how it was actually in three locations (and two heights) on the layout. I also wrote a whole series of posts showing how I built and moved (and then moved yet again) the thing. So I've gotten lots of mileage out of it.
 The Williams Creek bridge was built on it's own benchwork, meaning it was fairly easy to save when the layout was dismantled. In fact, it's the only piece of that layout I saved. As you can in the photo at right, it's been installed on the Richford Branch layout. It's just a little too long for the spot it's sitting in, but it does fit, although there's going to have to be some extensive and tricky blending of the river into the wall to fill a triangular-shaped gap. But it could be done. The question is should it.
What the Richford Branch had plenty of is wood trestles - right up to the point it was abandoned. What my layout has none of at this point are wood trestles. And precious few places where they would fit. However, one location that would be ideal for a trestle (or two) and some pastureland is the section where the Williams Creek bridge is currently installed. But as much as the Williams Creek Bridge doesn't really "fit" on the Richford Branch, a scene like the one in the George Corey photo below would truly capture the essence of the prototype:

Although I'm making every effort to avoid the "do-loops" which produced nothing but lack of progress on the previous layout, I think this one change may be appropriate. I can always keep the Williams Creek Bridge as a photo diorama.
*The name Williams Creek is not the prototype name for this bridge - it's named in honor of my college roommate and best friend, Brigadier General Zeb Williams, USA, Ret.
Monday, October 26, 2015
XTRA 471

I've managed to ID most of them - but believe I may have misidentified the boxcar in the second photo partially obscured by the bush. At first look I saw the Roman style "L &" (all that's readable in the photo, though there is clearly another single letter after the "&") and figured this might be an Louisville & Nashville car, perhaps one of the L&N's rebuilt cars with "reverse" Murphy ends. This seemed entirely logical. L&N didn't have a huge boxcar fleet, but it was a fairly substantial one, and entirely likely to show up in a wayfreight in south-central New England.

The true freight car experts already have the answer of course. And, after doing a little more digging this weekend I'm now of the opinion this is a much more rare (considering sheer numbers) Louisiana & Arkansas 1932 ARA boxcar. As built these cars had a block, almost Gothic style lettering with the roadname spelled out above the reporting marks.
This one doesn't have the roadname and the lettering is clearly Roman. Which means this is the second scheme these cars wore, with the "L&A" and car number to the left of the door and a Kansas City Southern herald to the right of the door.
I know Atlas makes a 1932 ARA boxcar - and even made one in this scheme.
Guess who can't find one of those anywhere??
Wednesday, August 5, 2015

Sunday, July 5, 2015
July 5 - Progress Report
 |
| Progress on the hay barn at Griffiths Farm. I might add a farmhouse "up the road aways…." But I finally got the lower level windows, doors, and trim in place. And planted the wire tree. |
Even without the MMR certificates I'm so close to getting some sections of this layout "finished" that I'm determined to do just that.
The barn scene I've shown several times was one of those "90%" done projects - the doors and lower windows weren't installed, and the tree adjacent to the barn was simply plopped into place.
Friday morning was spent finishing up the structure itself - I even "dug" a hole and planted the tree.
The Williams Creek area has progressed with a creamery building (a Branchline kit with a scratch built boiler house addition). But the scene needs something else.
I can't think of anything more New England than a country store. I'd had the sub walls for a BEST Trains country store (The Trussel Store) on the layout for more than a year. Finally this weekend between other obligations I got the clapboard walls painted and painted and glazed the windows.
Progress!
 |
| Walls with windows for the country store. The mullions on one of the large laser-cut large store front windows simply wasn't there when I removed the pieces from the wood sheet. Need to repair it. |
Not entirely sure if it will be placed in front of the mainline in Wiliams Creek or between the track and the backdrop - either position will require "adjusting" the scenery a little but I think it will be a nice addition to the scene. I'm going to hold off selecting exactly where to place it until it's assembled. See the photo below for the two possible locations.

I plan on adding a simple interior and some lighting to this structure - partially for the MMR thing (you get extra scenery points for "lighting") but mostly because I think it will be neat to have a chance to do a "nighttime" shot or two.
 |
| A light construction project for this week. I've stripped most of the structures from Waterbury in preparation for a short work session Tuesday evening. We're going to re-do the fascia around the lobe end of the peninsula (above) to make it a smooth curve and straighten out of a reverse curve in the fascia to add a few inches to the scene at Waterbury (below). |

A little bit of major construction is also on the agenda for this week - luckily it won't impact the upcoming op session (actually should be finished well before then). I've never been pleased with the fascia on the lobe end of the peninsula. Frankly it looked awful. John Paganoni is coming by Tuesday evening to help resolve the issue with the curved portion of the peninsula. At the same time I'm going to straighten out a weird "reverse" curve in the present fascia - essentially making the fascia straight and adding 6" or so to the front of the layout. I'll save what I'm planning to use that additional depth until another post.
Wednesday, June 3, 2015

Thursday, June 26, 2014
The many locales of Williams Creek

The expense and time building a helix, second level, and a laying a lot more track. The wasted effort of doing, and then tearing out backdrops, scenery and the like.
It seems kind of strange that I kept one scene - the Williams Creek crossing, intact through all these changes. The labels show how this section of the layout, about 20" x 48" overall, started on the upper level, then moved straight down about 15" when the layout was single-decked. Finally, the addition of the longer siding at Randolph meant the bridge came out. As I related in a series of posts back in March and April, the bridge scene sat on a shelf in the storage room and more than once almost went to the curb. In the end Williams Creek has come to rest in his present location and there are no plans to move it anytime soon.
I really need to accept that the track plan, area for buildings, scenery, etc... will never be ideal. Instead I have to move forward and finish some other portion of the railroad. I'm planning for that to be Waterbury - but you never know.
Stay tuned.
Friday, May 16, 2014
An M-3-a on a bridge

CV M-3-a 450 heads a short way freight across Williams Creek.
Wednesday, May 14, 2014

Tuesday, May 13, 2014
Re-Locating Williams Creek: 9
 |
| The scenery is still not finished, but this shot shows an eye-level view of the creamery road heading into the backdrop. The photo of the old country road seems to blend well. |
I tried painting a road onto the backdrop and found it less than satisfying. In fact, I've come to the conclusion that I stink at painting manmade objects like buildings, trains, ships, boats, and yes, even roads. But the creamery road runs directly into the backdrop so I had to find a way to lessen the shock of the transition from modeled scene to 2-dimensional backdrop.
Bernie Kempinski has had some success at incorporating photos of structures (barns, houses, and the like) into painted backdrops. In fact we cut out some farm houses and barns and pasted them to the upper deck backdrop back when the layout was double deck. The buildings can be readily blended into the scene by painting a tree or bush around the base or even partially obscuring the building with a large tree or the like.
I decided the concept a little further and see if I could use a photo to transition the road from the 3D scenery to the backdrop. Success rides on having the right photo. I took this photo up in Maryland last autumn.
 |
| The prototype photo. Taken in Maryland last October. |
I reduced the photo to the point where the road just about matched the width of the modeled road, and then printed it out on ordinary color printed paper. I trimmed the sky and some of the foreground out of the print and slid the picture into place.
 |
| Sliding the printed photo into place. |
Friday, May 9, 2014
Relocating Williams Creek: 8
There was nothing worth watching on TV so I spent another hour in the basement planting the background trees.

Relocating Williams Creek: 7
 When I got home from work tonight I added some additional texture to the foreground hills on the backdrop. I included a fair amount of rust/brown trees in the foreground hill since I have lots of Supertrees made up that are in that color "family." It may seem like the background hills are a little too tall, and that the lack of detail at the joint between the vertical backdrop and horizontal surface of the layout may seem distracting, but remember those things will be obscured once the trees are planted.
 Wednesday, May 7, 2014
Re-Locating Williams Creek: 6
In progress look at the backdrop with some of the tree textures added. To prevent a real circus look, even on a fall backdrop like mine the green trees should dominant the oranges, reds, and yellows. I still need to work on the foreground trunks and do something with the road in this view.

Re-Locating Williams Creek: 5
A quick update on progress on the Williams Creek scene.
 |
Current appearance of the Williams Creek scene, including my initial attempt at painting some distant mountains on the backdrop.
|
 A previous
post showed what I originally planned to include in this area of the layout (see photo at right). Comparing the two images shows how things have evolved. Inspired by the "less is more" principle espoused by some other modelers, I eliminated the planned station and country store from the scene. Also, the road running up the hill was just a little too steep so I located it between the creamery and bridge instead. In the place of the road and store the pasture (which was too small to look correct) will be expanded. The earlier view shows a stub-ended siding behind the station. It's been replaced with a double-ended siding that will serve the Whiting Creamery (based on a prototype in Waterbury.) I recall reading somewhere (perhaps in one of John Nehrich's article on milk trains?) that ".... most" creameries were on double-ended sidings..."
A previous
post showed what I originally planned to include in this area of the layout (see photo at right). Comparing the two images shows how things have evolved. Inspired by the "less is more" principle espoused by some other modelers, I eliminated the planned station and country store from the scene. Also, the road running up the hill was just a little too steep so I located it between the creamery and bridge instead. In the place of the road and store the pasture (which was too small to look correct) will be expanded. The earlier view shows a stub-ended siding behind the station. It's been replaced with a double-ended siding that will serve the Whiting Creamery (based on a prototype in Waterbury.) I recall reading somewhere (perhaps in one of John Nehrich's article on milk trains?) that ".... most" creameries were on double-ended sidings..."
I learned a long time ago to avoid such broad, declarative statements.
Most towns on the CV had at least one creamery during the time frame I'm modeling. The only two creameries I've found with this "typical" double-ended siding arrangement are the Whiting Creamery at Waterbury (below) and one of the creameries in Randolph.
 |
Pete McLachlan photo of the Whiting Creamery in Waterbury, Vt. This is going to be a fun scratchbuilding project.
|
As far as the scene goes, I might
include a small section house but
otherwise this is a simple scene that features the creamery, river and bridge – and not much
else.
Next on the agenda is to build a mockup of the creamery building, paint the detailed trees on the backdrop and add some ground cover and texture. The entire saga of removing and resintalling Williams Creek will be featured in my next "Getting Real" column in Model Railroad Hobbyist ezine.
Wednesday, April 2, 2014
Wordless Wednesday #41 - Prototype inspiration for 'Williams Creek' scene on my layout

Photo courtesy Bob's Photos
Saturday, March 29, 2014
Re-Locating Williams Creek: 3
 |
| After a long afternoon (and most of the morning) I've got the Williams Creek section in its new home. Obviously the mainline needs some realignment! But at least a favorite scene is back on the layout and not sitting on a shelf! |
Next step - getting the sub roadbed reinstalled and laying the mainline in place.
Subscribe to:
Posts (Atom)