Showing posts with label Structures. Show all posts

Tuesday, May 12, 2026

Layout Work Resumes - Wetherbee's Hardware (Part 1)

With the book in hand and shipping (thanks to everyone who ordered the book!) it's time to turn my attention back to the layout, and to this blog!

You ever get completely overwhelmed by the number of projects you want to complete? My typical reaction when that happens is to start a bunch of stuff that I'll work on for a bit, then put away. OR I just get some sort of overload and can't start or finish ANYTHING! The latter is what happed to me about three weeks ago.  I went downstairs, turned on the layout room lights, looked around, and promptly turned them back off! There seemed like there was so much to do I couldn't come up with a single project to focus on. 

Of course, thinking about this logically I'd remember that no matter how many projects I might want to do, I can only do one thing at a time!

There are too many empty lots in what is supposed be Enosburg Falls - and ideally, I'd like to get the rest of the structures for the town completed in time for the Mid Atlantic RPM meet this fall. I don't know if we'll have an open house this year as part of MARPM, but getting the town looking "done" by mid to late fall seems a reasonable goal. 

Between the CV freight house and the front edge of the layout is a large open area - approximately 7"x18" defined by Archambault Street and Railroad Ave. This is across the street from the implement dealer that I built five or six years ago. I did a nine or ten part series of posts on that build - you can find part 1 HERE.

As I was flipping through the History of Enosburg Falls book I came across this photo of a hardware dealer that, according to the descripition in the caption,

Test fitting walls and windows. Nothing is glued up or square at this point!

Experimenting with different finishes on piece of scrap shingles. 

Shot of the left front facade shows the two different types of siding. 


was located near where I had that blank lot. It was a fairly long, narrow building and I thought while it's in no danger of winning any architectural awards, it was typical enough of the business district of a New England small town that it would make a nice addition to the scene. 

I don't know for certain, but it looks as if this was two older buildings - perhaps a house and a barn? - connected with a "modern" addition connecting them together. Note this is the only picture I have found of this building, so I would have to imagineer the rear and side walls!

The first step was to figure out how to build this thing. My go-to and much preferred material is styrene, but in this case the entire street facing upper floor of the building is shingled. Note these are not shakes - these shingles have flush cut ends with varying widths. I've built a number of BEST Trains laser structure kits and several of them use laser etched wood sheets with the shingle pattern embossed in the wood. Thinking that would be easier than applying individual layers of shingles, I ordered a sheet of the stuff. For the first floor of the street side of the building I opted to use .090" vertical scribed boards. 

I dug through my rather extensive collection of Tichy and Grandt Line door and window castings and came up with close enough matches to what showed in the protoype photo. I did have to shorten the middle section somewhat - meaning I don't have quite as many big shop windows as the prototype - but I doubt anyone will ever realize that unless I tell them!

I will say it's been a long time since I cut window openings out of wood stock - and it's not something I enjoy. At this point I have front walls cut out - and my original plan was to use wood for the entire building, especially for the side wall that looks fairly weathered and worn from the little bit of it that shows in the right edge of the photo. But I'm toying with making the remainder of the building out of styrene. 


Friday, May 23, 2025

Ice Cream Parlor for Enosburg - 2


Finished the ice cream parlor for Main Street in Enosburg. This is the one spot on the "outer loop" of the layout that has no scenery started at all. I've decided completing this area is the going to the primary goal for the next few months. (Secondary goals include conducting several test op sessions for someone other than myself!) 

The building is Evergreen styrene, built using my normal method of a plain styrene subshell covered with styrene clapboard and novelty siding to capture the look of the prototype building. The awnings were interesting - I made a styrene shell for them and then glued tissue paper in place to give some semblence of cloth texture. A base coat of blue paint, with some drybrushed highlights of lighter blue, hopefully gives the illusion of minor folds in the "fabric." 

The sign was prepared by Bernie Kempinski - and really helps make the building. He thought that he'd gotten away with doing signs with the passing of our mutual friend Paul Dolkos. No such luck. 


Thursday, May 15, 2025

Pallets and other details for Clear Brook

I worked from home yesterday meaning I had a few minutes in the early morning (on a typical day that would have been spent on the VRE) and at lunch to knock out a quick project. In the morning I pulled out a bunch of the kit castings (that I'd previously painted). I also dug out a package of pallets I'd gotten from Inter Action Hobbies: (https://www.interactionhobbies.com/HO-Scale-Kit-Wood-Pallets-18-Pallets_p_96.html).

About 15 minutes later the pallets were glued together. Lunchtime I returned and brushed some quick stains to get rid of the "new" look of the pallets. I also chipped and cracked some of them. Last night (before I started my nightly routine) I placed the details around Clear Brook. 

A nice break through the day!


Monday, May 12, 2025

Ice Cream Parlor for Enosburg

Other than operating on the layout a few times, I really haven't done much on the layout since we went to Cocoa Bach back in January. I had surgery a the end of January that kept me out of the basement for a couple of weeks, and I've been getting used to life on dialysis. So far that's going better than expected but it certainly is life-changing. (Luckily, I do PD dialysis at home at night, so the impact on my daily life is much less than if I had to actually go to a dialysis center). So this is the "new normal" - at least until when and if I get a kidney transplant.

But last week I found some time to wander to the modeling desk with the goal of getting started on ... something. 


Back before Christmas I'd started on a South River Modelworks kit - so I dug that out. Stared at it for a few minutes and promptly put it back in the back. Don't get me wrong I love those kits but they're a lot of work - and I just wasn't in the mood for a big project. 

One area that needs some attention on the railroad is the Main Street scene in Enosburg Falls. This was referred to as the Billado Block - but on the HO Richford it's been a plain of brown painted plywood since the layout was started. 

In looking over the Jack Delano photo of the scene the obvious building to start with was the ice cream parlor. (Actually the building is an old creamery). 


A set of footprints for each of the buildings on that side of Main Street quickly revealed that "Full scale" models of all four structures (the parlor, the doctors house, the cafe, and the bank) wouldn't fit. 

I'll have to figure out how to address the other buildings at some point. One approach is to eliminate the bank building entirely - but the cafe is connected to it, leaving the question of how to address that. It would be hard to narrow the bank building enough to fit - or I could simply use a much narrower structure for that corner even if it wasn't a scratchbuilt model of the exact prototype. I'd gladly entertain any feedback and thoughts on the best way to approach this in the comment section. 

No matter what I end up deciding with the rest of the block, the ice cream parlor could be safely added full size (it was really too small to compress, although I shortened the overall length to allow me to add some trees behind the building the block the support post from intruding on the completed scene. 

The building still exists - although obviously it's been modified over the years. I have a railroad drawing that shows the outline of the building as a rectangle - the photo of the building today shows a lean to addition to the track (bike path) side of the structure. I haven't included that on my model since I'm choosing to believe the railroad map - but it wouldn't certainly make the building more visually interesting! 

Construction has been relatively straightforward using my typical techniques for frame buildings made from styrene. A sub shell of Evergreen .040" styrene Evergreen clapboard and novelty siding with Evergreen metal roofing panels on the taller portion in the rear (likely an ice house at one point) and N Scale Architect HO shingled roof on the main building. 
Currently I have the basic building together - it's sitting in the paint booth waiting for the initial coat of paint to dry so photos of the building in its current state has to wait for the next update. 

Thursday, June 27, 2024

A New Addition to the Layout - Part IX: An upper mill pond


When we removed the Charlton Branch section from Jason's layout we had to cut through the river. Although it went pretty well, the water did chip slightly and a couple of "chunks" of scenery separated from the subbase. I suppose I could have tried to blend it and add a new layer of Envirotex to blend everything together, but I wasn't sure that would even work and if it didn't work I was concerned it would mess up the remaining section of river and falls near Martin Machine that was in good shape. 

A logical - and easier - solution is to not try to patch the river but instead add another fall and a mill pond at a higher elevation. This has the added advantage of allowing for another mill building/complex. 

I did some rough measurements the other night and mocked things up. That seemed to go well enough that last nights "30 minutes a night" was spent cutting a mill pond surface (the leftover fascia piece - hence the color!) and the "land" - currently some 1" pink foam. 


Saturday, July 15, 2023

Coloring Laser Cut Shingles

The shingled potion of the roof on shows the results of this method of coloring roof shingles. 

A quick tip that I stole from someone else but works so well it's worth passing along. 

The only thing more tedious than applying roofing shingles to a model has to be coloring those shingles after they're installed. I spent many an hour using a fine tip marker to color each shingle. The results looked fine, but it seemed to take forever. 

Then I ran across a tip in a South River Modelworks kit. SRMW owner Bob VanGelder showed how he colored the shingles quickly, and randomly, before cutting the rows from the sheet. 

The effect was quite effective and the technique reduces the shingle coloring chore to a matter of minutes. 

Here's the starting point, a sheet of plain gray shingles:

Using several shades (I think I used 20%, 30%, 50%, and 70% Warm Gray) of Prismacolor markers simply draw random lines using the markers in line with the shingles. Once the sheet is colored, cut out all the rows, jumble then up on the table and select the rows at random as you apply them to the model. 

It looks that it will never work at this stage - the trick here is to trim all the rows off the sheet and mix them up before applying them.


One caution - unless you're going for a specific effect - like a deliberate decorative pattern on the roof shingles - don't color along the length of the row or you won't get any randomness to the finished roof! 

Saturday, May 27, 2023

"Next Stop - Stafford Mills"

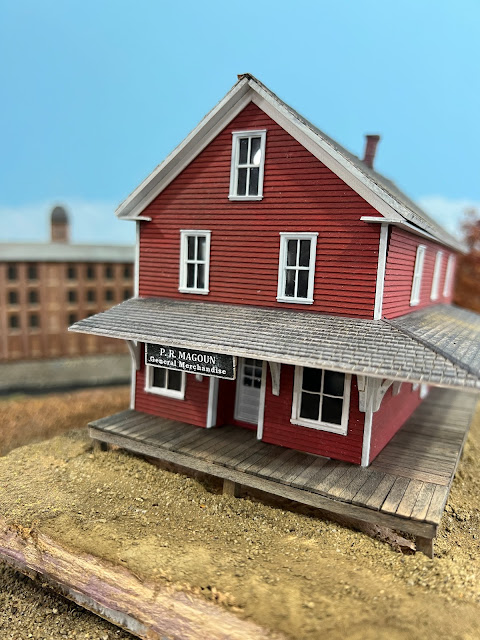
This is the approximate position of the Magoun Store. 
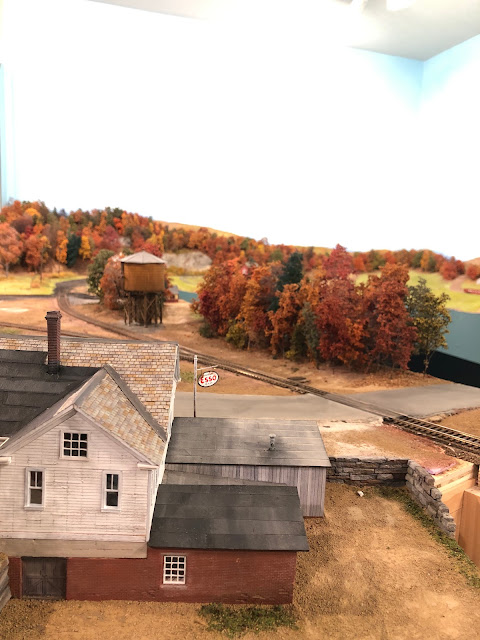
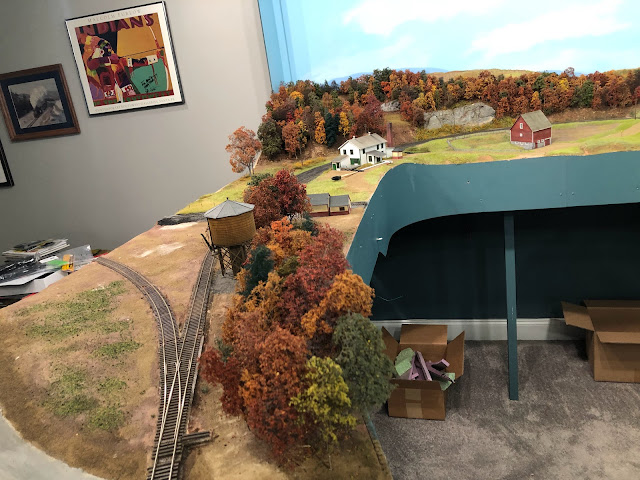
With the Missisquoi River crossing scene completed it's time to head to the opposite side of the Junction and finish up the Stafford Mills scene. "Stafford Mills" is the name I'm using to represent Sheldon Springs. Why change the name from the prototype you ask? 

I could give you some long explanation that I was concerned that two or three operational locations on the layout named "Sheldon something" - would confuse operators. Or how I wanted to include some elements that weren't part of the prototype scene so I couldn't say I was "modeling Sheldon Springs." 

The real explanation is pretty straightforward: "Stafford Mills" is a town name I dreamt up back in high school while trying to look like I was paying attention in Father Brisette's chemistry class and I kind of like it... (the town name, not chemistry!)

For some details on how Stafford Mills got to its current state you can look at this blog post. You can also check out the two videos on "Forced Perspective" on my "CVSNE" YouTube channel. 

The impetus to work on this section of the layout was digging out the half (okay, maybe 3/4!) finished BEST Trains Trussell store kit. Long time blog followers will recall I planned to include this building in Williams Creek on my former Roxbury Sub layout. I got the building mounted to a Gatorboard base, stained the roof, and added a couple of Woodland Scenics Easy Lighting LEDs. I also created a poor man's interior using photos of General Store interiors I found online.

I made a sign for the front of the store - christening it "P. R. Magoun's General Merchandise" - named for a former NMRA president and (more to the point) fellow Navy veteran and long time friend and strong supporter of the SNE. Friends of the SNE get buildings named after them - enemies of the SNE get their names on a plaque in the SNE HQ men's room ....(!) 

The first step in getting the store in place was to find a spot that it looked right. This was a little tricky with the N scale brick mill in the background. In the end I settled on the spot shown in the photo above. 

The N scale brick mill in the background of the scene. 

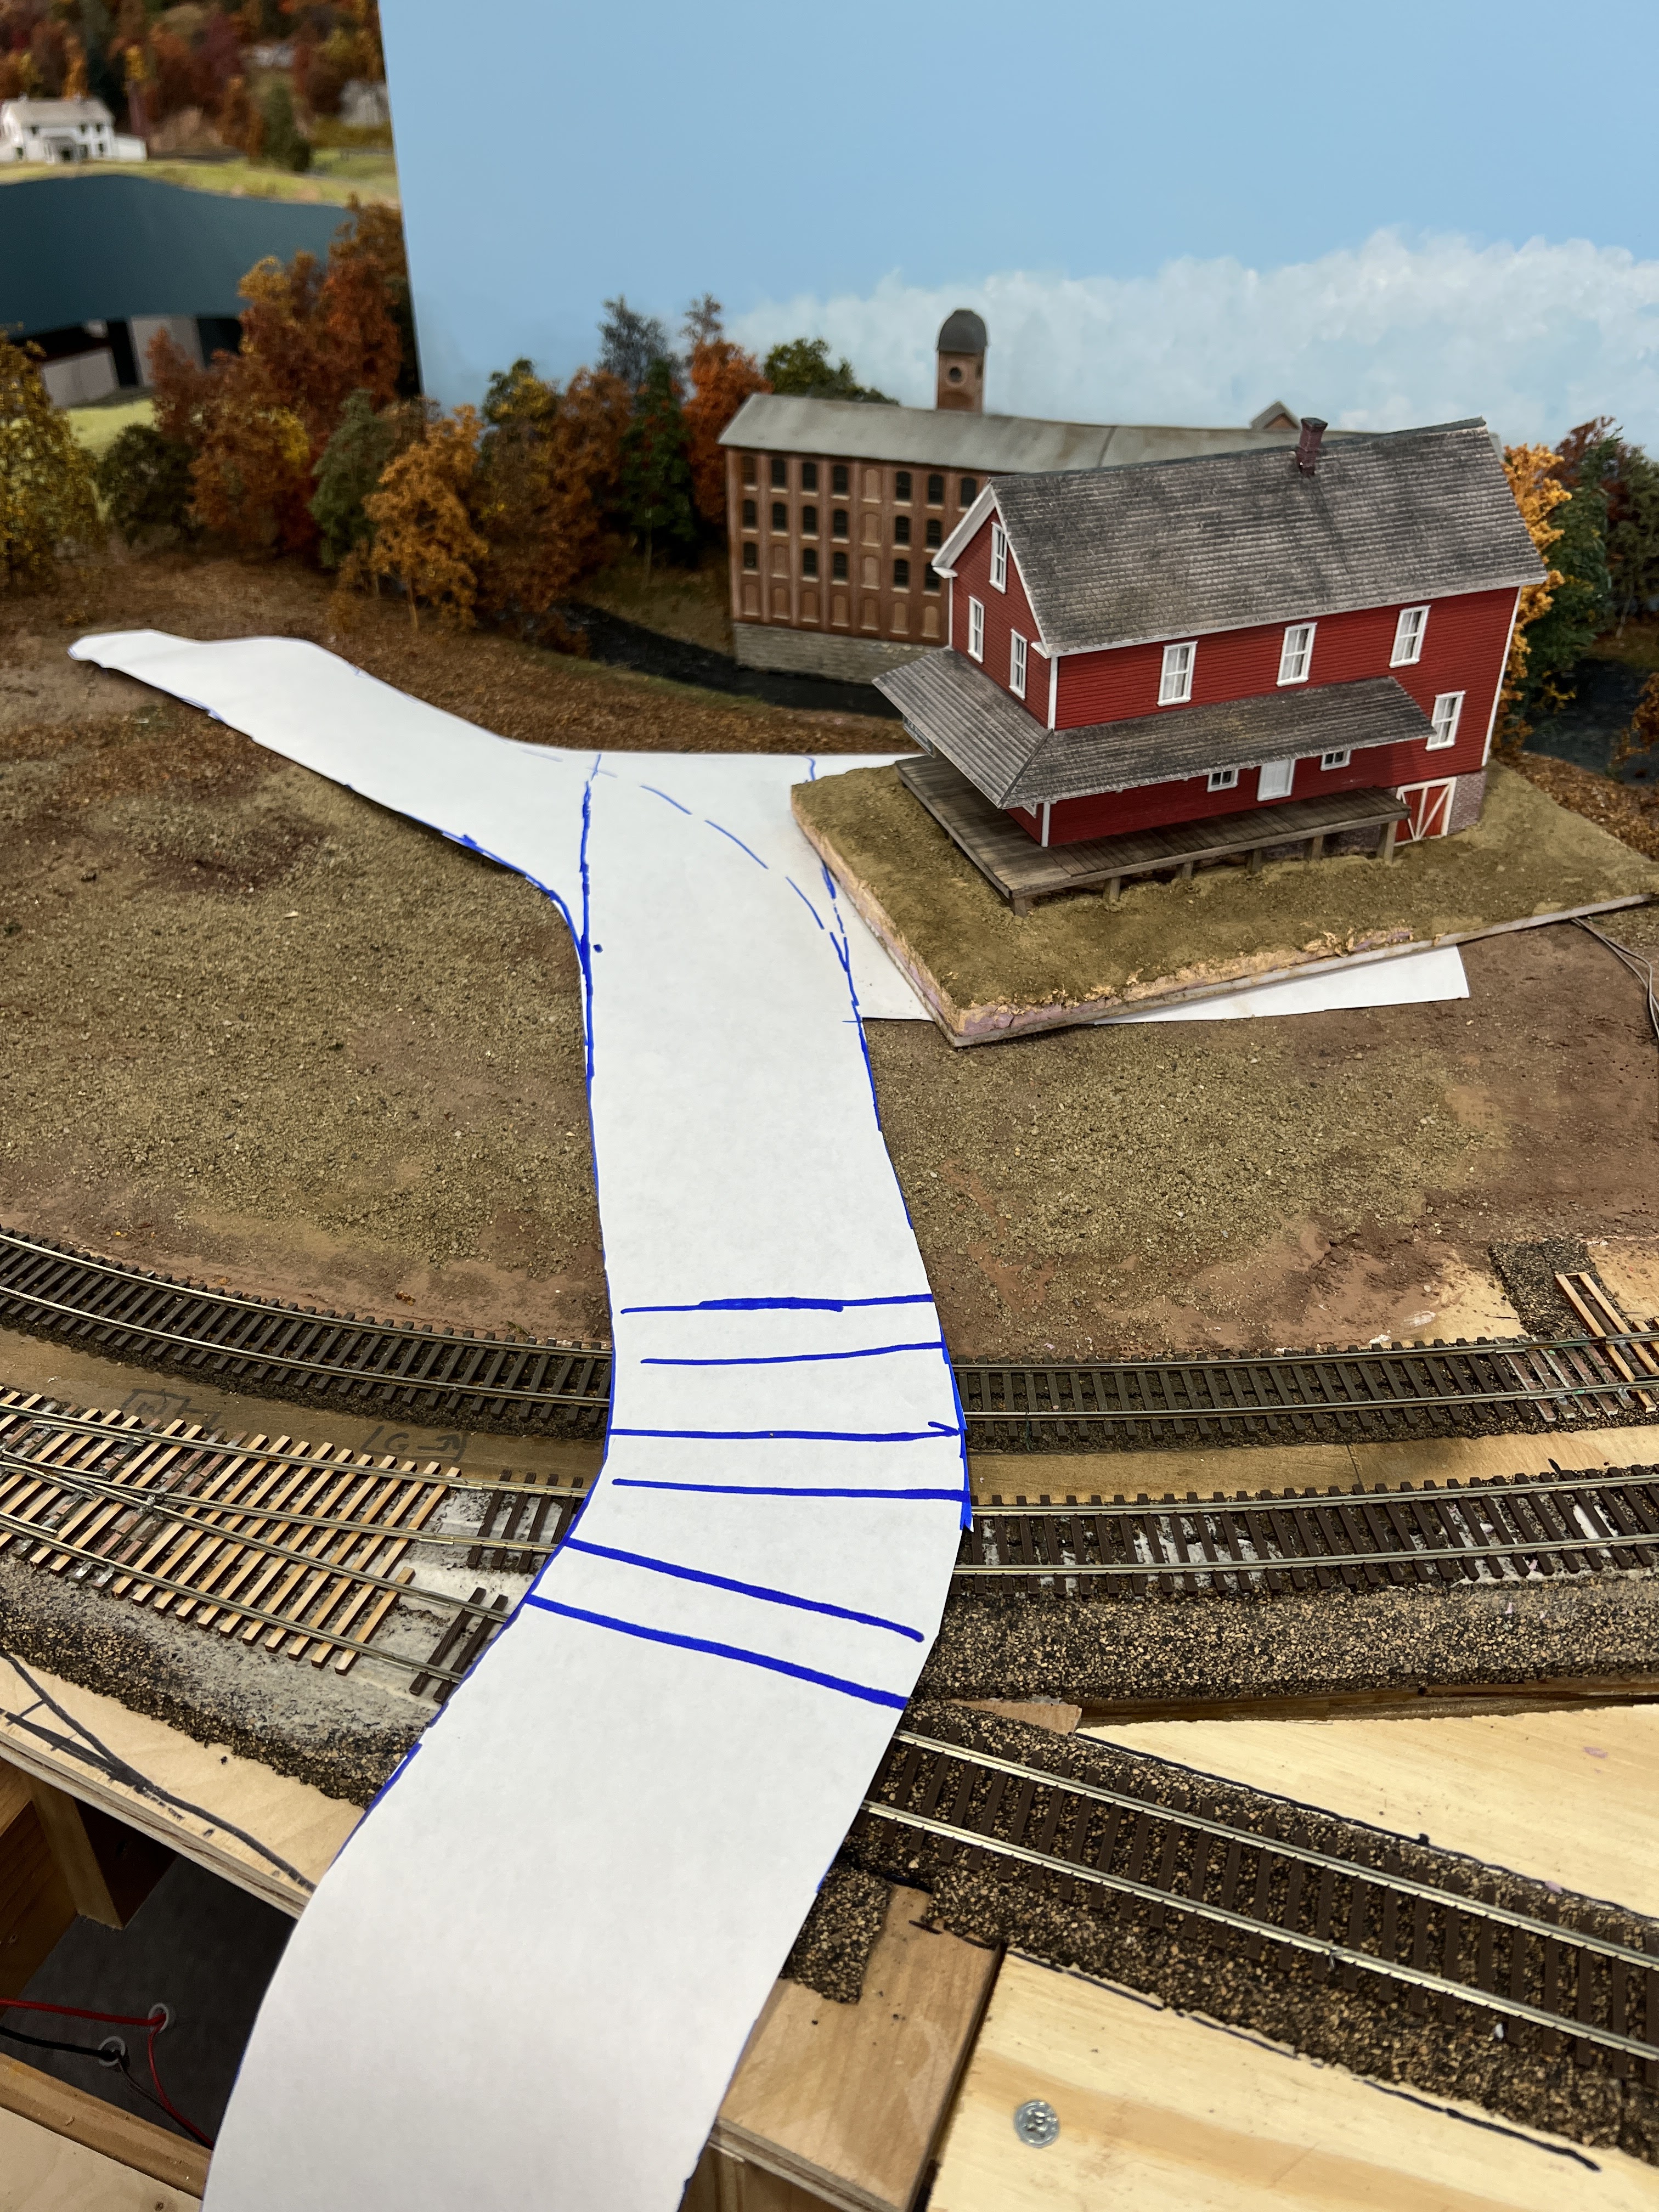
I also wanted to add a road in front of the store that would ultimately run towards the paper mill complex and tie these (and some future elements) of the scene together. 

I started by removing a lot of the trees that I'd installed along the front of the background mill river. Then I carefully placed a large sheet of paper and marked the approximate location of one side of the road. Then I removed the paper and cut out the roads themselves. 

I'll use the paper road as a template to cut the road base itself out of sheet styrene. But that's for the next blog post. 
Monday, November 28, 2022

A quick update

I haven't really posted much on the blog the last five or six weeks - but that doesn't mean things haven't been busy in my model railroading world! 

Three (!!!) open houses from early October until now. 

Before the first open house I managed to get a fair amount of "open country" scenery "completed." Of course, there's always the chance to go back and add more "texture" - but I did convert a fair percentage of the layout from "plywood pacific" to something looking more like rural New England. 

About a week before the first open house I put the brakes on layout work and did nothing but clean off the layout, clean the track, and make sure things looked ship shape. It was really hard not to dive back into messy layout work before the other open houses. It took all my will power but I managed to keep the layout and the layout room looking presentable.

That doesn't mean there was a complete lack of progress. For example, I got the paper mill peninsula track and wiring completed before the second open house.  

Obviously, this building, and/or the benchwork, needs some adjustment!

I even managed to meet with Bernie Kempinski and get the "old mill building" for the paper mill complex cut on his laser. Somehow, we ended up with a structure that's too large to fit the space for it. the main culprit is the single story "wing" on one end of the building. I have a couple of ideas to fix that issue. 

The open houses provided a chance to run trains over the layout for an extended period of time. I'm thrilled to report for the most part everything works well - and we've only got a couple of minor trouble spots that could use some tweaking. 

Completing the rework of the paper mill peninsula means trackwork is basically finished and the next step is to complete ballasting of the track. I didn't want to mess with ballasting between the open houses but I hope to get that done over the course of the holidays. (Ballasting is one of those tasks that's best done in short frequent work sessions - ideal for this time of year!) 

In the next few months I'd also like to (at long last!) get the through truss bridges installed. 


Sunday, May 22, 2022

House for Depot Street


Before I left on my current work trip I got a start at building some houses that will eventually end up on Depot Street in Enosburg Falls. This one is started as a City Classics Company House kit. Although the houses I need to create the look of a small New England town in the 1940s/50s don't have to be fancy or large, the company house was just a little too basic. I dressed up the City Classics kit by adding an enclosed front porch using Evergreen clapboard siding and a Tichy window and doors. I removed the casement window that was part of the Tichy door casting. I also replaced the plain kit roof with Best Trains 3-tab shingles. I also painted the house red with white trim (the enclosed porch remained white) and added a Tichy chimney casting to the roof in place of the one included in the kit, which seemed a little small. Still need to add a ridge cap and the front and side steps. I can also see a couple of spots where the trim needs to be touched up. 

Eventually I need six or seven houses to create the impression of a residential street. I've gotten a start on a couple of others that I'll finish up when I get home. 


Monday, February 21, 2022

"Blocking" in Atlas Plywood

Atlas Plywood in Richford is in the background. P. R. Hastings
 I've spent some time this morning gathering the information I have on the Atlas Plywood plant that once served as a backdrop to the CV's Richford yard. It didn't take long to gather the information since I don't really have all that much on it. 

I do have the Sanborn Map that shows the footprint of the building, and a few photos. I've blogged about the plant previously - mostly in the post you can find HERE. That post covers the prototype - my goal this morning was to think through how to convert the information I have into a (compressed) model of the facility. 

The brochure and Sanborn Map both date to the 1920s and early 30s. The only images I've found of the building after the war (it burned down in October 1954) were a partial view captured by Phil Hastings, and a quick snippet of the building on a DVD that was remastered from 8mm movie film shot from a moving caboose! 


Atlas Plywood - screen capture from a Central Vermont Railway in Steam DVD. 

It seemed pretty obvious that I wasn't going to find any more detailed images than I already had. Besides, a quick scaling of the map image of the facility (called Richford Mfg. on the 1920 Sanborn) revealed it was about 550 feet from stem to stern.


I'd left a large area for the model of the plywood plant - but building it full scale would completely dominant the view of the layout from anywhere in the room. 

A compressed version of the plant seemed a better approach. 

In the end I settled on a footprint about 36" long by 8" long at the widest point for the buildings themselves. That doesn't include some areas available for lumber stacks and the like. 

I drew up a footprint that seemed to capture the key elements of the building. Some of the items I wanted to include were:

1.  The two story section between the tracks in the map image

2. The walkway between it and the larger building. 

3. The portion of the three story section with the three smokestacks. 

4. The large two story area at the top of the image in the Sanborn Map. 

Rather than try to draw a scale plan of the building I blocked these key elements. 

The first draft of how this could look is shown below. I started by drawing the overhead "footprint" view. Then I carried the lines where the building went from two to three stories and the like and blocked into the basic shapes. It looks like this will fit well and produce a convincing impression of the complex. 

Before committing this to styrene I need to mockup the building in three dimensions. 

"Blocked in" sketch of how the key elements could be combined into a convincing compressed model of the prototype. 


Monday, January 17, 2022

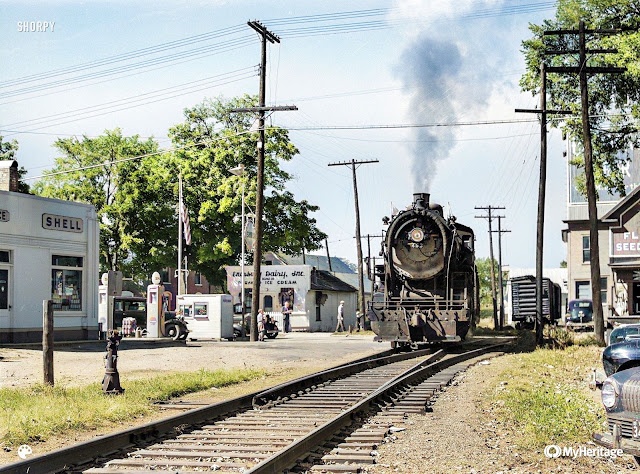
Enosburg Falls, 1941 in (Living?) Color

Jack Delano photo, Sep. 1941, Library of Congress, colorized from original black and white. 
 I've been working on drawing up some of the structures for Main Street in Enosburg Falls. Just for fun I ran the Jack Delano photo taken in September 1941 through the MyHeritage colorization app. 

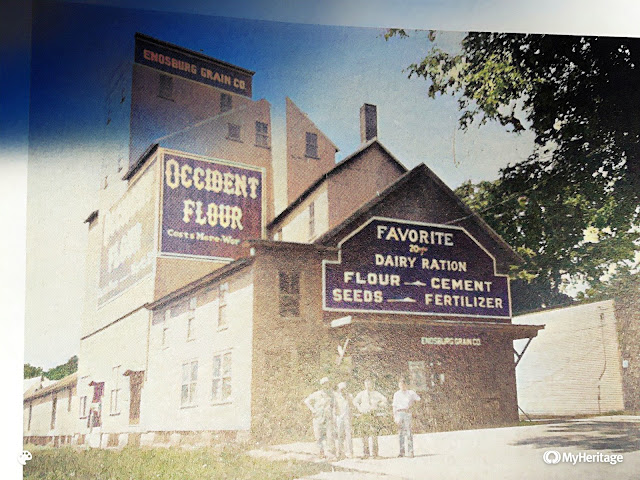
I also ran a photo from an  Enosburg Falls town history that showed the Enosburg Grain Co - about the same time as the Delano image. 

I originally thought the grain company building was painted some sort of "barn red" - but I'm not leaning towards an earth tone or perhaps a slightly browner version of yellow ochre. 

But the one thing I don't trust about the colorizer is the shade of the Shell signs - I would think they should be a much brighter yellow. 


Saturday, January 8, 2022

Streeters Store Scenicking

 Work continues on the Streeters Store area of the Junction. 

But what I've really been working on this past week is cleaning up and organizing the workshop area and modeling desk. 

I still have some more sorting/putting stuff away to do before showing photos of the finished result. 

In the meantime, here's a couple more photos of the store!


Wednesday, November 24, 2021

Streeters Store update and more scenery

The next project is getting the scenery completed in the Sheldon Junction scene between the junction crossing itself and the large river crossing. Stic came over a few weekends ago and between the two of us we were able to make some cuts into the benchwork to plant the Streeter's Store. Like most South River kits this one can be built "at grade" - in other words on a flat piece of ground, or can be built to include varying levels of terrain. Obviously the latter is almost always more interesting, but it can sometime present a few challenges! In this case we had to slightly widen the benchwork and dig down into the plywood subroadbed. And naturally the logical spot for the store was directly over the legs to one of the IKEA Ivar cabinets....

Nothing a saw couldn't take care of though!

I turned my attention to finishing up some more details on the store. The South River kit includes the really old fashioned glass top gas pumps - they just seemed a little too vintage for my era so I replaced them with pumps more typical of the 1930-50s era. 

Still to come is some additional signage. 

Obviously the ground is strictly the base terrain - I'll add some tile grout "soil" shortly, as well as installing the road proper. 

The foreground tree is a placeholder for how - frankly I like how it frames the store so the tree may well grow roots!

I was thinking about adding a farmhouse across the street from the store (basically between the curved interchange track and the store in the overall photo). But when I added a house as a mockup it just seemed like one too many elements in the scene. 

The only other structure will be the Campbell water tank - that's one of the first "real" models I built and I've had it on every layout since I was a teenager. Thought I should include it here!


Tuesday, September 21, 2021

Feed Storage Shed for Enosburg Falls


I built this model about a little more than year ago (I think!). I thought I'd described it on the blog but apparently had never posted this! 

After completing the seemingly never ending build of the farm supply dealer I was looking for a simple and quick project - and this feed warehouse kitbash of a couple of cheap plastic kits fit the bill! 

The branch through Enosburg Falls, Vermont featured a string of sheds, warehouses, and the like alongside the track from east of the freight house to the Pleasant Street crossing. 

I know these structures were there since they appear in some early photos of Enosburg Falls, and are included on railroad and Sanborn Maps. In this map the Enosburg Falls freight house is marked "Express" - the building that's the subject of this project is the Feed Store to the right of it. 

As is often the case with non-descript buildings such as these while I know they were there I have no way of knowing what they looked like. 

So, imagine my surprise when I was reviewing an old "Central Vermont Railway in Steam" DVD and saw a shot of the Richford local working Enosburg Falls. This was a short - one or two seconds at best - clip. But I rewound the DVD and took the following photo of the television screen with my iPhone.  


The quick screen capture from a video that inspired this build. (It's all about the sign!)  

One of those warehouses is visible to the left. Of course other than showing the building was wood (well weather clapboard) and had some sort of "tarpaper" or membrane roofing, there's not much to go on to create a detailed model. 

The list of industrial sidings in Enosburg Falls does show a Wirthmore Feeds dealer - and this structure has a bright yellow sign that appears to be the trademark colors and style of lettering of Wirthmore - so it doesn't seem to be much of a leap to figure this must be that building. 

I didn't want to spend a lot of time and effort guessing what the building looked like - only to invest time building a model that was likely going to be wrong. A generic well-weathered clapboard building with that trademark sign on the peak of the roof would let me quickly cross something off the "to do" list.  

That makes this a perfect candidate for a kitbash. 

I started with two Walthers Co-Op Storage Shed kits (part 933-3529). I cut the molded on vertical corner trim from the end of the long walls in one kit, and cutting the long walls in a second kit just slightly longer than half.  The result was a building that just about a little more than 1.5 times the length of original building with three warehouse doors on each side. I  carefully "lifted" a few of the clapboards to give some additional character to the siding. 

I could see from the prototype photo the doors are inset - so I cut some rectangles larger than the door openings from scribed siding. I put the doors aside until they were painted and weathered with the main structure. For variety I used one or two of the doors that came with the kit. Frankly I wish I hadn't - those doors are the worse looking parts in the kit. 

I gave the entire building a dark gray primer coat and drybrushed white and "linen" craft paint in the direction of the clapboards. I gave the doors the same treatment before installing them. 

I made a new subroof from .040" styrene and added tarpaper roofing from the scrap bin (I think it was originally from Branchline). 

The signs started with some Wirthmore artwork I found on the internet. During a Zoom call a few months ago Brett Wiley, who was on the call, took pity on my efforts at creating the sign and in the course of 20 minutes during the call created the rooftop sign for me!

I wanted to have some feed sacks stacked on the loading dock, and perhaps in the bed of a farmer's pickup. I started with Tichy feed sacks, but even after painting them they didn't look right. So I found photos of Wirthmore feed sacks on the internet, reduced them to HO scale (or at least the size of the Tichy feed sacks!) and glued them to the plastic sacks. 

Sanded tile grout for the road, cinder ballast, sifted dirt and tan tile grout for the soil, and some static grass and the scene was basically completed. 


Thursday, July 22, 2021

Streeters and Clear Brook Progress


Not a great deal of progress in the basement this week, but I did manage to get the feed mill (the "Clear Brook portion of the Streeters and Clear Brook kit) basically assembled and installed on its foundation. There's a metal sheathed warehouse addition that's not shown - it's currently in the paint booth drying!

Although I like the basic lines of this kit I find it, like most "craftsman" kits are really too overly compressed to justify rail service. At least this one doesn't have a lot of weird additions and oddball architectural elements - meaning that I may use it in town as a feed and farm supply store - it will just receives supplies via the team track and not a dedicated siding. 

Friday, February 26, 2021

Pulling together the Junction Scene


The Junction scene can have some structures - but the prototype scene that's inspiring it was really in the middle of nowhere, with a few buildings clustered around the junction trackage proper. Temporarily arranging the structures shows the open air feeling of the prototype can be maintained with three or four buildings. More than that and it will quickly fall apart visually. 


With the freight car catch up project completed, I've redirected my efforts to finishing up the Junction/River scene, based in spirit, if not entirely in fact, on Sheldon Junction, Vt. 

I've been making good progress on South river Model Works Streeters & Clear Brook kit, and have managed to get the store walls assembled, meaning I'm at the point in this project where I can start locating an appropriate spot for thing. One nice thing about this particular store is the fact that there is little or selective compression, meaning it's the size an HO scale country store should be, and not, as is often the case with a craftsman structure kit, more like an N scale building with HO windows!

A logical place for it seems to be some place between the bridge and St. J & LC crossing. 

Here's the prototype inspiration for my scene. Note the bridge to the left, behind the darker structure. 

I have seen numerous references to a store being located at Sheldon Junction - and though I'm not modeling the prototype exactly, including the South River Streeters Store doesn't seem like much of a stretch. I don't think the building in the b&w photo is a store - I think it may be an old creamery that has been converted to a residence. 

My plan was to place the feed mill that's part of the SRMW kit on the siding in the foreground (the one that dead ends in front of the St. J track by the crossing). 

Three issues: 

1. One of the neat things about the kit's feed mill is the way the rear shed addition is slightly downhill from the main part of the building. While the structure is designed to be built on either or a slope or flat ground, the slope adds a lot of character. Problem is the rear of the building would be at the St. J. track - meaning the ground would have to slope UP sharply to the meet the track. I think it could be done, but there's a river to the right - and the feed mill may very well end up below water level.  At best, the whole thing may look forced. 

2. I haven't assembled the walls on yet, but placing the foundation in position looks like to me like the building will just seem, well, small. 

3. This last one is really more aesthetic than practical, but the store and feedmill are shown arranged on a single diorama on the SRMW kit box. In other words, they go together. And that might not be a good thing. While most people won't know the difference, people familiar with these kits will instantly look at the scene and say "hey that's Streeter's from South River - I have that kit also...!" Not something I want to hear either from visitors - or from myself in my head. Seems the best way to prevent that is to not use the kits next to one another in a scene. 

This last item is of course the bane of kits when it comes to a prototype model railroad layout. You really do need to scratchbuild most, if not all, of the buildings if the goal is to get something realistic, and not merely artistic. 

I do have a feed mill leftover from the old layout. It's based on a structure that once stood across the tracks from the Waterbury, Vt. station. It's prototype size, which means it looks like it can handle a car or two of feed a week. It's also finished, which is a rare commodity around here, and not one to be taken lightly. 

After playing around with several arrangements, the photo below seems to include the essential elements. The white house in the center of the photo is a stand in for the structure in the prototype shot. I plan to build a new model for this scene. Besides, I want something that's painted a color other than white - even if that "other" color is some form of barn red!