The major area I have been working on in the last couple of months has been the Missisquoi River crossing at Sheldon Junction. This is the area between the store scene (above) and the swing gate opening. This has been a project beset by challenges and issues, but I think I'm past most of those now. It started with issues assembling the Central Valley truss bridge. The latest challenge was when suddenly locomotives lost power halfway across the bridge - after I'd gotten the bridge installed (of course, everything worked fine before I put in the landform scenery.)After rewiring all the feeders last night in this section of the layout everything worked great - except on the bridge itself. After some work with the voltmeter I figured out the problem was a loose rail joiner at the point where the bridge joined the mainline. As a rule I don't like to solder rail joiners but I made an exception here. Just one more challenge in a string of issues that have made this project such a joy!
When I started working on this scene I considered doing some sort of step-by-step. Frankly I’m so sick of working on it at this point I want to just get it done!
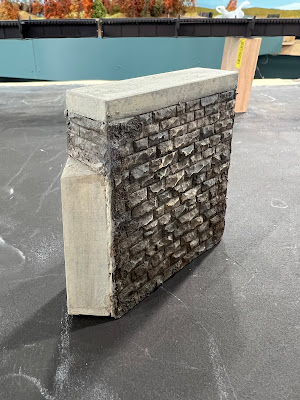
The multi-span bridge obviously needed a pier in the center. The prototype was stone (the stone abutments by my era had been replaced with concrete ones). I started with a Chooch pier but it was not only too big it was a “challenge” to cut the resin. Are these things Kryptonite? So my poorly cut Chooch pier went into the trash and looked for another solution.
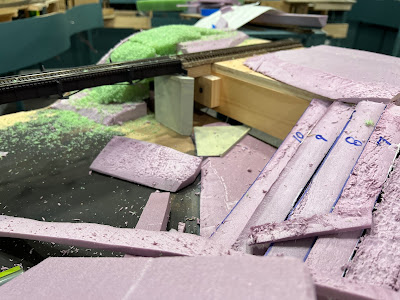
I dug a Walthers plastic concrete pier out of a box. The Walthers part and some of that Chooch flexible peel and stick granite made a passable result. Some paint and weathering and all was good. After the considerable enjoyment of hobby time to build the bridge itself out of Central Valley Truss bridge kit components, I installed the bridge deck, and abutments and stacked (vertically and horizontally) pink foam, installed the abutments, carved the foam to shape, added Cripplebush rocks as rock outcroppings, and a base “earth” texture. I dug out some half finished trees to determine how many I needed and roughly where they look “right”. There’s one or two spots where none of the trees really fit - I may twist up a couple of wire trees to fill the gaps. Next steps are static grass and other textures to the “open” areas and spending a couple of evenings this week in front of the television with the glue pot to attach the Super tree sprigs to the tree armatures. Apologies for the lack of depth of field in these photos - they are truly grab shots with my phone.


No comments:
Post a Comment