Pages

Monday, August 30, 2021

Grass mats

Remember back in the old days when Life-Like (and some other companies I'm sure) sold "grass mats." Basically rolled up paper with dyed green sawdust glued to it? 

My first HO layout featured just such a mat as the scenery. I carefully stapled it to the plywood sheet that formed the base of the layout. I do remember I took the time to paint the shiny staples with green poster paint - otherwise the silver staples made the whole thing look less realistic. 

Grass mats, much like the "horn hook" coupler are, as far as I know pretty much gone from model railroading. 

So imagine my surprise a week or so ago when Christine texted me she had found something she thought I could use at the craft store. When she got home she presented me with a "grass mat" of sorts. In fairness, she got it thinking it would be a nice basis for fields or swamps on a wargame table. And it would. But as I examined it I think I found it may be useful for some limited applications on the layout. 

First of all, this isn't your grandfather's grass mat. No dyed sawdust here. Instead, it features various lengths and textures of realistic-looking vegetation. It's real purpose is a decorative table runner, meaning it fairly large - about 17" wide and almost 7 feet in length. The retail price was about $20. 

I have one narrow spot between the rear staging track and wall. This needed to be finished with something other than raw or even painted plywood, but I didn't want to invest a great deal of time or effort. 


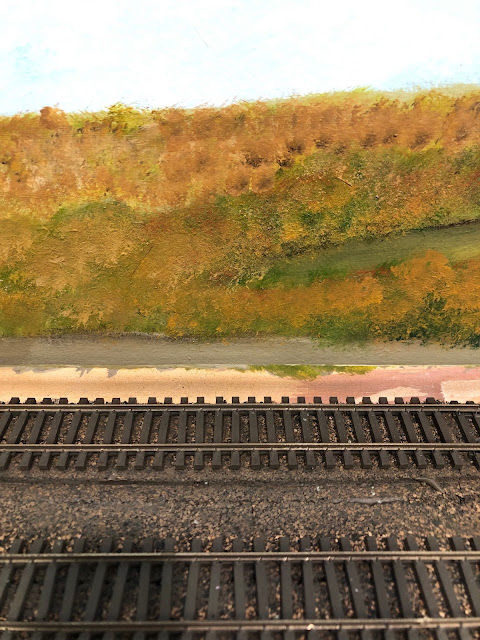
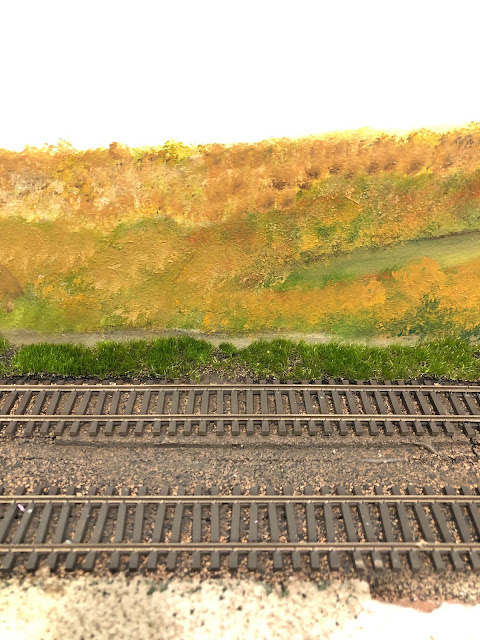
I cut the mat into several narrow strips and placed them in position. 


They worked, but were just a little to "vivid" and green. So I broke out the airbrush and a selection of Vallejo tans, olive green, and browns and misted the green. 

The result can be seen in the photo to the right. 

And I have plenty of raw material left to create some South Carolina swamps for our next wargame table!


Wednesday, August 18, 2021

Explaining Staging

Over the last few evenings I've completed the basic landforms for the area where trains will emerge from the staging tracks onto the scenicked portion of the layout. As mentioned previously, the staging tracks aren't hidden from view (since hidden from view in this case would also mean "difficult to access"!). They will, however, be screened from view by a low rise in the ground, and perhaps trees and bushes. At the point where the staging tracks emerge from hiding trains will round a bend and appear from behind a more dense stand of trees. At least that's the plan. We'll see how effective it is in practice. 

Some questions and comments indicate a little bit of confusion with what exactly is going on in this corner of the layout. Really, it may seem complicated or confusing but when you see it in person it makes perfect sense. 

I will try to clear this up with a couple of labeled photos. 

A few months back I described how I added a couple of new staging tracks to the layout. There are actually two stub-ended "screened" tracks along the right hand (short) wall if you view the track plan in the Richford Branch layout description tab above. 

These represent the originating point of the Richford Branch in St. Albans, Vermont. These are labeled St. Albans (west) in the image above. As you can see in the photo above there are two other double-ended siding tracks visible in the foreground. These tracks serve a dual purpose. First of all, their primary function is to represent the interchange connection with the CPR in Richford at the other end of the branch. But since these two tracks are double-ended they could also provide additional "surge" staging capacity for another train originating in St. Albans. And their third, and perhaps most important function, at least to me, is to provide a continuous run connection. 

The second photo shows the other end of the staging yard. This is the point where trains coming from St. Albans will first appear "on scene." This photo also shows the other end of those double ended Richford CPR interchange tracks. I've built up the basic landforms out of foam board and florist foam to create a scene with a slight slope to the foreground between the track and aisle and a slight hillside between the track and wall. I'm hoping this will prove to be a good place for "roster shots" of rolling stock. 

Since all this "staging" is really integrated into the rest of the layout visually my intention is to scenic it, ballast the track, etc... 

To the casual observer it will just look like a few more tracks - perhaps with a train or cut of cars spotted on it - but won't be a visually jarring distraction from the rest of the layout. 

Hope that clears things up!

Tuesday, August 10, 2021

More backdrops

 Work continues on the basic scenery landforms around the staging yard. I managed to slice my finger pretty good with a box cutter - I attempted to slice a section of foam off a block while steadying it with my other hand - and let's just say that put a damper on any further progress that evening!

I've also managed to complete painting the initial base coat of the background hills along the long wall of the basement. 

Now that my finger is no longer throbbing I should be able to add the highlights to the backdrop trees. 

Here's a couple of photos showing some sections of the backdrop - sorry, no photos of the finger... 


Thursday, August 5, 2021

More backdrop and Kempinski Curve

I got some more backdrop painted yesterday - the image below (please excuse the mess on the peninsula!) shows a view of the backdrop from the main "viewing aisle" in front of the layout. 


This shot shows an aerial view of Kempinski's Curve (for the record there's been a "Kempinski's Curve" on SNE #3 and now #4....!) 

Longtime SNE fans may recall this tale of the design and construction of the famed helical tunnel on SNE #2:

"As you recall, last year the Company contracted with Colonel Niezgrabny Inzynier Kempinski to survey the route of the Southern New England from Tidewater to the Mashantucket Valley. This is, by all measures, considered easy country to accommodate a railroad line – with numerous watercourses and relatively low gradients – none exceeding 300 feet in a mile.
Therefore, I was as shocked as you were to learn that the Company had undertaken the construction of a major tunneling project. I was especially shocked to find Colonel Kempinski, lately of the Polish Army Corps of Engineers and a recent immigrant to our land, had commenced, with nothing more than a rough sketch on the back of a napkin, construction of a tunnel only slightly shorter than the famed Hoosac Tunnel with a constant circular curve. The net result is a linear run of mainline approaching 1.5 miles with the two portals within sight of each other on the same side of a low ridge separated by approximately 150 feet in the vertical plane.
My initial reaction was to sever all ties with the Colonel and send him back to his native Poland. Apparently the Polish Navy would like him to speak with him directly regarding his unique submarine door design (intended to improve air circulation, but at great cost).
However, after speaking briefly with the Colonel (through a translater as no one can understand his Polish or broken English) I believe more than a fair share of the confusion for this debacle lies squarely with our own Chief Engineer's failure to provide the Colonel with detailed surveys of the intended route. According to witnesses, the Colonel kept inquiring of the Chief Engineer "Gdzie jest mapa?, "Gdzie jest mapa?." Unbeknown to any Southern New England employee this means "Where is the map?" Our men thought he was looking for directions to the facility since he was frantically jumping up and down.
When one our younger employees said something to the effect "The Company is going around in circles" – apparently the Colonel's English is just good enough to take that statement as an indication of the intended route. So, we ended up with a tunnel that takes a lot of time to traverse and goes nowhere but up.

You'll also likely receive a communication from the Colonel regarding a tremendous personal injury he suffered when a large tunnel boring drill fell on his foot. His constitution is quite remarkable- I know of few men who can withstand the force of a 100+-foot long drill hitting their foot and continue working. But I assure you the Company bears no responsibility for loss or damages . . . what do you expect when you hire a guy to build a railroad who shows up wearing open toed shoes and who's name, roughly translated, means "clumsy engineer."


All kidding aside, I took a couple of quick snap shots of the curve area to see where and how many trees and other elements I need to position to effectively screen the view of the two staging tracks.  Here's an overhead shot (you can see the condensary building in place to the left) as well as eye level and track level views of the same spot. 


*(The quote above is one of a series of emails from my SNE Mailing List. But it's firmly rooted in fact - Bernie Kempinski and I did indeed build a helix without any complex drawings - or even measurements. And he did wear open toed shoes and dropped a rather large drill bit right on his foot. Luckily, it wasn't on the carpeted floor! And if the email above seems silly it's nothing compared to the Schneider's Row series of reports....)


Wednesday, August 4, 2021

Backdrop scenery for the staging "yard"

 I'm updating my "Modeling the October Scene" clinic for the upcoming MARPM in September. One thing I want to include in the clinic are some shots of the new layout. At the same time I'd really like to be able to stage some trains in my staging yard - so it makes sense to finish up the scenery along the staging yard "scene." 

The primary scenic element here is the backdrop. Most of the staging yard tracks (all two of them!) will be screened from view by a line of trees, bushes etc... a modified version of "Screened Staging" I used on a prior layout. 

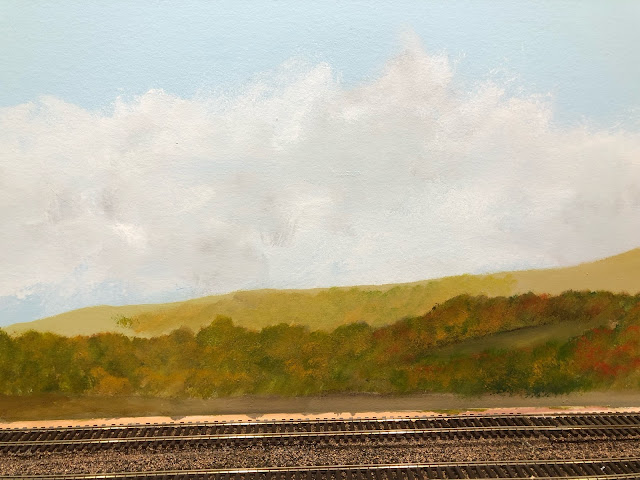
Yesterday I dug out the backdrop paints and got a start on the backdrop behind the staging yard. 

At first I didn't like how "flat" the mid ground (tan) hill looked. So I experimented with adding some additional texture - you can see it if you look closely at the center of the hill in the photo below. Now I have to add that texturing to the rest of the hillside.